Your Triumph 4850 paper cutter sits idle, buttons pressed, but nothing happens. No blade drop, no “click” to signal readiness. This frustrating scenario is common with older industrial cutters, especially the 1996 Triumph 4850. The root cause usually lies in the safety interlock system, not the motor or blade. In this guide, you will learn step-by-step Triumph 4850 paper cutter troubleshooting for the most frequent failures, including safety circuit resets, fuse testing, mid-cycle stalling, and blade evaluation. All steps use verified technical data so you can diagnose confidently.
Fix No Power or Activation Issues
When the cutter ignores button presses and the cover produces no “click,” the safety interlock system has failed. This is the most reported Triumph 4850 problem, particularly on aged units. Start with the simplest electrical checks before assuming component failure.
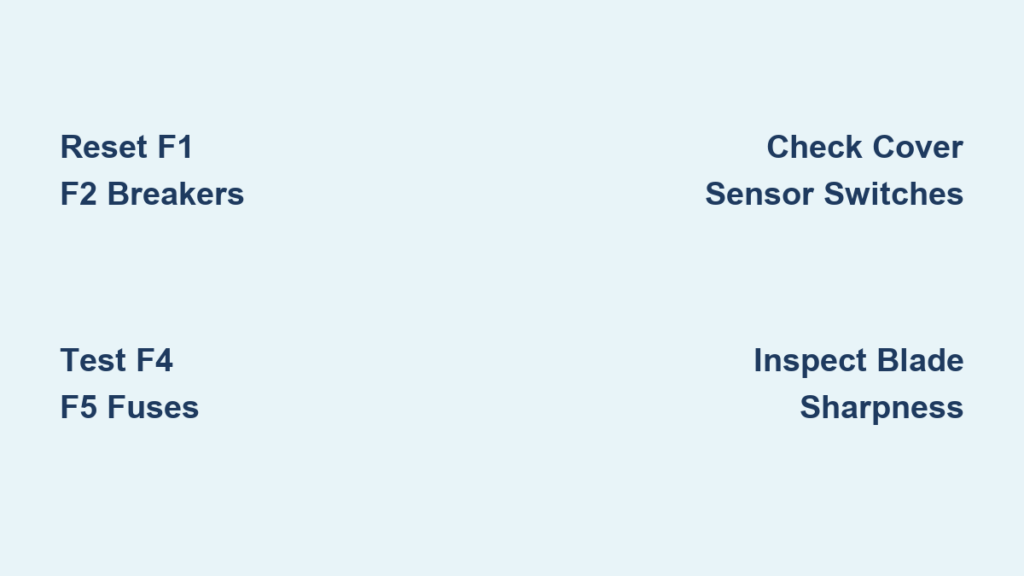
Reset F1 and F2 Safety Circuit Breakers
On the Triumph 4850, F1 and F2 serve as the primary safety circuit breakers. On 1996 models, these are labeled A and B and function as the dual-hand safety buttons. No F3 exists on this variant. Even when breakers appear to be reset, press them firmly into the ON and READY positions using your fingers. Do this with power disconnected, then restore power and test.
Pro Tip: These breakers sit at the bottom of the machine. Physically push them upward until you feel them click into place.
After resetting:
– Close the cover completely
– Listen for the distinctive “click” sound confirming circuit completion
– Press both cutting buttons at the same time
If the cutter remains unresponsive, move to fuse testing.
Test F4 and F5 Fuses with a Multimeter
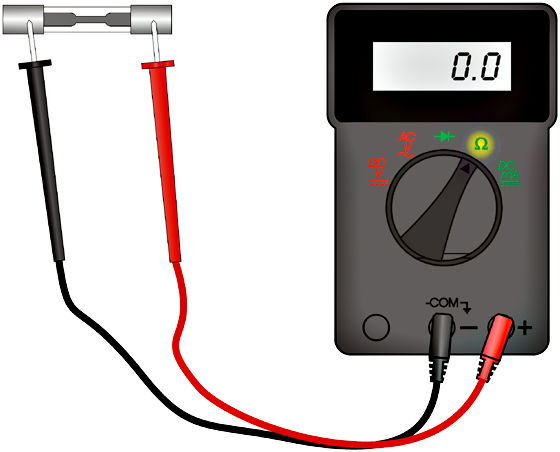
Fuses F4 and F5 protect the control circuit. A blown fuse blocks activation entirely.
Tools needed: Digital multimeter set to continuity or ohms
Testing steps:
1. Power off and unplug the cutter
2. Locate F4 and F5 on the control panel or PCB
3. Remove each fuse carefully
4. Test with multimeter probes on each end
5. A good fuse reads 0 Ohms or produces an audible beep
6. Any other reading means the fuse is defective
Replace bad fuses with identical ratings, then re-test the machine.
Warning: Never bypass a fuse. Doing so risks motor or PCB damage.
Diagnose Sensor and Switch Failures
Even with restored power and reset breakers, faulty sensors can prevent arming. The safety system depends on mechanical switches triggered by the cover and dual-hand buttons.
Check Cover-Activated Sensor Switches

These push-button switches activate when the safety cover closes. Misalignment or failure keeps the cutter from arming.
Visual inspection checklist:
– Confirm the cover closes fully and latches
– Look for bent or blocked switch plungers
– Check PCB wiring for loose or unseated terminals
Multimeter test:
1. Set meter to continuity mode
2. Open the cover and manually press the switch
3. Meter should beep or show 0Ω when pressed
4. Reading should show open when released
5. Repeat for all limit switches around the frame
A switch that fails this test likely needs replacement. On older Triumph models, sensor failure is less common than wiring or PCB problems.
Clean and Verify Dual-Hand Button Function
Buttons A and B must be pressed simultaneously to activate the cutter. Dirt and oxidation disrupt contact.
Cleaning procedure:
1. Remove the buttons if accessible
2. Spray with electrical contact cleaner
3. Work the button mechanism to flush debris
4. Reinstall and test
Note: On 1996 models, these buttons connect directly to F1 and F2. Make sure they are fully depressed during testing.
Resolve Mid-Cycle Cutting Failure
If the blade descends but stops halfway through clamping or cutting, the issue is mechanical or power-related, not safety circuit.
Inspect Blade Sharpness and Regrind Count
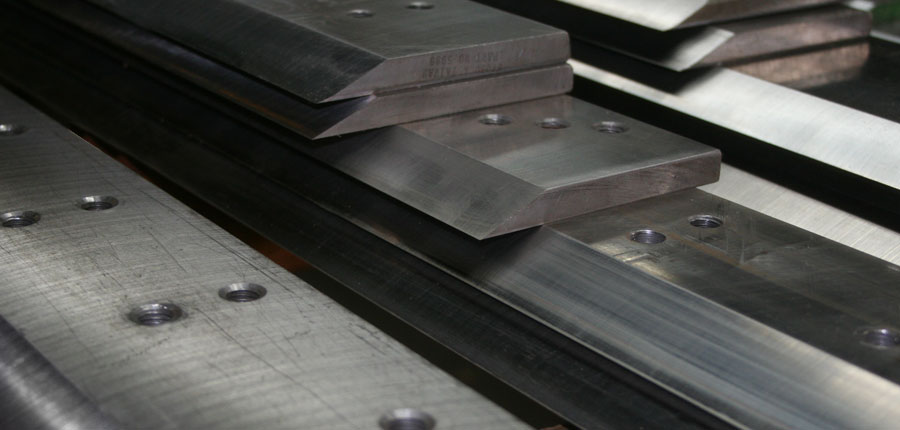
A dull blade forces the motor to work harder, causing stalling mid-cycle. The Triumph 4850 blade supports 6 to 10 regrinds before requiring full replacement.
Blade evaluation steps:
– Look for chipping, rounding, or visible edge wear
– Count previous sharpenings
– Replace the blade if near or past 10 regrinds
Pro Tip: Use a magnifying glass to inspect the edge. A worn blade cannot hold a crisp cutting angle.
Even with a sharp blade, excessive material stack height can overload the system. Always follow recommended cutting limits for your specific model.
Evaluate Motor and Voltage Supply
Intermittent power delivery frequently causes mid-cycle failure. Testing the supply eliminates electrical variables quickly.
Test Voltage at the Power Source
Multimeter voltage check:
– Set meter to AC voltage
– Test wall outlet (should read 110–120V)
– Check machine input terminals
Low or fluctuating voltage reduces cutting power and causes stalls.
Common voltage problems:
– Overloaded circuit sharing
– Faulty extension cord
– Shared outlet with high-draw equipment
Quick fixes:
– Plug directly into a dedicated wall outlet
– Avoid power strips or daisy-chained cords
– Test the outlet with another machine to confirm supply
Monitor Motor Performance by Sound
Listen for these warning signs:
– Grinding noise points to motor or gearbox wear
– Humming without movement suggests a power or clutch issue
– Sudden stop indicates overload or voltage drop
If motor symptoms persist after verifying power supply and blade condition, internal repair is the next step.
Identify Your 4850 Model Variant
The Triumph 4850 ships in several versions. Confirming your exact model prevents ordering wrong parts.
| Model | Key Features |
|---|---|
| 4850 | Standard mechanical version |
| 4850-95 | 1995 model with minor spec updates |
| 4850-EP A | 9-program electronic controller |
| 4850-EP B | 99-program electronic controller |
1996 model specifics:
– No F3 circuit breaker present
– F1 and F2 double as safety buttons
– Buttons pressed from the bottom of the unit
– Use parts manual 4850-95 for component compatibility
Always reference the correct operation and parts manual for your unit.
Know the Adjustment Limitations
Triumph cutters prioritize durability over fine-tuning. The 4850 has no user-accessible pressure control, no electronic force calibration, and no digital cut depth interface. If clamping feels weak, inspect:
- Blade alignment
- Back gauge pressure
- Hydraulic fluid levels (if applicable)
Adjustments beyond basic maintenance require a qualified technician.
When to Call a Professional Technician
Some failures exceed DIY repair scope. Contact an expert if you have completed all troubleshooting steps and the cutter still malfunctions.
Signs you need professional service:
– All fuses and breakers test good
– Sensors and switches function correctly
– Blade is sharp and installed properly
– Cutter still won’t activate or cuts inconsistently
Advanced diagnostics require reading the electrical schematic, monitoring contactor states during operation, and testing PCB outputs. These tasks demand technical training and specialized tools.
Access Operation and Parts Manuals
Proper documentation speeds up every repair. Operation manuals are available for the 4850, 4850-95, 4850-EP A, and 4850-EP B. Parts manuals cover the same variants plus electronic version diagrams. Always match the exact model number printed on your machine before ordering components.
Maintain Blade Longevity
Prevent future cutting problems with proper knife care.
Regrind guidelines:
– Maximum 10 regrinds per blade
– Replace the knife after reaching the limit
– Typical failure signs include edge collapse and poor cut quality
Recommended sharpening service:
– Jorson and Carlson Company
– Contact: Joe Zambole
– Phone: 800.656.7766 x 34
– Offers proprietary edge treatment for extended blade life
Avoid low-cost sharpening services that over-grind or misalign the bevel angle.
Expert Repair Contacts
For complex electrical or mechanical issues, connect with specialists.
Challenge Machinery
– Contact: Alex Esnaola
– Services: Triumph cutter repairs and technical advice
– Best for: Schematic interpretation and PCB issues
Jorson and Carlson Company
– Knife sharpening and replacement
– High-quality reconditioning services
Keep these contacts accessible for situations beyond DIY repair.
Quick Reference Troubleshooting Checklist
Work through this list before requesting service:
- Reset F1 and F2 breakers (F3 if present)
- Test F4 and F5 fuses (0 Ohms = good)
- Listen for “click” when closing cover
- Inspect sensor switch wiring
- Test switches with multimeter
- Clean dual-hand buttons with contact cleaner
- Check blade sharpness and regrind count
- Verify proper voltage supply
- Confirm correct model variant
- Consult operation and parts manuals
Frequently Asked Questions About Triumph 4850 Paper Cutter Troubleshooting
Why won’t my Triumph 4850 paper cutter turn on?
The most common cause is a tripped safety circuit. Reset F1 and F2 breakers by pressing them firmly into the ON and READY positions. On 1996 models, these also serve as the dual-hand safety buttons. Test F4 and F5 fuses with a multimeter. A good fuse reads 0 Ohms. If breakers and fuses are good, check cover-activated sensor switches and wiring connections at the PCB.
What does the “click” sound mean on the Triumph 4850?
The “click” confirms the safety circuit is complete and the cutter is ready to operate. This sound occurs when the cover closes and engages the sensor switches properly. If you press the cutting buttons but hear no click, the safety interlock system has not armed. Inspect the cover closure, sensor switches, and wiring.
How many times can a Triumph 4850 blade be sharpened?
The Triumph 4850 blade supports 6 to 10 regrinds before replacement is required. Beyond 10 regrinds, the edge can collapse, causing poor cut quality and motor strain. Track your sharpening count and inspect the blade regularly with a magnifying glass for signs of wear.
Why does my paper cutter stop mid-cycle?
Mid-cycle stalling usually points to a dull blade, motor problems, or voltage supply issues. Check blade sharpness first, then verify incoming voltage reads 110–120V. Listen for grinding or humming sounds that indicate motor or clutch problems. Excessive material stack height can also trigger overload stops.
Where can I find a Triumph 4850 parts manual?
Parts manuals are available for the 4850, 4850-95, 4850-EP A, and 4850-EP B. These can be downloaded or obtained through service providers. Always match the exact model number on your machine. For 1996 models without F3, use the 4850-95 manual for compatible components.
Can I adjust the clamping pressure on a Triumph 4850?
No. Triumph cutters have minimal user-adjustable settings. There is no pressure sensitivity control, electronic force calibration, or digital cut depth adjustment. If clamping seems weak, check blade alignment, back gauge pressure, and hydraulic fluid levels. Further adjustments require a qualified technician.
Key Takeaways for Triumph 4850 Paper Cutter Troubleshooting
Most Triumph 4850 paper cutter troubleshooting comes down to the safety circuit. Reset F1 and F2 breakers, test F4 and F5 fuses, and verify cover sensor switches before exploring deeper issues. Mid-cycle failures typically trace back to blade condition or power supply problems. Keep your blade within the 6–10 regrind limit and always verify voltage at the outlet. Reference the correct manual for your 4850 variant to ensure part compatibility. When all DIY steps fail, contact Challenge Machinery or Jorson and Carlson for expert support. Start with the checklist above, and you can resolve most issues in-house.