If your Royal crosscut paper shredder suddenly stops working with the motor humming but blades frozen, you are not alone. Thousands of users face this issue with popular models like the Royal 1212X and 805MC. The good news? Most failures are not terminal. Whether it is a stripped plastic gear, a paper jam, or a sensor misalignment, many repairs can be done at home with basic tools and a few simple steps.
This guide walks you through diagnosing the exact problem, repairing critical mechanical failures, and performing essential maintenance to extend your shredder is life. From emergency jam fixes to advanced gear reconstruction using epoxy, we cover every scenario. You will learn how to identify when a repair is worth it and when to consider replacement.
Diagnose Why Your Royal Shredder Won t Move
Before opening the unit, determine whether the issue is mechanical, electrical, or user-induced. Misdiagnosis leads to wasted effort and potential damage. Use these clear indicators to pinpoint the root cause.
Motor Runs But Blades Do Not Move
This is the classic symptom of a stripped drive gear, especially in Royal 1212X models. The motor powers on and may hum, but the cutting blades remain still. There is no grinding or resistance.
- Check for smooth, toothless plastic gear upon inspection
- Cause is overloading with too many sheets that strips the plastic gear is teeth
- This is fixable via epoxy repair detailed below
Shredder Powers On But Won t Start
If lights turn on but the motor does not engage in forward or reverse, the fault may lie in sensors or electronics.
- Test the bin sensor by emptying the wastebasket completely
- Re-seat the shredder head by removing the unit from the bin, rotating it 180 degrees, and reattaching
- Wait 5 minutes and unplug to reset the control board
Blades Jam Frequently or Struggle to Cut
Persistent jams are not always user error. Blunt blades or lack of lubrication increase friction, causing paper to bind.
- Look for torn or unevenly cut paper and increased noise
- Solution involves lubricating blades and inspecting for foreign objects
Repair a Stripped Plastic Drive Gear
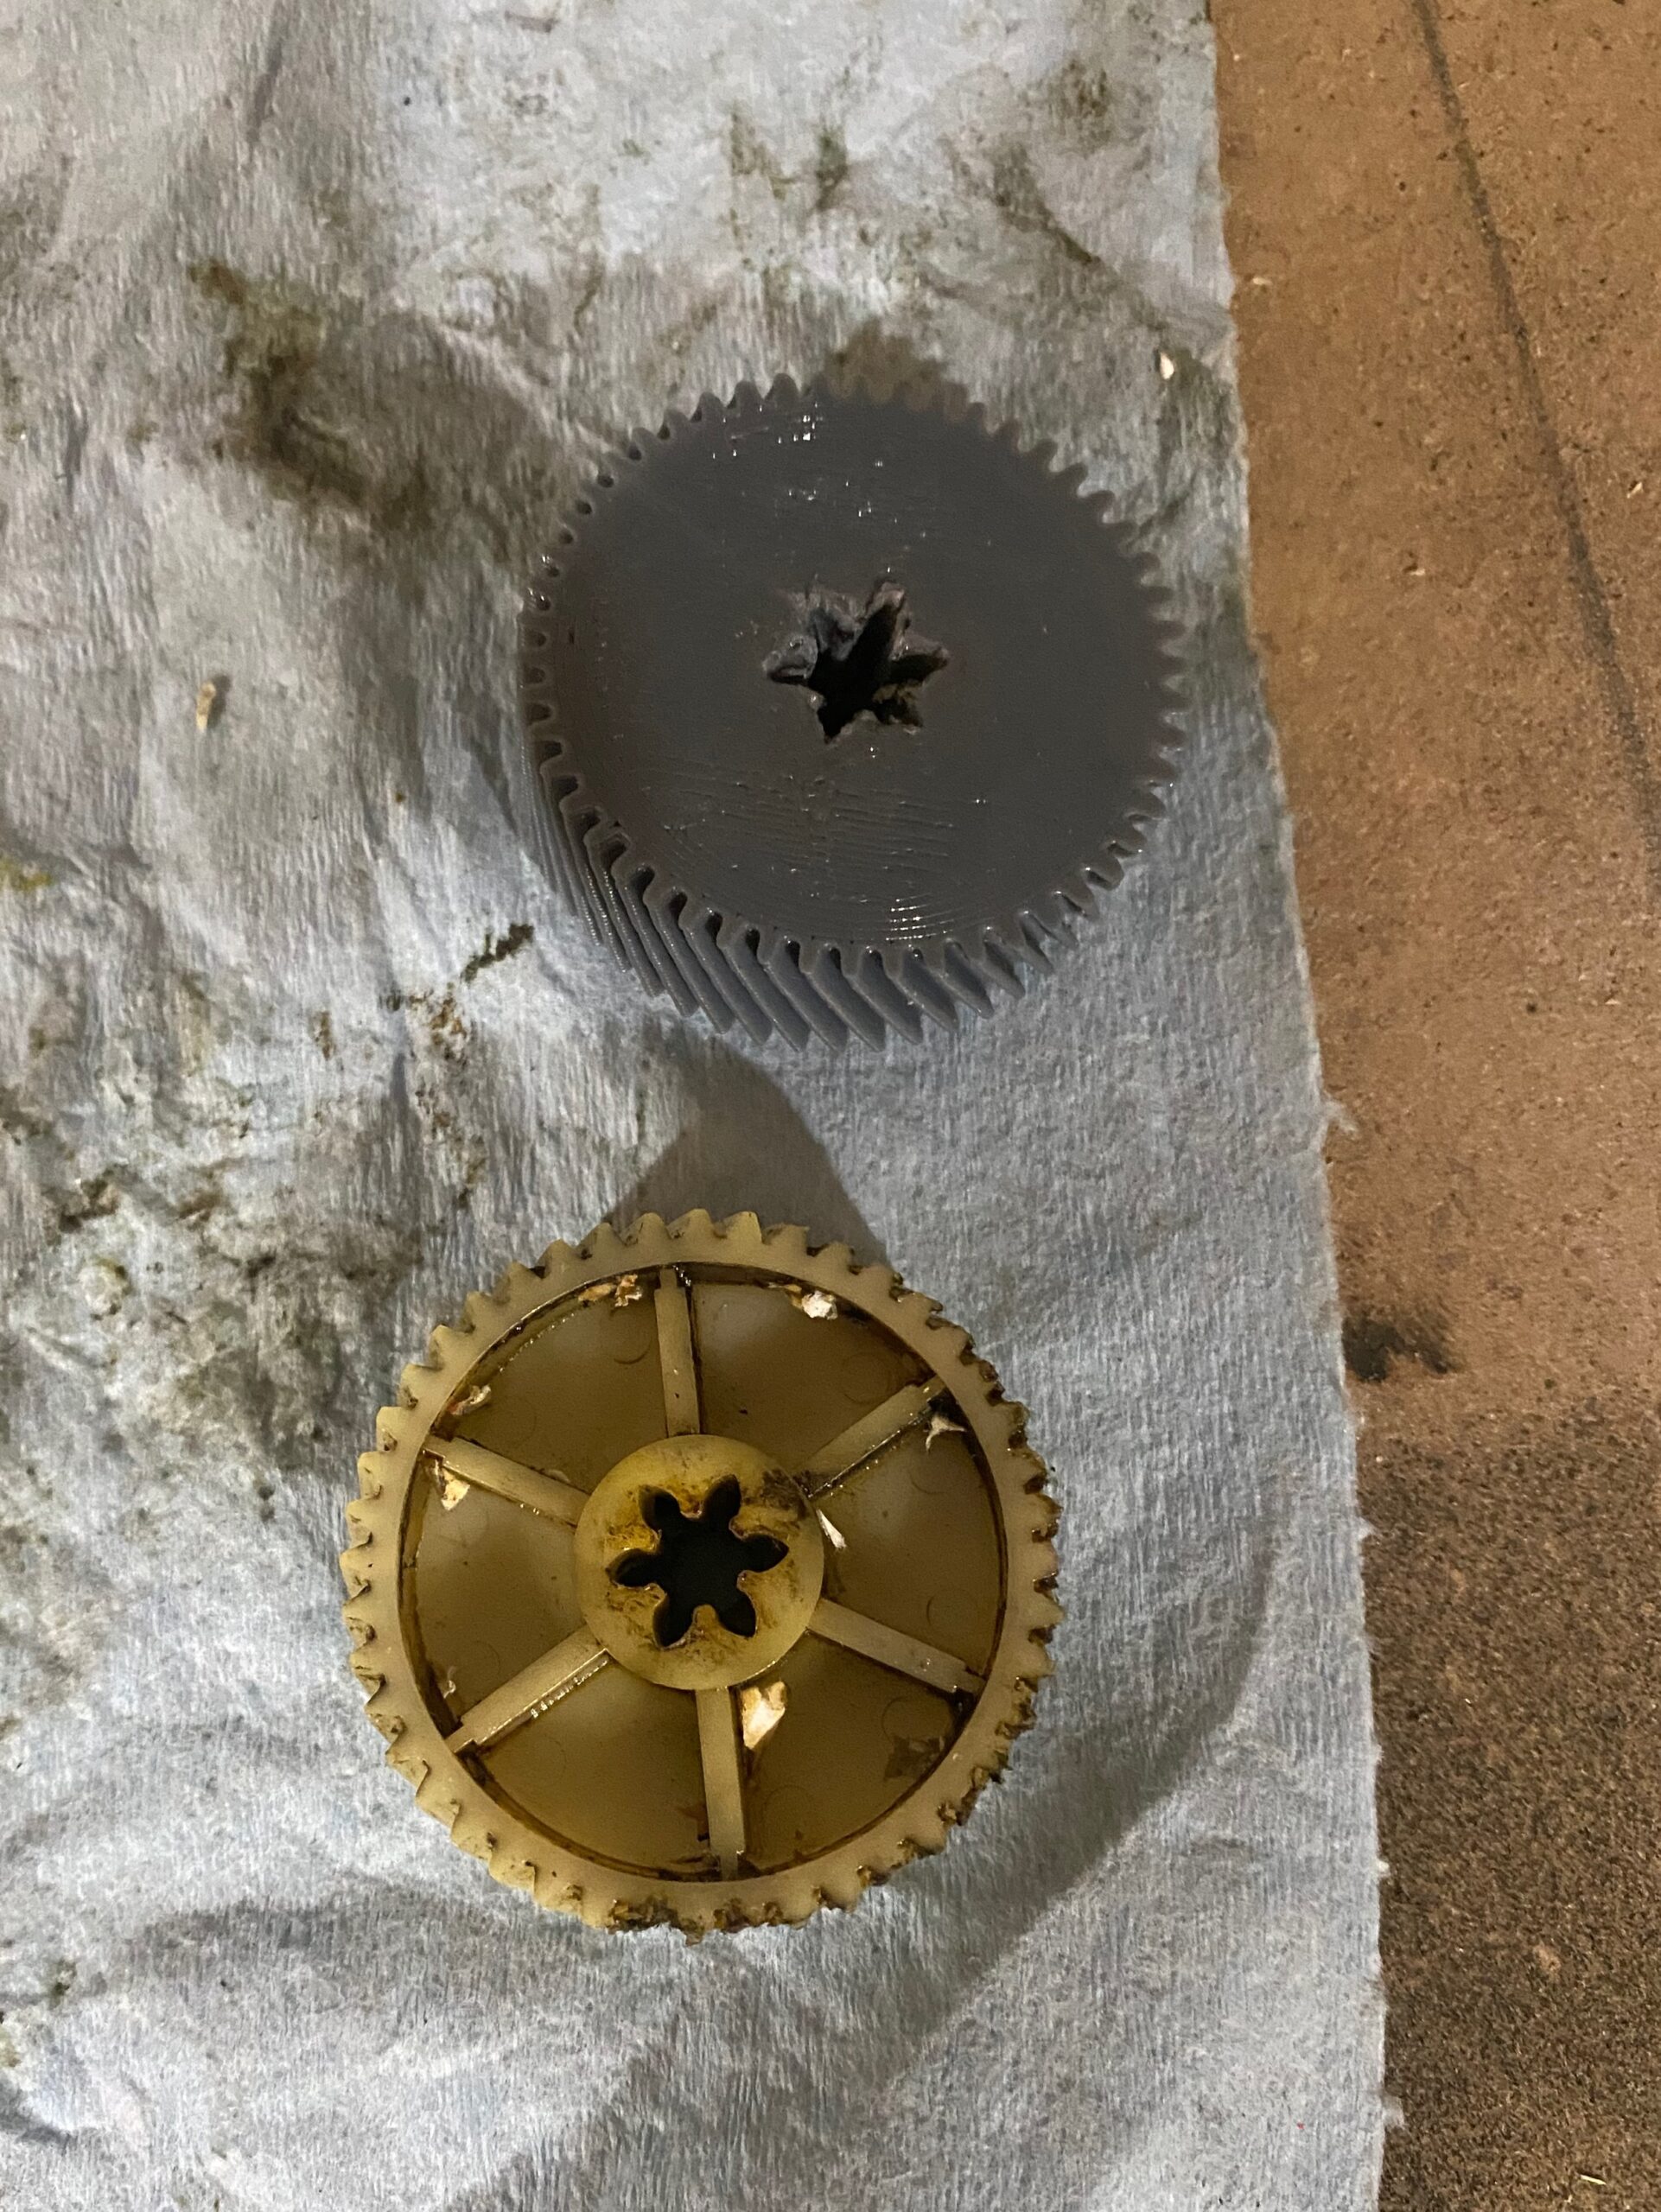
The most common mechanical failure in Royal crosscut shredders is a stripped plastic drive gear. Official replacement parts are often unavailable, making repair the only viable option.
Disassemble the Shredder Safely
- Unplug the unit. No exceptions.
- Flip the shredder upside down.
- Remove three Phillips head screws from the base.
- Gently pry apart the top and bottom casings. A small plastic clip may hold them together, so use a flat tool carefully.
- Locate the gear housing near the motor and remove its mounting screws.
- Extract the damaged gear. If the teeth are smooth or missing, this is your culprit.
Warning: Do not force the casing. Broken clips make reassembly difficult.
Prepare the Gear for Epoxy Bonding
Epoxy alone will not hold under high torque. You must create mechanical anchors.
- Select a small drill bit (1/16 inch or similar).
- Drill six evenly spaced holes around the gear is outer rim, positioning them between where the original teeth were.
- These holes allow the epoxy to lock into place, preventing slippage.
Pro Tip: Mark hole positions with a marker first to ensure even spacing.
Apply JB Weld Epoxy Correctly
Standard glue will not survive. Use JB Weld two-part epoxy for strength.
- Mix equal parts resin and hardener on a clean surface until uniform.
- Fill each drilled hole completely with the mixture.
- Wipe excess off the gear face. Do not coat the tooth edges.
- Let the epoxy begin to set slightly (5 to 10 minutes) before reinstallation.
Reassemble and Cure Overnight
- Slide the gear back onto the motor shaft.
- Reattach the gear housing and secure with screws.
- Reconnect the top and bottom casings and replace base screws.
- Wait 24 hours before use.
Critical: Do not rush curing. A 30-minute set time is not enough for torque resistance.
Test the Repaired Shredder
After 24 hours:
- Plug in the unit.
- Run a single sheet of paper through.
- Listen for smooth engagement. No slipping or grinding.
- Gradually increase to 2 to 3 sheets to confirm stability.
Clear a Paper Jam Without Damaging Blades
Jams are the most frequent issue. Done wrong, they cause permanent blade damage.
Power Down and Unplug Immediately
Never attempt jam clearance while plugged in. Even reverse mode can activate unexpectedly.
Use Reverse Mode First
- Plug in the shredder briefly.
- Switch to reverse and hold for 3 to 5 seconds.
- Unplug again. This often backs paper out safely.
If motor strains or does not move, proceed to manual removal.
Remove Paper Manually with Care
Use only non-metal tools. Tweezers, chopsticks, credit cards, and plastic pens work well.
- Insert tool from the back or side of the feed chute.
- Gently pull or push jammed paper outward.
- Work slowly. Do not force it deeper.
Never use fingers or metal screwdrivers. Blades are sharp and easily nicked.
Clear Residual Fragments
After removing bulk paper:
- Shine a flashlight into the cutting chamber.
- Use compressed air or a small brush to blow out dust and tiny shreds.
- Run a lubricating sheet or wax paper through to clean and prep blades.
Lubricate Blades to Prevent Future Jams
Dull or dry blades increase friction, leading to jams and motor strain.
Apply Oil Properly
- Turn off and unplug the shredder.
- Drip 3 to 5 drops of shredder-specific oil across the blade width. Do not use WD-40 or household oils.
- Wait 10 seconds for absorption.
- Plug in and run in reverse for 3 seconds, then forward with one sheet to absorb excess.
Frequency: After every 1 to 2 shredding sessions, or when cutting becomes noisy.
Use Lubricating Sheets as Alternative
Pre-oiled sheets are convenient and evenly distribute oil.
- Feed one sheet through in forward mode.
- Let the machine run completely.
- Wait 5 minutes before heavy use.
Fix Sensor and Electrical Issues

When the shredder won t start despite power, sensors or control boards may be at fault.
Reset the Control Board
Overheating or jams can lock the system.
- Unplug for at least 5 minutes.
- This resets thermal protection and logic circuits.
- Reconnect and test.
Clean and Realign Safety Sensors
Infrared sensors detect bin presence. Dust or misalignment disables operation.
- Remove the shredder head from the basket.
- Wipe sensor ports with a dry cloth. No liquids.
- Rotate the unit 180 degrees and reseat it firmly.
- Ensure the basket clicks into place.
Note: Even a slightly misaligned bin triggers a safety shutdown.
Check Power Supply and Outlet
Rule out external issues.
- Test the outlet with another device
- Try a different power cord if detachable
- Avoid extension cords. They reduce voltage
Replace Worn Drive Belts If Applicable

In units older than 5 years, internal belts may stretch or snap.
Identify Belt-Driven Models
Not all Royal shredders use belts. If your model lacks a visible gear train, it likely uses a belt.
- After disassembly, look for a rubber belt connecting motor to blades.
- If cracked, stretched, or missing, replacement is needed.
Source and Install a New Belt
- Search online for Royal model drive belt.
- Remove old belt carefully.
- Loop new belt around motor pulley and blade shaft.
- Ensure tension is firm but not over-tight.
Warning: Belts degrade over time even without use. Units over 5 years old are high-risk.
Prevent Future Failures
A repaired shredder will not last without proper care. Follow these habits to avoid repeat breakdowns.
Never Exceed Sheet Capacity
Overloading is the number one cause of gear stripping.
- Royal 1212X: Max 10 to 12 sheets per pass
- Smaller models: 6 to 8 sheets
- Always feed slowly
Remove Staples and Paper Clips
Even staple-safe shredders can jam with heavy metal loads.
- Remove clips, binder rings, and plastic covers
- Avoid shredding credit cards unless rated for it
Perform Weekly Maintenance
- Clean sensors monthly with a dry cloth
- Lubricate blades after each use
- Empty bin before it is full. Sensor errors increase near capacity.
Know When to Replace Instead of Repair
Some failures are not worth fixing, especially if labor exceeds replacement cost.
Replace If
- Unit is over 5 years old and has motor burnout
- Control board is damaged with no lights or response
- Multiple components failed (gear, belt, motor)
- Repair cost (parts plus time) exceeds $30 to $40
Cost Tip: A new Royal crosscut shredder starts at $40 to $60. Repair only makes sense for younger units or sentimental value.
Contact Royal Support or Local Repair Shops
For warranty claims or professional help:
- Royal Customer Service: 908-429-4357
- Warranty covers defects, not misuse like overloading. Proof of purchase required.
- Local options include Staples, Office Depot, or PC repair shops that may offer diagnostics or trade-in deals.
Reality Check: Most retailers charge $50 or more for service, often more than a new unit.
Frequently Asked Questions About Repairing a Royal Crosscut Paper Shredder
How do I know if my Royal shredder has a stripped gear?
If the motor runs and hums but the blades do not move at all, you likely have a stripped gear. The plastic teeth wear smooth from overloading, preventing power transfer to the cutting head.
Can I use regular glue to repair the stripped gear?
No. Standard glue will not hold under the high torque of a shredder. You must use JB Weld two-part epoxy and create mechanical anchors by drilling holes for the epoxy to grip.
How long does the epoxy repair take to cure?
You must wait a full 24 hours before using the shredder. Although JB Weld may feel set in 30 minutes, full structural strength for high-torque environments requires overnight curing.
Why does my shredder stop working even when the bin is not full?
The infrared sensor may be dirty or misaligned. Remove the shredder head, wipe the sensor ports with a dry cloth, rotate the unit 180 degrees, and reseat it firmly on the basket.
Is it worth repairing an older Royal shredder?
If the unit is over 5 years old with motor burnout, multiple component failures, or a damaged control board, replacement is usually more cost-effective than repair. A new Royal crosscut shredder starts at $40 to $60.
How often should I lubricate my Royal shredder blades?
Lubricate blades after every 1 to 2 shredding sessions, or whenever the machine becomes noisy or starts cutting unevenly. Use only shredder-specific oil, not WD-40 or household oils.
Key Takeaways for Repairing Your Royal Crosscut Shredder
Repairing a Royal crosscut paper shredder is often faster and cheaper than replacement, especially for the common stripped gear issue. With a Phillips screwdriver, JB Weld epoxy, and 24 hours of curing time, you can restore full function to a seemingly dead machine. The key is accurate diagnosis before starting any repair work.
Always start with simple fixes like resetting the control board, cleaning sensors, and clearing jams before attempting mechanical repairs. Overloading is the primary cause of gear stripping, so respect the sheet capacity limits for your model.
Follow this guide, avoid common pitfalls like rushing epoxy cure or using metal tools in the cutting chamber, and you will extend your shredder is life for years. If your unit is over 5 years old with multiple failures, consider whether replacement makes more financial sense than continued repairs.