
You’re halfway through a scrapbook page when you realize your paper trimmer is missing. Or maybe you’re framing a photo and don’t have a dedicated tool in sight. Don’t abandon your project just yet. Cutting paper without a paper cutter is entirely possible using items you already have at home.
Below, you’ll discover nine reliable techniques that range from completely tool-free to precision cutting with a ruler and knife. Whether you’re working with printer paper, cardstock, or tissue, there’s a method here that will help you achieve clean, straight edges.
Fold and Tear Along a Sharp Crease
Create a Deep, Straight Crease
Lay your paper flat on a hard, clean surface. Align the spot where you want to cut with a straight edge, like a book spine or table corner, to keep your fold even. Press your fingernail firmly along the line and run it back and forth several times.
Flip the paper over and repeat on the back. Pressing both sides breaks the paper fibers evenly and sets you up for a much cleaner tear.
Tear With Slow, Even Pressure
Grip the paper on both sides of the crease with your thumbs close to the fold. Pull the top half upward slowly while keeping the bottom half flat on the surface. Avoid yanking. Controlled tension is what gives you a straight line.
Best for: Printer paper, notebook paper, lightweight cardstock.
Pro Tip: Score the fold multiple times for thicker paper. If the tear starts to drift, stop and re-crease before continuing.
Why Folding Works
The crease weakens the paper’s internal fibers, creating a natural breaking point. When you apply tension, the tear follows that weakened path. It’s the same logic behind industrial perforation, just done by hand.
Limitation: Don’t rely on this for heavy cardstock or photo paper. Jagged lines are common if the crease isn’t deep enough.
Use a Table Edge to Snap Paper Cleanly
Align the Cut Line With the Edge
Position your paper so the cut line sits exactly along the edge of a desk or table. The section you want to remove should hang over the edge while the rest stays flat for support.
Press down firmly along the edge with your palm or the side of your hand. This compresses the fibers at the fold point.
Snap Downward in One Motion
Hold the overhanging section and bend it downward in a single, quick movement. The sharp bend breaks the compressed fibers, giving you a surprisingly clean edge on thinner paper.
Works best on: Copy paper, construction paper, lightweight craft sheets.
Visual cue: Listen for a faint “crack” when the fibers split. It sounds similar to snapping a cracker.
Avoid this with: Thick cardstock or laminated paper. It will resist snapping and likely tear unevenly.
Bend and Snap Thin Paper in Seconds
Grip Both Ends and Bend Sharply
For ultra-thin paper like tissue, tracing paper, or gift wrap, skip the creasing step entirely. Hold the sheet at both ends with your fingers near the cut line. Bend it sharply backward, like folding a piece of foil.
The paper will split along the bend almost instantly, no tools required.
Ideal for: Decorative layers, gift toppers, overlay designs where perfect edges aren’t critical.
Warning: This method offers minimal control, so don’t use it when precision matters.
Cut With a Ruler and Exacto Knife
Secure the Ruler Before Cutting
Place your ruler along the cut line. Press down firmly with your non-dominant hand, keeping your fingers flat across the top edge. This prevents slipping, which is the most common cause of crooked cuts and injuries.
A metal ruler is best. Plastic can shift or get nicked by the blade.
Score With Light, Consistent Passes
Hold the Exacto knife like a pencil. Start near your dominant hand and draw the blade along the ruler’s edge, moving away from your body. Apply light, steady pressure. For thick paper, make several shallow passes instead of one deep cut.
Critical: Always place a cutting mat or scrap cardboard underneath. One crafter reported permanent scratches on their dining table from cutting directly on wood.
Blade tip: Replace dull blades often. A sharp blade needs less force and produces cleaner cuts.
Achieve Laser-Straight Edges
This is the gold standard for manual paper cutting. Scrapbookers, matting artists, and photo trimmers use it when a paper cutter isn’t available.
Pro Tip: Cut from right to left if you’re left-handed to keep the line visible.
Mark Lines With a Pencil Before Cutting
Measure and Mark Every Key Point
Even with a ruler, freehand cutting can drift. Improve accuracy by marking first. Use a ruler to measure your cut line, then make small pencil marks at each corner and midpoint.
For photo matting, place the photo on the mat board and mark 1/8 inch around all edges, including the halfway points on each side.
Connect the Dots With Your Ruler
Lay your ruler between the marks and draw a light pencil line. This gives you a visible guide, especially helpful if you struggle with straight cuts.
One crafter admitted, “I can’t cut a straight line either!” but found this method “usually works” for their projects.
Erasing tip: Use a soft eraser after cutting to avoid smudging or tearing the paper.
Try a Rotary Cutter and Self-Healing Mat
Adapt Quilting Tools for Paper
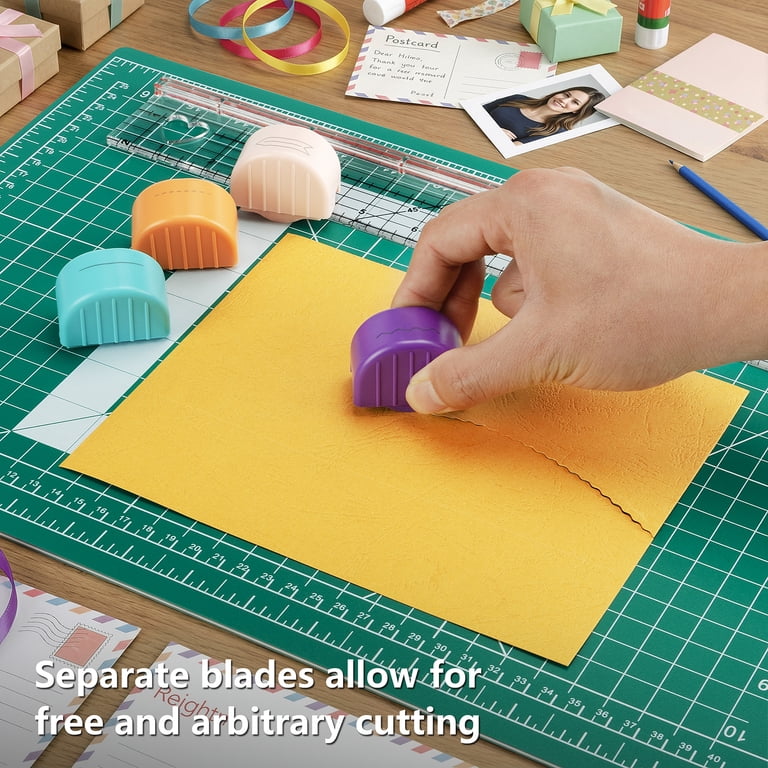
If you own a rotary cutter and self-healing cutting mat, they work beautifully for paper. These tools are standard in quilting but transfer seamlessly to scrapbooking and cardmaking.
Place the paper on the mat, align a ruler with your cut line, and hold it down firmly. Roll the rotary blade along the edge in one smooth motion.
Why it works: The circular blade glides through paper with minimal resistance, reducing jagged edges.
Weigh Cost Against Your Needs
One crafter noted: “You could invest in a rotary blade and mat… but you might be better off getting a 12-inch paper trimmer.”
Rotary systems are ideal if you also cut fabric. For paper-only use, a dedicated trimmer is often more practical and affordable.
Upgrade to a Manual Paper Trimmer
Fiskars 12-Inch Trimmer for General Use
The Fiskars 12-inch paper trimmer is a popular, budget-friendly option. Users describe it as “generally loved” and “not all that much” in price.
Align the paper, lower the blade, and slide it across. You get perfect straight cuts every time.
Watch for defects: One user reported a “sticky” last half-inch due to a manufacturing flaw. Test new trimmers immediately and return if faulty.
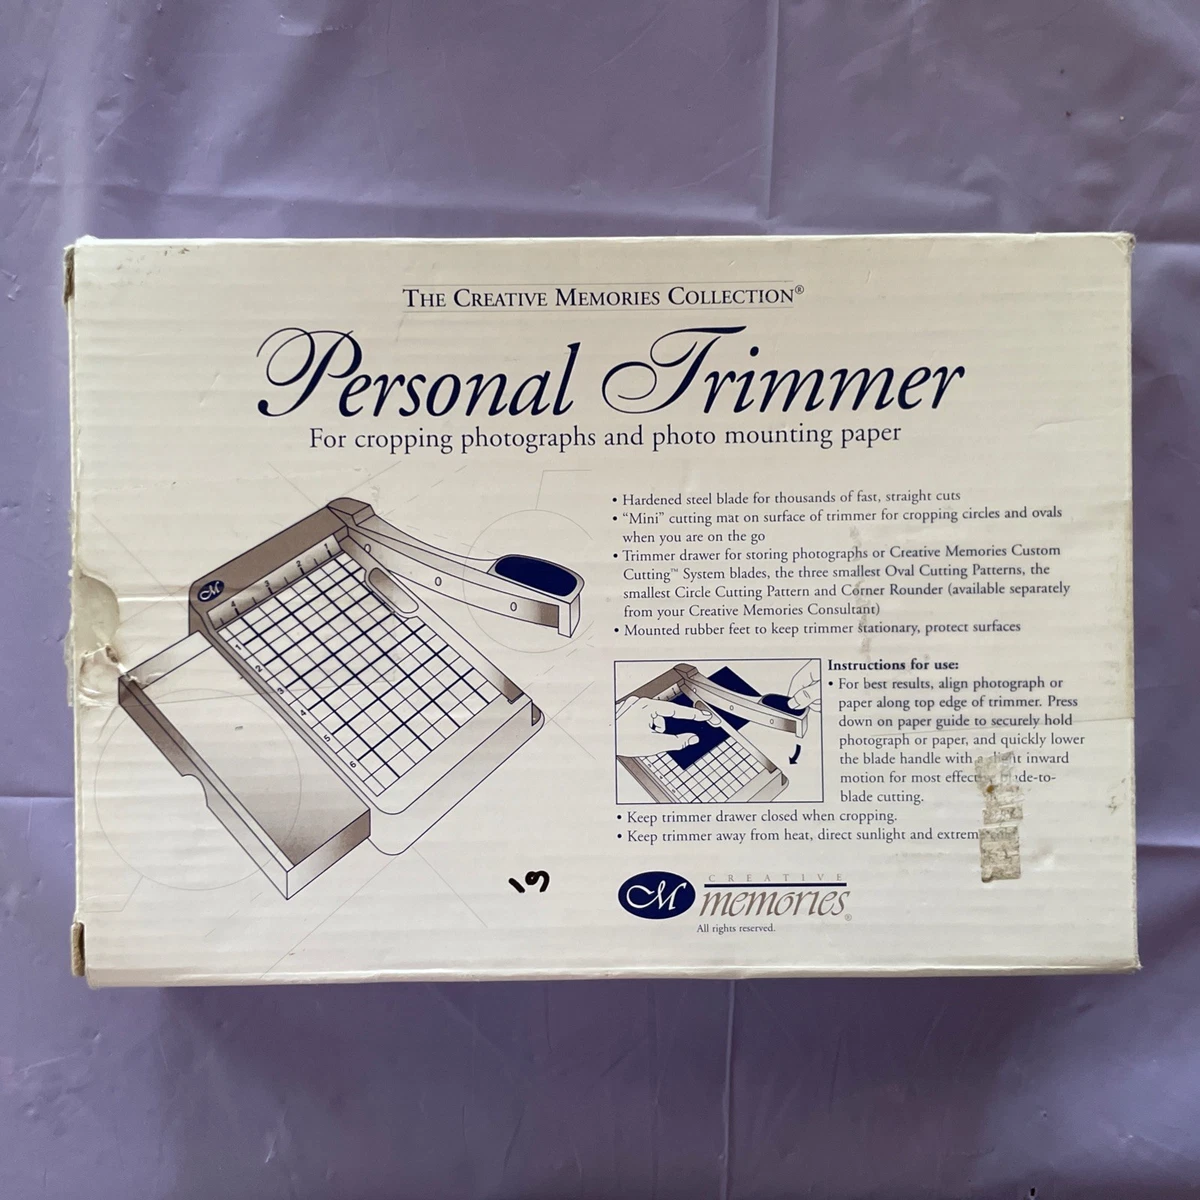
Creative Memories Personal Trimmer for Photos
If you work with photos and small paper pieces, the Creative Memories personal trimmer is compact, precise, and designed for scrapbookers.
Users say it “changed the way I scrap” by speeding up small cuts. Some started with the CM 12-inch mat and blade system before upgrading to a full trimmer.
Choose the Right Method for Your Project
Quick Cuts With No Tools
• Best method: Fold-and-crease or table-edge snap
• Use for: Rough trims, temporary cuts, school projects
• Expect: Slightly uneven edges, totally acceptable for non-display work
Precision Cuts With Basic Tools
• Best method: Ruler, Exacto knife, and cutting mat
• Use for: Photo matting, framing, scrapbooking
• Pro tip: Mark lines in pencil first for foolproof accuracy
Repeated or Frequent Cutting
• Best method: Invest in a 12-inch paper trimmer
• Top picks: Fiskars for general use, Creative Memories for photos
• Bonus: Faster, safer, and more consistent than manual methods
Multi-Craft Use (Paper and Fabric)
• Best method: Rotary cutter with self-healing mat
• Ideal for: Crafters who quilt, sew, or work with mixed media
• Note: Overkill if you only cut paper occasionally
Avoid Common Cutting Mistakes
Jagged Edges
A weak crease is the usual culprit. Run your fingernail along the fold multiple times, both front and back. For thick paper, press with a spoon edge for extra force.
Crooked Cuts
Even with a ruler, lines can drift. Mark not just the corners but also the midpoint of each side. Connect them with short segments to keep alignment straight.
Damaged Surfaces
Never cut directly on furniture. A $10 self-healing mat protects your work surface and improves cutting performance.
Slipping Ruler
Place a rubber shelf liner or damp cloth under the ruler to prevent sliding. Metal rulers with gripper edges also help.
Maintain Clean, Safe Cutting Habits
Replace Blades Regularly
Dull blades require more pressure, increasing the risk of slips. Change your Exacto or rotary blade after every few heavy projects.
Cut Away From Your Body
Always direct the blade motion away from your hands and torso. Keep your fingers behind the cutting line.
Store Tools Safely
Keep blades retracted and out of reach of children. Store trimmers in a closed drawer or with protective covers.
Frequently Asked Questions About Cutting Paper Without a Paper Cutter
Can you cut paper straight without scissors or a cutter?
Yes. Folding along a sharp crease and tearing slowly gives you a straight line on standard printer paper. For better precision, use a ruler and Exacto knife on a cutting mat.
What is the best tool to cut paper if you don’t have a paper cutter?
A ruler paired with an Exacto knife is the most recommended method among crafters. It produces clean, straight lines and gives you excellent control.
How do you cut thick paper or cardstock without a cutter?
Score the paper deeply with a ruler’s edge or a spoon before folding and tearing. For cleaner results, make multiple shallow passes with an Exacto knife instead of one deep cut.
Why does my paper tear unevenly when I fold it?
The crease is likely too shallow. Press your fingernail along the line multiple times on both sides. Inconsistent pulling pressure also causes jagged edges, so tear slowly and evenly.
Is it safe to use an Exacto knife on a regular table?
No. Always place a cutting mat, scrap cardboard, or thick board underneath. Cutting directly on wood or laminate can scratch or gouge the surface permanently.
What’s a good budget-friendly paper trimmer for beginners?
The Fiskars 12-inch paper trimmer is widely recommended for its affordability and reliability. For photos and small pieces, the Creative Memories personal trimmer is a popular choice among scrapbookers.
Final Tips for Perfect Paper Cuts Every Time
Practice on scrap paper before cutting your final pieces. Work under bright lighting so you can see creases and pencil marks clearly. Move slowly because rushing leads to mistakes. And know your paper: thin sheets tear easily, while thick stock needs scoring or a blade.
If you cut paper regularly, a Fiskars or Creative Memories trimmer pays for itself in time saved and frustration avoided. But when you don’t have tools on hand, the folding, table-edge, and ruler-and-knife methods will get you through cleanly and confidently.
No paper cutter? No problem. With these techniques, you’ve got everything you need to cut paper like a pro, starting right now.