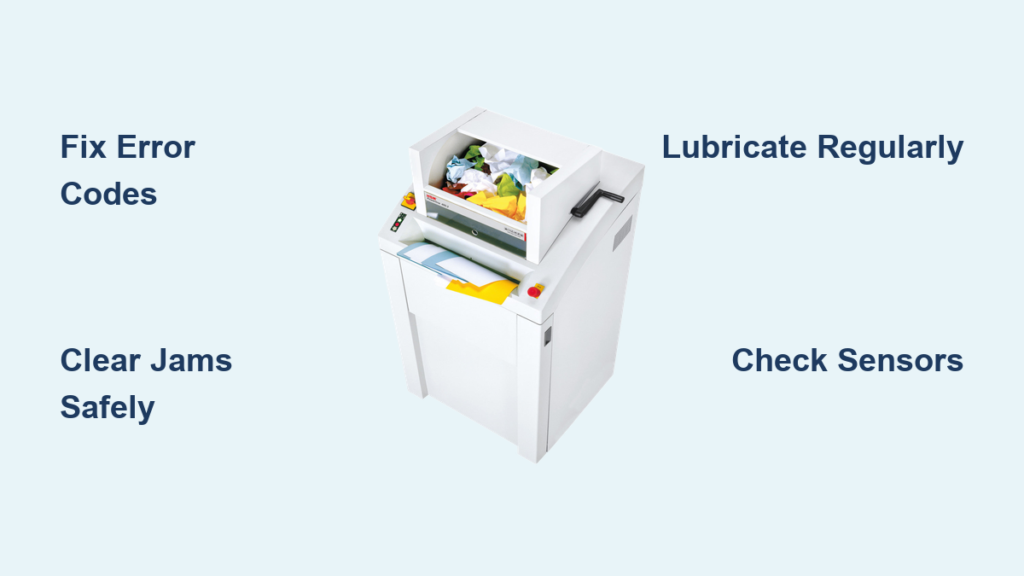
Is your paper shredder humming but not shredding? You are not alone. One of the most common failure points in home and office shredders is worn or stripped plastic gears, especially where they mesh with steel counterparts. Over time, the softer plastic teeth erode, leading to slippage, grinding noises, or complete drive failure. But before you toss it, know this: fixing paper shredder gears is often possible, even without replacing the entire unit.
The good news is there are multiple repair paths, from a quick emergency patch using household items to a permanent fix with precision-replaced gears. However, many users jump straight into disassembly only to discover the real culprit was a clogged safety sensor, not a broken gear at all. This guide cuts through the confusion with a step-by-step roadmap to accurately diagnose and repair gear-related issues.
You will learn how to distinguish sensor malfunctions from true mechanical failure, rebuild damaged gears in a pinch, or replace them permanently using donor parts or 3D printing. We will cover exact measurements, tools, and field-tested techniques that restore function reliably. Whether you are salvaging an AmazonBasics, Fellowes, Rexel, or Staples model, this is your complete resource for getting your shredder back online fast.
Diagnose: Sensor or Gear Failure
Before opening the case, confirm whether the problem is mechanical or electronic. Misdiagnosis wastes time and risks unnecessary disassembly.
Check the Safety Sensor First
Most dead shredders are not broken. They are just blocked. The bin sensor lever is a frequent failure point. Dust and paper dust jam this small metal rod, preventing the circuit from closing even when the bin is seated.
Symptoms of sensor failure include motor running in reverse but not forward, a humming noise with no blade movement, and power light on with no response to paper insertion.
Quick test steps:
- Unplug the shredder
- Open the casing with a Phillips #0 screwdriver
- Locate the thin metal sensor rod near the bin housing
- Manually press it in, simulating a full bin
- Plug in and insert paper. If it starts, the gears are fine. Clean the sensor.
Confirm Gear Damage Visually
If the motor spins but blades do not turn, or you hear grinding, inspect the gears.
Signs of gear failure include plastic gear teeth worn down, chipped, or missing entire quadrants. The steel gear may be intact but spinning freely. You may also notice uneven meshing or visible gaps between gears.
Pro tip: Many shredders use a 54T plastic gear paired with a 10T steel gear in the CD slot mechanism. These are common failure zones due to higher torque demands.
Rule Out Power and Jam Issues
Check these items first:
- Test the outlet with another device
- Clear any paper jams with tweezers or reverse mode
- Ensure the waste bin is fully seated and latched
Use the troubleshooting matrix below to narrow it down:
| Symptom | Likely Cause | Fix |
|---|---|---|
| Motor hums, no shred | Stuck sensor | Clean lever, realign housing |
| Blades static, motor spins | Stripped gear | Rebuild or replace gear |
| Grinding noise | Misaligned or broken teeth | Replace gear, remove debris |
| Intermittent operation | Dirty contacts | Clean with isopropyl alcohol |
Emergency Fix: Rebuild Teeth with Glue and Baking Soda

When you need a fast, no-tools fix, this method can revive a shredded gear temporarily.
Why It Works
Super glue, also called cyanoacrylate, hardens instantly when mixed with baking soda. This forms a rigid, dense composite stronger than epoxy for this application. The exothermic reaction creates a durable plastic-like mass that can withstand limited torque.
Tools Needed
- Super glue, extra strength
- Baking soda
- Gloves and eye protection, the reaction generates heat
Step-by-Step Repair
Clean the gear surface. Remove loose debris and oil with isopropyl alcohol. Let dry completely.
Apply glue and powder:
- Apply a thin layer of super glue to the worn tooth area
- Immediately sprinkle baking soda over it. Watch it harden in seconds.
- Repeat layer by layer until the missing tooth volume is rebuilt
Shape and cure. Use a hobby knife to roughly shape the new teeth. Do not aim for perfection. Just make enough to engage the steel gear.
Let cure fully, 10 to 15 minutes. Initial hardness is instant, but full bond strength develops quickly.
Reattach the gear. Use extra-strength glue to secure the gear to the shaft. Hold in place for 60 seconds.
Optional: Reinforce cracked housing with the same mix to prevent case splitting under load.
What to Expect
Functionality is restored, but shredding will be uneven and loud. Capacity is limited to 1 to 2 sheets only. Durability lasts days to weeks depending on use. The risk is that teeth may snap under stress. This fix is not for heavy-duty use.
Expert note: This is a last resort fix, effective for emergency use but not a long-term solution.
Permanent Fix: Replace the Gear Precisely
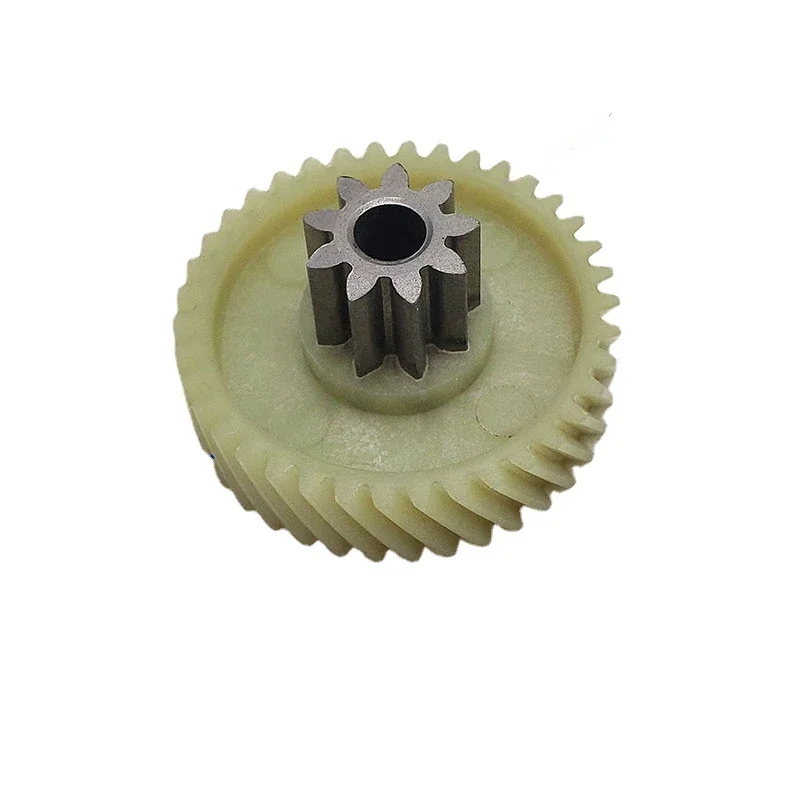
For lasting results, replace the damaged gear with an exact match. This requires precision measurement and sourcing.
Measure Five Critical Dimensions
Use digital calipers for accuracy. Ruler measurements are unreliable.
Tooth count: Count teeth on both plastic and steel gears. Common counts are 24T, 25T, 54T, and 10T. This determines gear ratio and sync with motor.
Outside diameter: Measure from tooth tip to tooth tip across the center. Example measurements include 40.0 mm or 40.5 mm, common in AmazonBasics models. This ensures proper fit within the housing.
Pitch height and thickness: Pitch height is the vertical tooth profile, typically 3 to 4 mm. Pitch thickness is the gear body width, for example 5.1 to 5.6 mm. This is critical for full engagement without binding.
Axle hole diameter: Measure the inner hole. Divide by 2 for radius if designing from scratch. This ensures snug fit on the drive shaft for torque transfer.
Helix angle: Most shredder gears are helical, not straight. Teeth are cut at an angle. To measure, align a protractor or combination square with the tooth slope. Read the angle across the top surface, for example 115 degrees. Subtract 90 degrees to get true helix angle, for example 25 degrees. A mismatched helix angle causes immediate grinding or jamming. It must match the steel gear exactly.
Source or Fabricate a Replacement Gear
Option 1: Salvage from a Donor Shredder
Most discarded shredders still have good gears. Buy a used unit of the same model on eBay or Craigslist.
Strategy: Search by model number, for example Fellowes T7CM, Rexel Auto X60. Look for units sold for parts due to bin sensor or cord issues. Extract the 54T and 10T gear set from the CD mechanism.
Pro tip: Gears from the same manufacturer series often interchange even across models.
Option 2: 3D Print a High-Strength Gear
FDM filament printers will not work. Layer adhesion fails under load. Use SLA or DLP resin printing only.
Requirements:
- Printer: SLA or DLP, for example Anycubic Photon, Elegoo Mars
- Resin: High-strength engineering resin, for example Siraya Tech Tenacious
- Design: 100 percent solid, no infill, precise helix angle, correct tooth profile
Software setup: Use FreeCAD with Gear Workbench plugin. Input teeth count, OD, shaft diameter, helix angle, pressure angle, typically 30 degrees. Simulate meshing virtually before printing.
Success rate is high with accurate input. Minor trial and error may be needed.
Option 3: Professional Machining or Custom Order
Contact a local machine shop or gear supplier.
Provide these specifications:
- Tooth count and OD
- Pitch height and thickness
- Shaft diameter
- Helix angle if helical
- Material preference: Delrin acetal or nylon, best for wear resistance
Alternative materials include steel, durable but noisy. Acrylic is laser-cuttable but brittle. Wood is not suitable, it fails under torque.
Option 4: Search Industrial Gear Catalogs
Some shredders use standard spur gears.
Search by module or diametral pitch, pressure angle, usually 30 degrees, and tooth count.
Challenge: Many manufacturers use proprietary designs, making off-the-shelf matches rare.
Reassemble and Test Safely
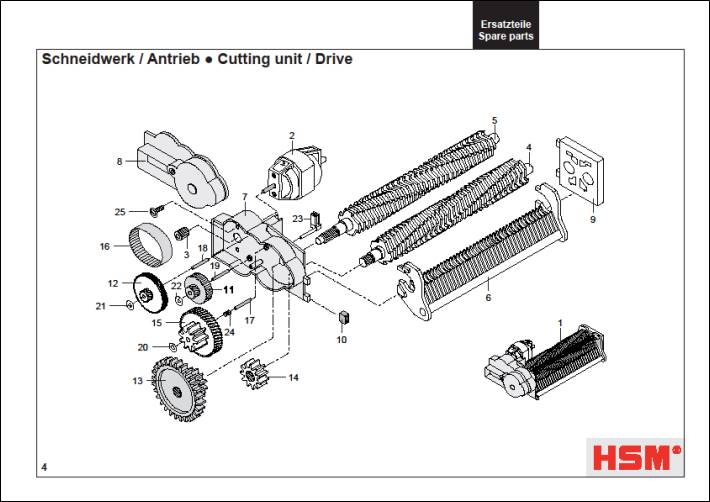
Once the gear is replaced or rebuilt, reassembly must be precise.
Reassembly steps:
- Align gears so teeth mesh smoothly, no binding
- Reattach motor and housing with original screws
- Ensure sensor lever moves freely. Do not trap wires.
- Plug in and test in reverse first, then forward
Warning: If it grinds, power off immediately. Helix angle or tooth count is wrong.
Final test: Run an oiled sheet through. See maintenance below. Shred 1 to 2 sheets slowly. Listen for smooth operation.
Prevent Future Gear Failure
A repaired shredder can last years with proper care.
Lubricate Every 6 to 12 Months
Method: Lightly coat a sheet with shredder oil or cooking oil. Run it through in forward mode. Follow with a dry sheet to absorb excess.
Why: Reduces friction between plastic and steel gears, preventing premature wear.
Avoid These Mistakes
- Overloading: Never exceed recommended sheet count
- Staples and clips: These jam blades and strain gears
- Adhesive labels: Can gunk up gears and sensors
Clean Sensors Regularly
Every 6 months: Wipe sensor lever with isopropyl alcohol. Use an old toothbrush to remove dust. Apply one drop of WD-40 only if lever is stiff. Avoid plastic gears.
Final Note
Fixing paper shredder gears is not magic. It is mechanics. The key is correct diagnosis first. Most dead shredders fail due to clogged sensors, not broken gears. Always test the sensor lever before disassembling.
If gears are truly damaged, you have options. Quick fix uses super glue and baking soda for light, temporary use. Permanent fix replaces with salvaged, 3D-printed, or machined gear using precise measurements.
With the right tools and approach, even a shredded plastic gear can be restored. Models like AmazonBasics, Fellowes, and Rexel respond well to these repairs. By measuring accurately, sourcing correctly, and maintaining regularly, you can keep your shredder running for years, saving money and reducing e-waste.
Now that you know how to fix paper shredder gears, do not throw it out. Fix it.
Frequently Asked Questions About Fixing Paper Shredder Gears
Why does my shredder hum but not shred?
This is usually a sensor issue, not a gear problem. The bin sensor lever is likely stuck due to dust and debris. Open the casing and manually press the sensor lever to test. If the shredder starts, clean the sensor with isopropyl alcohol.
Can I use super glue alone to fix shredder gears?
Super glue alone is too brittle for this application. Mix it with baking soda to create a hard, durable compound. This emergency fix works for light use but will not hold up to heavy shredding loads.
How do I know if my plastic gear is stripped?
Disassemble the shredder and inspect the gear teeth. Look for rounded edges, missing teeth, or gaps where teeth should be. If the motor spins but blades do not move, stripped gears are the likely cause.
What tools do I need to replace shredder gears?
You need digital calipers for precise measurements, a Phillips #0 screwdriver for disassembly, isopropyl alcohol for cleaning, and either a replacement gear source or access to an SLA 3D printer for custom fabrication.
Can I 3D print a replacement gear?
Yes, but only with SLA or DLP resin printing. FDM printers create weak layer bonds that fail under torque. Use high-strength engineering resin and input exact measurements including helix angle for best results.
How often should I lubricate my shredder?
Lubricate every 6 to 12 months, or more frequently for heavy use. Run a sheet coated with shredder oil or cooking oil through the machine, then follow with a dry sheet to remove excess.