
If your Boston 2612 paper cutter isn’t producing clean, accurate cuts, it probably needs adjustment. This 36-inch guillotine paper cutter delivers precision straight from the factory, but frequent use can throw off blade alignment, back gauge positioning, and clamping pressure. Knowing how to adjust a Boston 2612 paper cutter keeps cuts consistent, extends machine life, and protects operators in busy print shops, photography studios, and offices.
In this guide, you’ll find step-by-step instructions for diagnosing problems and fine-tuning blade angle, back gauge calibration, clamp pressure, and safety components. Each section includes practical tips you can apply right away, even if you’ve never serviced a paper cutter before.
Essential Safety Precautions Before Adjusting a Boston 2612 Paper Cutter
The Boston 2612 features a heavy-duty steel blade that slices cleanly through photo paper, cardstock, and thick stacks. One careless move can lead to serious injury, so safety comes first.
Power Off and Unplug the Machine
Disconnect the cutter from power before any inspection or adjustment. While the Boston 2612 is primarily manual, certain configurations include electric clamping or motorized back gauges. Unplugging eliminates the risk of accidental activation.
Lock the Blade in the Raised Position
Use the blade lock lever near the handle to secure the blade in its upright position. Never reach near the cutting edge while the blade is unlocked or free to move.
Wear Cut-Resistant Gloves
When inspecting or cleaning around the blade, wear ANSI-rated cut-resistant gloves. Remove jewelry and avoid loose sleeves that could catch on the mechanism.
Check and Correct Blade Alignment
A misaligned blade is the most common cause of uneven, frayed, or stepped cuts. Proper alignment ensures the blade meets the anvil evenly from left to right.
Inspect the Anvil for Drag Marks
Raise the blade fully and examine the anvil strip beneath the cutting zone. Look closely for scoring patterns:
– Heavier marks on one side indicate the blade is skewed.
– A diagonal drag line points to angular misalignment.
Loosen the Blade Mounting Bolts
Locate the blade mounting assembly at the rear of the cutter. Use a hex key to slightly loosen the four mounting bolts on the pivot block. Do not remove them; just loosen enough to allow minor repositioning.
Center the Blade by Hand
Lower the blade slowly and observe its path. It should glide smoothly with full contact along the anvil. Shift the pivot block left or right until the gap between blade and anvil is uniform. Retighten the bolts using a crisscross pattern for even pressure.
Test the Cut with Scrap Paper
Cut a 10-sheet stack of 20 lb bond paper and examine the edge. A clean, straight cut confirms proper alignment, while a jagged or stepped edge means you should repeat the adjustment.
Calibrate the Back Gauge for Accurate Measurements
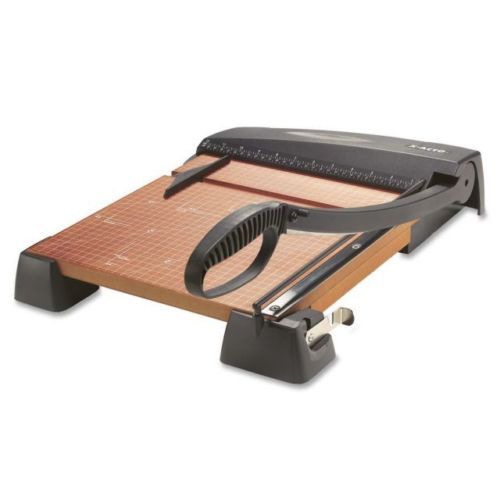
The back gauge controls cut size. Even a small drift of 1/32 inch compounds quickly across repeated cuts, so calibration matters.
Zero the Scale Indicator
Slide the back gauge to the 0-inch mark. Place a precision metal ruler against the cutting line etched into the bed. If the indicator doesn’t line up flush, the scale needs adjustment.
Adjust the Scale Mounting Screws
Find the two Phillips-head screws on the rail bracket. Loosen them slightly, then shift the scale left or right until the indicator aligns exactly with the cut line. Retighten the screws and verify the position.
Verify with Multiple Measurements
Test the gauge at 1, 6, and 12 inches by cutting sheets and measuring each result. If discrepancies exceed 1/64 inch, check the rail for warping or debris trapped beneath the gauge foot.
Align the Cutting Blade Angle
The Boston 2612 blade is set at a factory angle of 23 degrees plus or minus 1 degree for optimal shearing. If the blade was replaced or struck hard, the angle may need correction.
Measure the Angle with a Protractor
Press a digital protractor against the blade face near the center. Compare the reading to the manufacturer’s 23-degree specification.
Adjust the Blade Tilt Mechanism
On models with rear tilt screws, loosen the lock nuts and turn the adjustment screw clockwise to increase the angle or counterclockwise to decrease it. Make small changes of about 1/8 turn, then re-measure.
Recheck the Angle After Tightening
Tightening bolts can shift the blade slightly. Always re-measure once all hardware is secure to confirm the angle remains correct.
Set the Clamp Pressure Correctly

The clamp holds paper firmly without crushing it. Incorrect pressure causes slippage or damaged stock, especially with delicate photo paper.
Observe the Clamp Action
Cycle the handle and watch the clamp descend. It should press flat across the entire stack with no visible light gaps beneath the edge.
Adjust the Spring Tension Knob
Locate the spring tension knob at the top rear of the clamp arm. Turn clockwise to increase pressure and counterclockwise to reduce it.
Test with a Standard Paper Stack
Use a 20-sheet stack of 24 lb copy paper for testing. If sheets shift during the cut, increase pressure. If you see indentations or jamming, reduce pressure and retest.
Fix Common Back Gauge Drift
A calibrated gauge can lose accuracy from vibration, impact, or loose hardware. Routine checks prevent costly mistakes.
Tighten All Rail Fasteners
Run a hex wrench along the back gauge rail and secure any loose bolts. A wobbly rail produces inconsistent positioning and uneven cuts.
Clean and Lubricate the Rail System
Wipe the rail with a lint-free cloth dampened with isopropyl alcohol to remove dust and paper fibers. Apply silicone-based grease sparingly; never use oil-based lubricants that can stain paper.
Inspect the Gauge Lock Mechanism
The back gauge should lock firmly at any position. If it slips, tighten the pivot screw or replace worn rubber pads beneath the locking lever.
Adjust the Safety Guard Position
The safety guard keeps hands out of the blade zone. Poorly positioned guards can block cuts or create hidden hazards.
Align the Guard with the Blade Path
With the blade raised, confirm the guard covers the full cutting zone without interfering with handle movement.
Test the Safety Interlock (If Equipped)
Some Boston 2612 models include an interlock that prevents cutting unless the guard is in place. Block the guard and attempt a cut. If the blade still lowers, stop using the machine and contact a service technician.
Secure the Guard Mounting Brackets
Tighten the guard’s mounting screws if loose, but avoid over-tightening any plastic components.
Perform Routine Maintenance After Adjustment
Completing the adjustments is only half the job. Ongoing care keeps your Boston 2612 performing at its best.
Clean the Cutting Strip
Wipe the anvil with a dry cloth after each session. For stubborn residue, use a rubber eraser or plastic scraper. Never use metal tools that can damage the anvil surface.
Oil Pivot Points Monthly
Apply one drop of machine oil to the blade pivot shaft, handle hinge, and clamp linkage. Wipe away excess to prevent oil from staining paper.
Replace Worn Parts Promptly
Watch for blade chips, anvil dents deeper than 0.5 mm, and a cracked or warped back gauge. OEM replacement parts ensure the best fit and performance.
Frequently Asked Questions About the Boston 2612 Paper Cutter
How often should I adjust a Boston 2612 paper cutter?
Perform a full adjustment check monthly or after heavy use. High-volume environments may need more frequent calibration to maintain accuracy.
What causes uneven cuts on a Boston 2612?
Uneven cuts usually come from blade misalignment, anvil wear, or incorrect clamp pressure. Start by inspecting the blade and anvil for drag marks.
Can I use oil-based lubricants on the back gauge rail?
No. Use only silicone-based grease on the rail. Oil-based products attract dust and can stain or damage paper during cutting.
What is the factory blade angle for a Boston 2612?
The factory angle is 23 degrees plus or minus 1 degree. Measure with a digital protractor and adjust using the rear tilt screws if needed.
When should I replace the blade on a Boston 2612?
Replace the blade when you notice chips, dullness, or persistent fraying on cut edges. A worn blade forces extra pressure and reduces cut quality.
Final Thoughts on Adjusting Your Boston 2612 Paper Cutter
Mastering how to adjust a Boston 2612 paper cutter comes down to three priorities: blade alignment, back gauge calibration, and clamp pressure. Address these first whenever cut quality slips, and you’ll solve most performance issues.
Make a habit of inspecting the cutter monthly, cleaning the rail weekly, and oiling pivot points on schedule. With consistent care, your 36-inch guillotine will keep delivering clean, professional cuts for years to come.