

Is your paper cutter leaving crooked edges, tearing sheets, or producing inconsistent sizes? A misaligned paper cutter can derail print jobs, ruin photos, and waste valuable stock. Knowing how to adjust a paper cutter correctly saves you time, money, and frustration. The good news: you don’t need a technician to restore factory-quality performance.
This guide covers everything from safety prep and tool requirements to diagnosing problems, leveling the base, aligning the backstop, calibrating the scale, and setting the blade gap. Whether you use a Fiskars rotary trimmer, Dahle guillotine, or Fellowes swing-arm cutter, these universal steps work across most models.
Essential Safety Steps Before Adjusting Your Paper Cutter
Sharp blades can cause serious injury. Protect yourself before reaching for any tools.
Lock the Blade Before Adjustments
Engage the blade lock or safety latch on your model. For rotary trimmers, retract the blade fully into its housing. This prevents accidental release while you work.
Wear Cut-Resistant Gloves
Even with the blade secured, gloves add a critical layer of protection. Choose gloves rated for cut resistance when handling the blade rail or testing alignment.
Clear Your Work Area
Remove paper scraps, rulers, and other clutter. A clean surface reduces slip risks and gives you room to maneuver tools during calibration.
Tools You Need to Adjust a Paper Cutter
Most adjustments require only basic items you likely already own.
Basic Tool Kit
- Steel ruler or precision straightedge (at least 12 inches)
- Allen wrench set for set screws
- Phillips and flathead screwdrivers
- Small spirit level for bench models
- Marker or tape for marking alignment points
Optional Precision Tools
- Feeler gauges to measure the blade-to-anvil gap
- Laser level for high-accuracy work
- Compressed air for clearing dust from rails
Diagnose the Problem Before You Adjust
Jumping into adjustments without a diagnosis wastes effort. Match the symptom to the cause.
Uneven or Angled Cuts
Slanted edges almost always point to a misaligned backstop (paper fence). This is the most common issue and the easiest to fix.
Ragged or Torn Paper Edges
A dull blade causes fraying, but a sharp blade that still tears signals a blade gap problem. The space between the blade and anvil may be too wide.
Inconsistent Repeat Cuts
If the same measurement produces different results, the scale or measurement guide has shifted. Loose mounting or adhesive failure is usually the culprit.
Level the Cutting Base for Accurate Results
A tilted base throws off every cut, especially on larger bench models.
Check with a Spirit Level
Place the level across the cutting bed front-to-back, then side-to-side. An off-center bubble means the unit needs adjustment.
Adjust the Feet
Most bench cutters have rubber feet that screw in and out. Turn clockwise to raise a corner, counterclockwise to lower it. Recheck after each turn.
Use Shims on Uneven Floors
If the feet can’t compensate, slip thin shims (cardboard or plastic washers) under the low side. Secure them so they don’t shift during cutting.
Align the Backstop Fence for Square Cuts

The backstop keeps paper perpendicular to the blade. If it drifts, every cut leans the same way.
Loosen the Fence Mounting Screws
Find the screws on the underside or rear of the backstop. Loosen them just enough to slide the fence—do not remove them.
Square the Fence to the Blade
- Paper flip test: Cut a sheet, flip it 180°, align the cut edge to the same mark, and cut again. If the cuts don’t match, the fence is off.
- Drafting triangle method: Press a known-square object against the fence and blade edge to check alignment visually.
Tighten Gradually and Re-Test
Hold the fence in position and tighten the screws slowly, alternating sides to prevent warping. Repeat the paper flip test until both cuts line up perfectly.
Calibrate the Measurement Scale
A drifting scale means wrong cut sizes, which can ruin framing or print layouts.
Compare the Scale to a Precision Ruler
Line up a trusted ruler with the cutter’s scale at multiple points, such as 1 inch, 6 inches, and 12 inches. Note any gaps or overlaps.
Reattach or Reposition the Scale
For adhesive-backed scales, carefully peel and reposition using the ruler as a guide. For screwed metal scales, loosen, realign, and retighten evenly.
Mark a Zero Reference Line
Once aligned, draw a thin permanent marker line at the 0 mark on both the scale and the bed. This gives you a quick visual checkpoint for future use.
Set the Correct Blade and Anvil Gap
The right gap ensures clean cuts without crushing or dragging.
Locate the Adjustment Screws
On rotary and guillotine cutters, these sit near the blade pivot or along the rail. Check your manual if they’re not obvious.
Measure with Feeler Gauges
- Paper up to 20 lb: gap around 0.002 inches (barely visible)
- Cardstock or cover stock: up to 0.005 inches maximum
Test Cuts on Scrap Paper
Cut several sheets of different weights. The blade should glide through without resistance. Dragging means the gap is too tight; crushed edges mean it’s too wide.
Align the Blade Path for Even Wear
A blade that wobbles or veers cuts poorly and wears unevenly.
Watch the Blade Motion
Lower the blade manually (with no paper loaded) and observe its travel. It should move smoothly and parallel to the cutting edge.
Inspect the Guide Rails
Look for bends, debris, or loose mounts. Wipe with a dry cloth and blow out dust with compressed air.
Adjust the Rail Set Screws
If the blade wobbles, loosen the rail alignment screws slightly. Reseat the rail using a straightedge, then retighten. Tiny shifts create big improvements.
Maintain Sharpness and Smooth Operation
A well-tuned blade still fails if it’s dull or dirty.
Clean the Blade After Each Use
Wipe with a lint-free cloth. For sticky residue, dampen the cloth with isopropyl alcohol. Never spray liquids directly onto the blade.
Replace Dull Blades Quickly
Most rotary blades last 500 to 1,000 cuts depending on paper weight. Increased effort, burrs, or resistance signal it’s time for a new blade.
Lubricate the Rail Sparingly
Some manufacturers recommend a light silicone-based lubricant on the rail every few months. Avoid oil-based products, which attract dust and gum up the mechanism.
Prevent Future Misalignment
Routine habits keep your cutter accurate for years.
Lower the Blade Smoothly
Slamming the blade creates shock that loosens screws and warps rails. A controlled motion protects every component.
Store Rotary Blades Retracted
Pull the blade into the housing after each use. This protects the edge and reduces accidental contact.
Run Monthly Maintenance Checks
Set a recurring reminder to verify backstop alignment, inspect blade sharpness, clean the base and rail, and confirm scale accuracy.
Troubleshoot Common Paper Cutter Problems
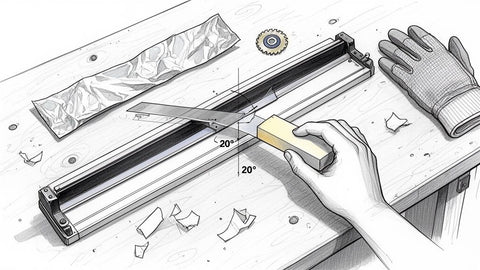
Quick fixes for issues that pop up mid-project.
Paper Slips During the Cut
Cause: Worn or dirty grip strip on the clamp bar.
Fix: Clean the strip with isopropyl alcohol or replace the rubber piece.
Blade Fails to Cut Fully on One Side
Cause: Uneven pressure or rail misalignment.
Fix: Re-level the base and tighten rail screws on the weak side.
Scale Drifts Over Time
Cause: Weak adhesive or temperature changes.
Fix: Re-secure the scale with strong tape like 3M VHB and recalibrate.
Frequently Asked Questions About Adjusting a Paper Cutter
How often should I adjust my paper cutter?
Check alignment every month with regular use, or immediately if you notice crooked cuts, tearing, or inconsistent sizing. Heavy daily use may require weekly checks.
Can I adjust a paper cutter without a manual?
Yes. Universal steps like leveling the base, squaring the backstop with the paper flip test, and measuring the blade gap with feeler gauges work on most models. A manual helps locate hidden screws, though.
What is the correct blade gap for different paper weights?
For standard 20 lb paper, aim for a gap of about 0.002 inches. For cardstock or cover stock, widen it slightly but never exceed 0.005 inches.
Why does my paper cutter tear instead of cutting cleanly?
Tearing usually means a dull blade or a gap that’s too wide. Replace the blade first, then measure and adjust the gap with feeler gauges.
Do rotary trimmers need the same adjustments as guillotine cutters?
The core principles are identical: level the base, square the backstop, calibrate the scale, and set the blade gap. Rotary trimmers typically have fewer screws but still benefit from the same diagnostic steps.
Key Takeaways for Adjusting Your Paper Cutter
A well-adjusted paper cutter delivers crisp, square cuts and lasts for years. Start with safety: lock the blade, wear gloves, and clear your workspace. Diagnose the symptom before touching any screws, then level the base, align the backstop, calibrate the scale, and set the blade gap with feeler gauges. Finish with regular cleaning, smooth blade operation, and monthly alignment checks to prevent drift.
Grab your steel ruler, screwdrivers, and a stack of scrap paper, and run through these adjustments today. Your next project deserves clean, precise cuts from a cutter that performs like new.





