
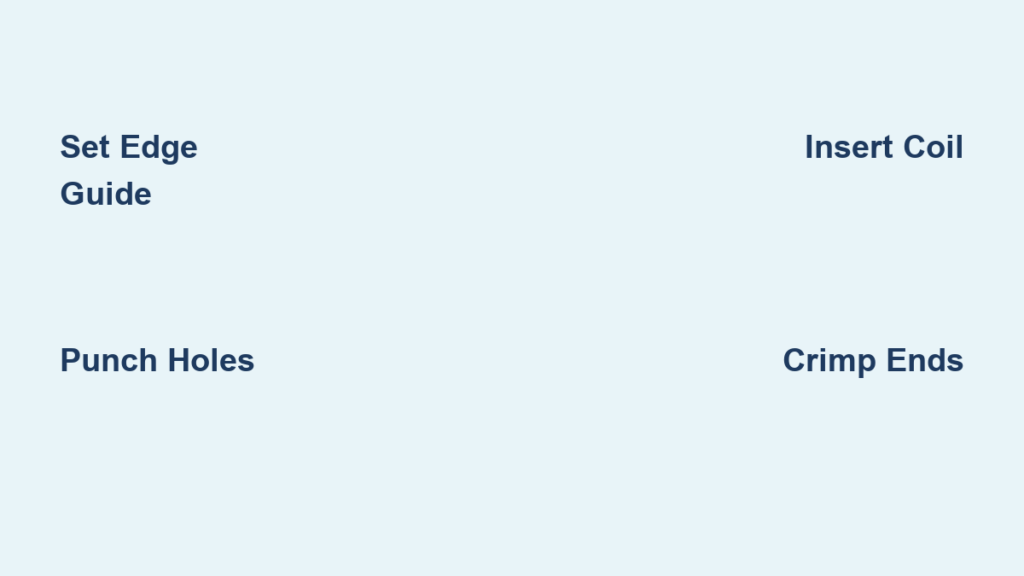
Binding documents like reports, presentations, or manuals doesn’t have to be a chore. With a spiral binding machine, you can create professional-looking, durable booklets in minutes, right from your home or office. Whether you are preparing a project proposal, a recipe collection, or a student portfolio, spiral binding offers flexibility and a polished finish. But if you have never used one before, the machine might seem intimidating. The good news? It is simpler than it looks. This step-by-step guide walks you through how to use a spiral binding machine safely and effectively, from punching holes to crimping the coil. No prior experience needed, just follow along and you will be binding like a pro in no time.
Set Up the Spiral Binding Machine Safely
Before touching paper or coils, ensure your machine is ready for use. Safety and stability are key to consistent results and avoiding damage to the device.
Choose a Stable Surface
Always place the spiral binding machine on a flat, sturdy surface. An unstable table can shift during punching, causing misaligned holes or even injury. Make sure there is enough space around the machine for paper handling and waste removal.
Inspect Power and Components
Plug in the machine only when you are ready to bind. Confirm the power cord is undamaged and the outlet is accessible. Check the punch mechanism, edge guide, and limit block for any visible wear or obstruction.
Prepare Your Workspace
Keep your workspace clean and organized. Have your paper, spiral coils, crimper, and waste bin within reach. You will generate paper scraps during punching, so emptying the waste tray after each use prevents jams and maintains performance.
Adjust the Edge Guide and Paper Stop
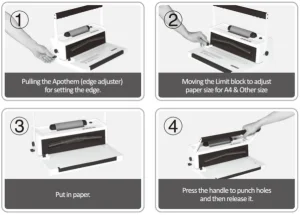
Proper alignment ensures clean, consistent hole punching. The edge guide (apothem) and limit block help position your document correctly before you start.
Set the Apothem for Edge Spacing
The apothem controls how far the holes sit from the paper edge. Pull or push it to match your desired margin. Lock it in place once adjusted so it does not shift during use.
Reposition the Limit Block
If your paper size differs from the current setup, such as switching from letter to legal, loosen the limit block, slide it to match your paper length, then re-tighten. This step ensures your paper is flush against the guide for straight punching.
Punch the Paper
Now that everything is aligned, it is time to punch the holes that will hold the spiral coil. This step sets the foundation for a clean, professional finish.
Load the Paper Correctly
Insert your stack of papers into the machine, sliding them firmly until they hit the limit block. Keep the edges aligned to avoid crooked holes. Never exceed 20 sheets at a time, as overloading can damage the punch mechanism.
Execute the Punch
Press the handle down firmly and evenly. You should hear a crisp punching sound. Release the handle and remove the paper. Check that all holes are clean and fully punched. If any are incomplete, realign the paper and try again with a smaller stack.
Pro Tip: For thicker stacks, punch in batches of 20 sheets, then align and bind the entire document at once.
Select the Right Spiral Coil
Choosing the correct coil size ensures your document lies flat and turns smoothly. The wrong size can make pages tear or the coil spin loose.
Match Coil Size to Document Thickness
Coils are measured in inches and come in various diameters. Refer to your machine’s coil size chart to match the coil to the number of pages you are binding.
Choose the Right Color and Finish
Coils come in multiple colors and finishes. Pick one that complements your document’s design. For professional reports, neutral colors like black or white are standard.
Insert the Spiral Coil
With holes punched and coil selected, it is time to load the document. Take your time here to avoid bending the coil or tearing the paper.
Twist the Coil into the First Hole
Start at the bottom of the document. Twist the end of the coil into the first hole to anchor it. Then, continue threading the coil upward through each hole manually.
Visual Cue: The coil should sit snugly in each hole without forcing. If resistance is high, check for misaligned holes or a bent coil.
Align with the Binding Head
Once fully threaded, place the document into the machine’s binding head. Line up the coil with the barrel at the top. Hold the document steady near the barrel to prevent shifting during binding.
Activate the Binding Process
The machine will automatically twist the coil to secure it through all pages. Stay focused during this step to catch any issues early.
Start the Binding Cycle
Press and hold the binding button. The machine will rotate the coil, tightening it through the document. Watch as the coil advances smoothly and stop when the entire length is bound.
Troubleshooting Tip: If the binding goes too far and one side is not bound, either rotate the coil back by hand or flip the document over and repeat from the new orientation.
Trim and Crimp the Coil

A clean finish prevents the coil from snagging and keeps your document secure. Skipping this step can lead to unraveled coils and damaged pages.
Cut Excess Coil
Use the crimper’s cutting side, which is the side without the red dot. Insert the excess coil and squeeze to trim. Leave a small tip of coil past the last hole for crimping.
Crimp the Ends
Insert the tip of the coil into the red dot side of the crimper. Squeeze firmly to bend the end. It should be bent enough that it prevents the binding from spinning off.
Expert Note: Over-crimping can break the coil. Under-crimping will not hold. Bend just enough to create a secure lip.
Handle Common Issues
Even with care, problems can arise. Here is how to fix them fast and get back to binding.
Misaligned Holes
If holes do not line up, check that the paper was flush against the limit block. Re-punch with a smaller stack. Also, ensure the apothem has not shifted during use.
Coil Will Not Thread
Bent coils or incomplete punches are the usual culprits. Straighten the coil gently or re-punch the document. Use a toothpick to clear any paper debris from holes.
Binding Stops Mid-Cycle
Ensure the machine is not overheating. Allow it to cool if used continuously. Also, verify the coil is properly aligned with the barrel before restarting.
Maintain Your Machine
Regular care extends the life of your spiral binding machine and keeps results professional. A few minutes of upkeep saves costly repairs later.
Clean After Every Use
Remove paper scraps from the punch tray and wipe the surface with a dry cloth. Jammed debris can cause misfires or damage over time.
Store Coils and Tools Properly
Keep coils in a dry place and the crimper in an accessible spot. Organize by size and color for quick selection during your next project.
Best Practices for Professional Results
Follow these tips to elevate your binding game and produce documents that look store-bought.
Use High-Quality Paper
Thicker paper gives a premium feel but may require smaller stacks per punch. Always test a sample first to avoid jams.
Pre-Align Your Pages
Tap your stack on a flat surface to square the edges before punching. Crooked stacks lead to uneven binding and misaligned holes.
Bind in Batches
For multiple copies, punch all documents first, then bind them one after another. This saves time and ensures consistency across every booklet.
Frequently Asked Questions About Spiral Binding Machines
How many sheets can a spiral binding machine punch at once?
Most spiral binding machines can safely punch up to 20 sheets at a time. Exceeding this limit can damage the punch mechanism or cause misaligned holes.
What is the apothem on a spiral binding machine?
The apothem is the edge guide that adjusts the distance between the holes and the edge of the paper. Setting it correctly ensures your holes are evenly spaced and properly positioned for binding.
Can I reuse a spiral coil after removing it?
Yes, spiral coils can be reused if they are not bent or damaged during removal. Simply uncoil them from the document and reinsert them into your next project.
Why is one side of my binding not fully bound?
This usually happens when the coil advances too far during binding. Rotate the coil back by hand or flip the document and repeat the binding step from the opposite orientation.
What is the red dot on the crimper for?
The red dot side of the crimper is used to bend and crimp the ends of the coil. The other side, without the red dot, is used to cut off excess coil length.
Do spiral binding machines need lubrication?
Light maintenance helps, but most machines work well with regular cleaning. Check your machine’s manual for any specific lubrication recommendations.
Key Takeaways for Mastering a Spiral Binding Machine
Using a spiral binding machine is a simple, satisfying process once you know the steps. Start with a stable setup and proper alignment of the apothem and limit block. Punch in batches of 20 sheets or fewer to protect the machine, and always match your coil size to the document thickness. Finish strong by trimming and crimping the coil ends to prevent unraveling. With proper technique and care, your documents will look professionally produced every time. Now that you know how to use a spiral binding machine, gather your materials and bind your first document today.





