
You’ve finished your report, proposal, or presentation, but the loose pages feel unfinished. A wire binding machine turns that stack of paper into a polished document with pages that rotate a full 360 degrees. Understanding how to use a wire binding machine comes down to a reliable two-step process: punching holes and threading twin-loop wire through them. The result looks more professional than comb or spiral binding, and the pages lie completely flat when open. This guide breaks down every step, from choosing the right die to closing the final crimp, so you get clean, consistent results on every project.
Install the Correct Die for Your Wire Pitch
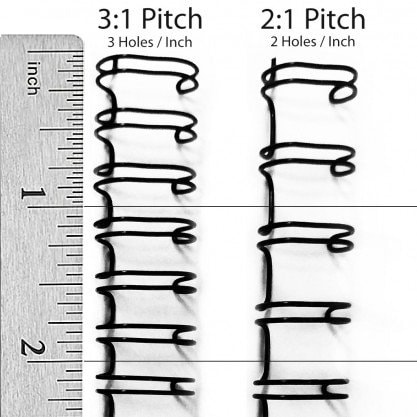
Match the Die to the Wire Pitch
Wire spines come in two pitches. A 2:1 pitch has 34 holes across an 11-inch edge, while a 3:1 pitch has 21 holes. You must use a 2:1 die with 2:1 wire and a 3:1 die with 3:1 wire. Mixing them prevents proper threading and can damage your document.
Confirm the Die Is Locked In Place
Slide the die into the machine frame and lock it down. A loose or misaligned die causes uneven holes and partial punches. Most machines have labeled slots or color-coded indicators so you can confirm the current pitch setting at a glance.
Adjust the Machine for Your Paper Size
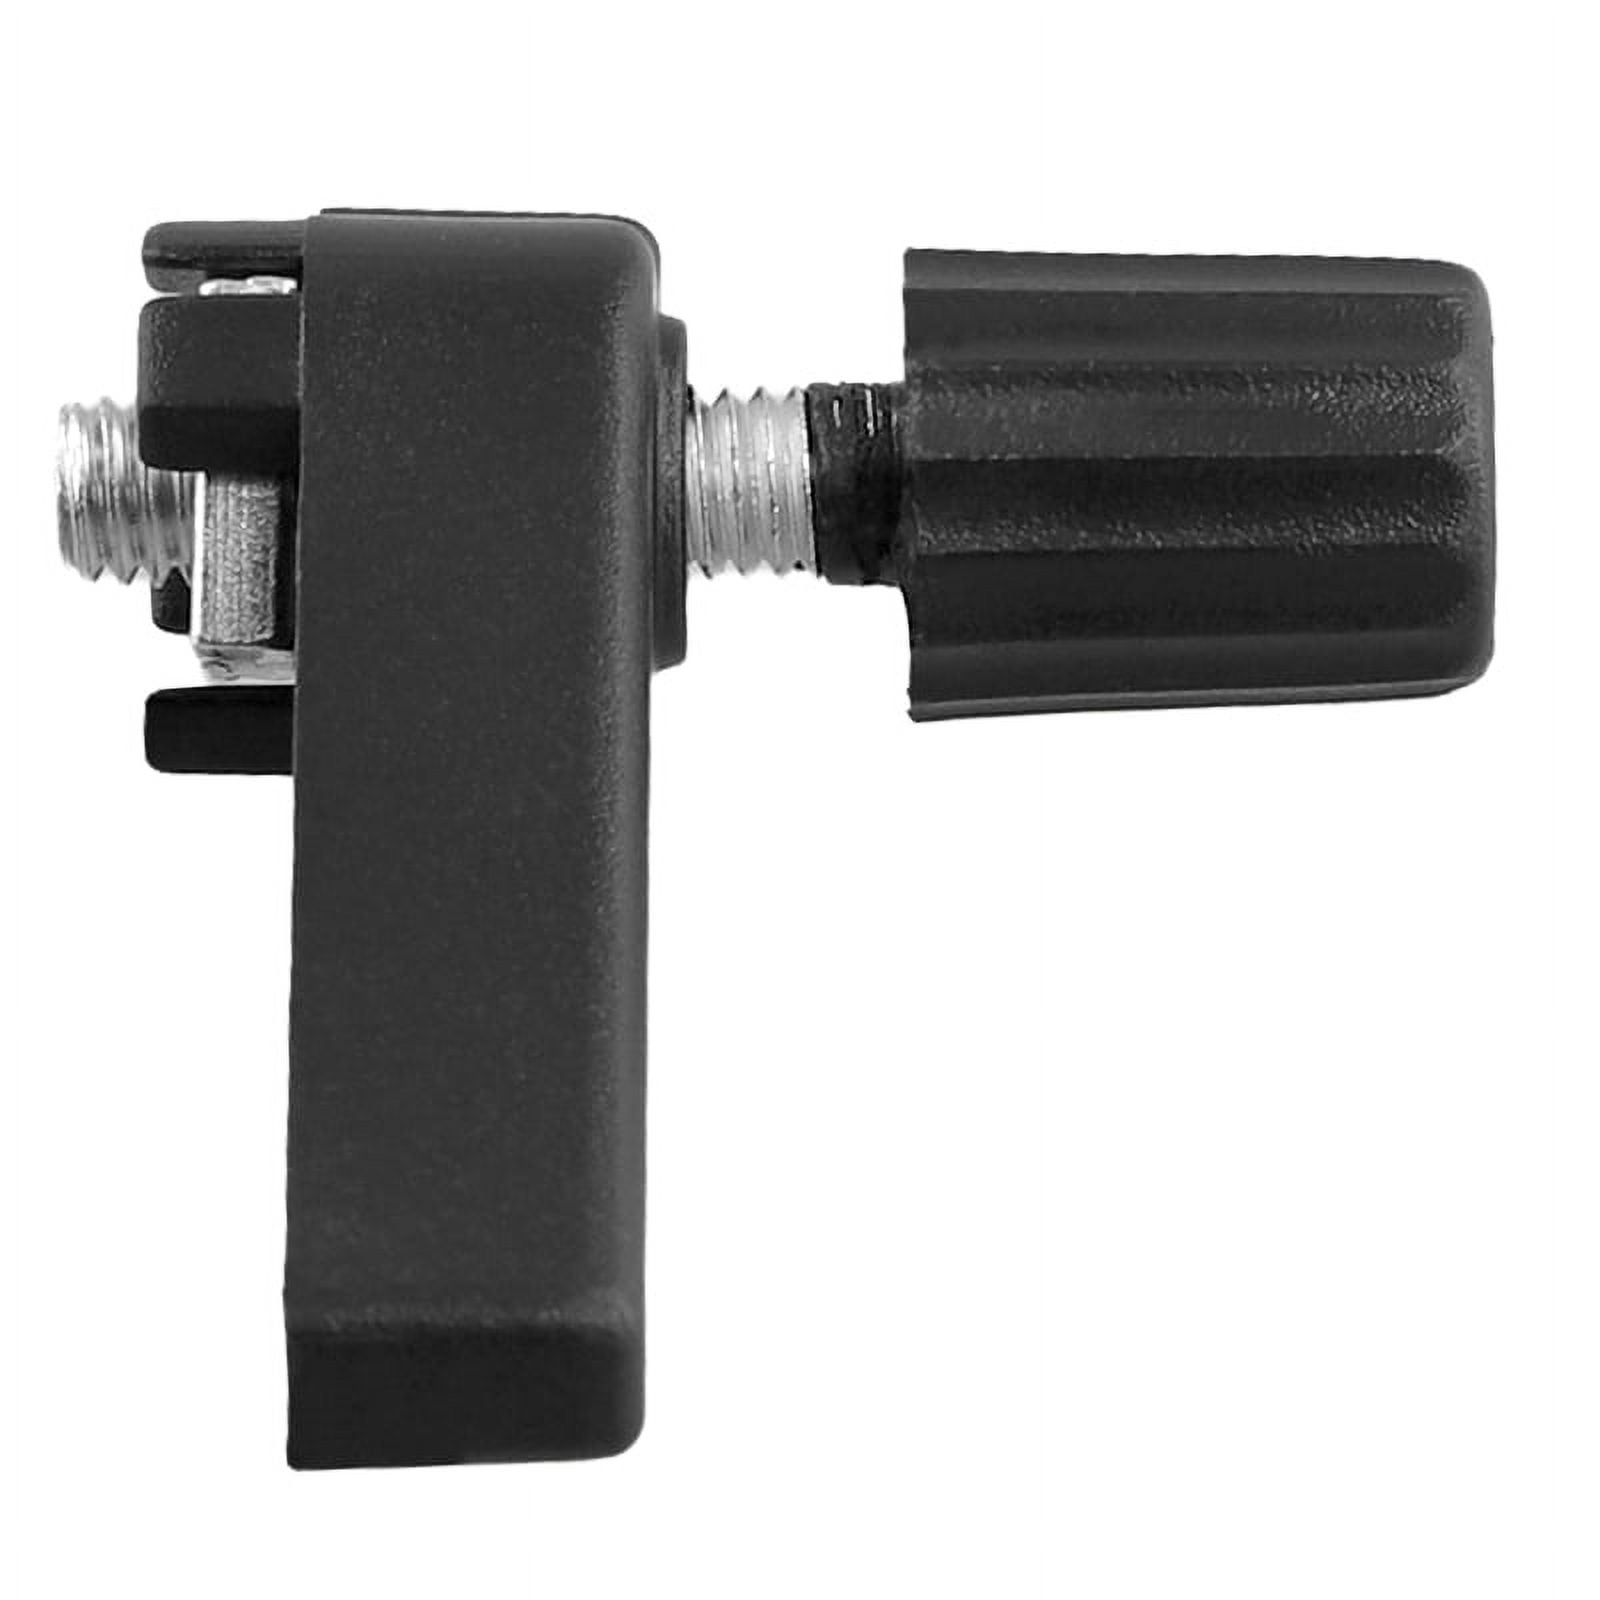
Activate the Right Punch Pins
Set the disengageable pins to match your paper width. For 8.5 x 11-inch documents, leave all pins active. For half-size or custom sheets, slide the unused pins to the off position. This prevents partial holes at the paper edges and keeps your holes clean.
Set the Margin Depth Guide
Position the paper depth guide to control how far the holes sit from the paper edge. The standard margin is 1/4 inch. Use a closer margin for thin wires and a deeper margin for thicker wires. Lock the guide once you’ve set it.
Pro Tip: Punch a few test sheets, fold them in half, and check whether the holes align. If they don’t, adjust the guide until your top and bottom margins are even.
Punch Pages in Proper Stacks
Organize the Stack First
Arrange all pages in their final order. Place the front cover on top and the back cover on the bottom. A tight, aligned stack is critical for uniform hole placement.
Respect the Machine’s Capacity
Most desktop wire binding machines handle 15 to 25 sheets of 20 lb paper per punch. For cover stock or cardstock, cut the stack size in half because thicker material puts more strain on the punch. Overloading leads to ragged holes and premature blade wear.
Punch Interior Pages and Covers Separately
Punch the interior pages in manageable batches first. Then punch the covers on their own to guarantee clean, full holes through the thicker material. After each batch, inspect the holes. You want complete, round holes with smooth edges.
Select the Right Wire Spine
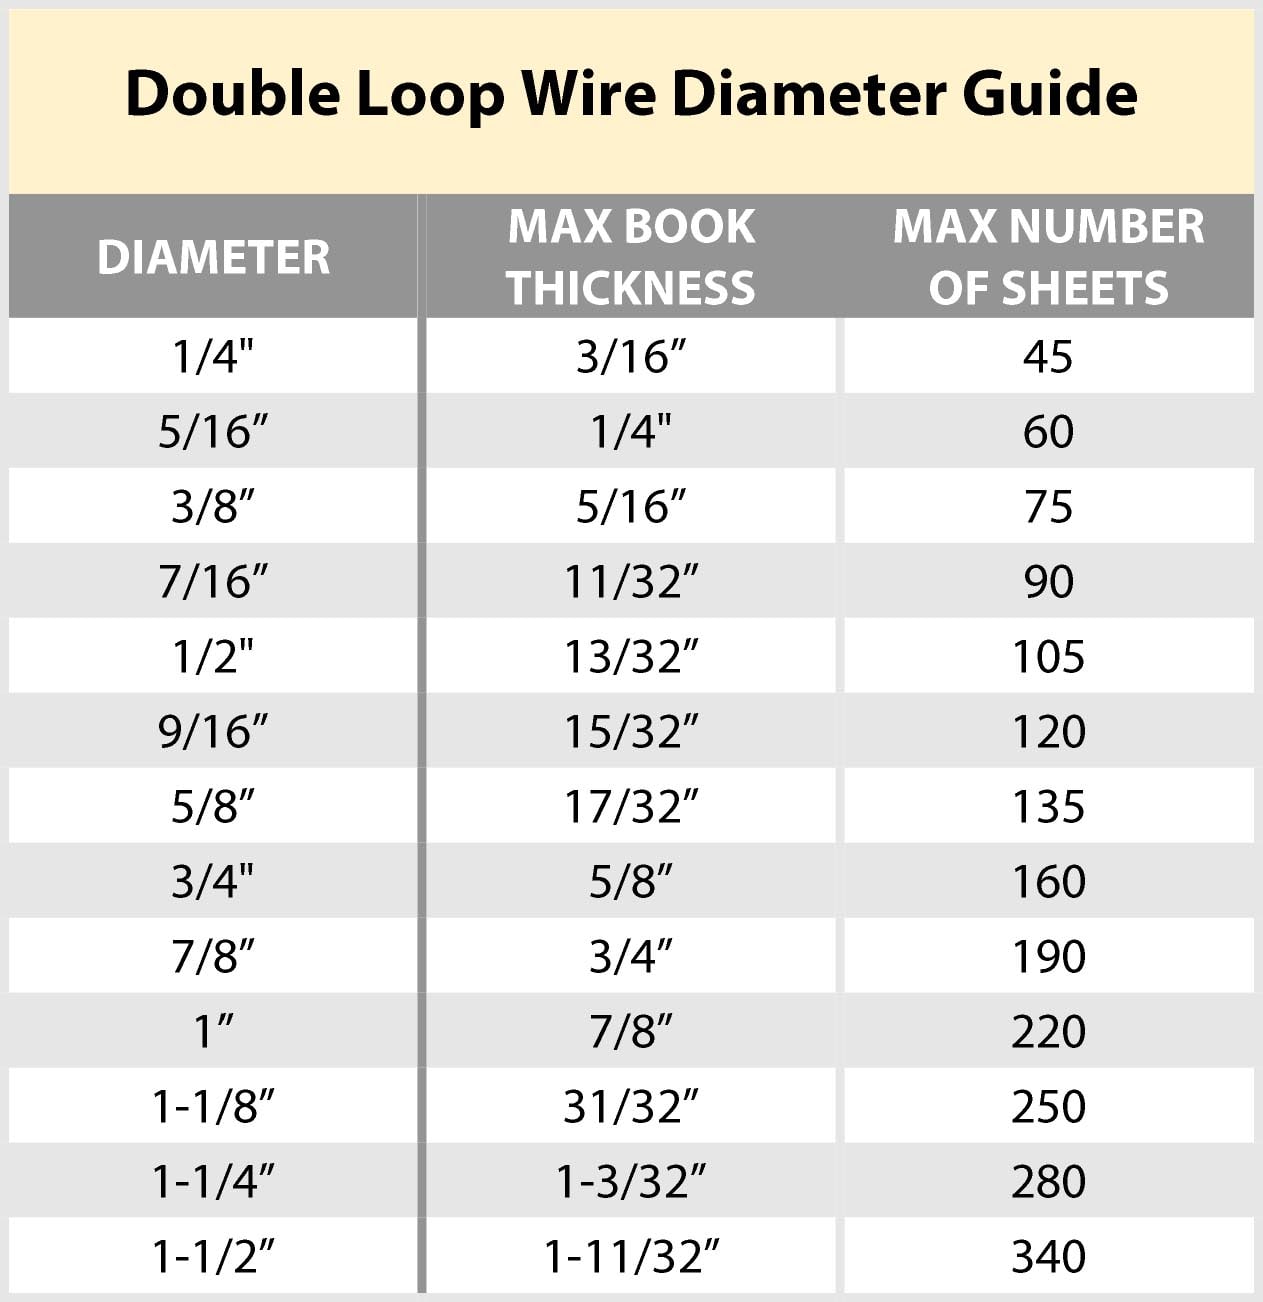
Measure the Compressed Stack
After punching, stack all pages including the covers and press the binding edge flat with your fingers. Measure the thickness so you can pick the correct wire diameter.
Choose the Closest Wire Size
Match the wire diameter to your measured thickness. When you fall between two standard sizes, choose the smaller wire. A slightly tight bind is always better than a loose one that lets pages rattle.
| Wire Diameter | Page Capacity (20 lb) | Best For |
|---|---|---|
| 3/16″ | Up to 20 | Programs, thin booklets |
| 1/4″ | 20–40 | Reports, manuals |
| 5/16″ | 40–65 | Thicker reports |
| 3/8″ | 65–85 | Binders, catalogs |
| 1/2″ | 85–120 | Heavy manuals |
| 9/16″–5/8″ | 120–175 | Large presentations |
| 3/4″–1″ | 175–250 | Yearbooks, thick portfolios |
Avoid oversized wire. It causes pages to rattle and bows the document outward.
Thread the Wire Spine Through the Holes
Open the Wire and Align the Document
Gently spread the twin-loop wire so the loops are visible. Hold the punched stack square with all edges flush and pages aligned.
Insert Loops from Front to Back
Start at one end of the document and thread each loop through its corresponding hole, working steadily to the other end. Make sure no loops skip holes or double-thread through the same hole. If you hit resistance, stop and check for misaligned pages or a partial punch.
Use the Built-In Wire Hanger
Many machines include a wire hanger on the front. Place the wire in the holder with the teeth facing up, then position the punched document over the wire and drop it into place.
Close the Wire with Even Pressure
Prepare the Crimper
Set the crimping mechanism to match your wire diameter. Some machines require manual gauge selection, while others adjust automatically. Position the document so the thinner side of the wire loops faces up during closing.
Load and Crimp the Document
Place the wire-threaded document into the closing guide. Keep the pages square and flat. Lower the crimper handle smoothly and fully. The machine will compress the loops from round to oval, locking them shut.
Never add covers after crimping. Standard wire cannot be reopened without damage. Only ProClick-style wire allows snap-open functionality.
Inspect the Finished Bind
Check Loop Closure
Look at the spine from the side. Every loop should be evenly crimped, with no visibly open or over-crimped sections. Uneven closure points to misalignment or a calibration issue.
Test the Page Rotation
Open the document fully. Pages should rotate 360 degrees smoothly without catching. Fan through each page to confirm it moves freely within the wire loops. The front and back covers should align perfectly with the interior pages.
Maintain Your Machine for Long-Term Performance
Empty the Chad Tray Often
Clear paper chad every 50 to 100 punch strokes. A full tray causes jams and reduces punch efficiency.
Clean the Die and Oil the Pins
Use compressed air to blow out paper dust from the die channel after each session. Once a month, apply one drop of light machine oil to each punch pin shaft to keep the action smooth.
Calibrate the Crimper
If your wires consistently close too loose or too tight, recalibrate the crimping mechanism according to your machine’s manual. Proper calibration keeps your results consistent across all wire sizes.
Troubleshoot Common Binding Problems
Wire Won’t Close Evenly
The pages are likely not sitting square in the crimper. Realign the stack and re-close. Also confirm the crimping die is calibrated for your wire size.
Wire Loop Snaps During Crimping
The wire is too small for your document thickness, so the loop is under too much tension. Remove the damaged wire and replace it with the next larger diameter.
Loops Misalign in the Holes
The document shifted during threading. Remove the wire, re-stack the pages, and re-thread carefully.
Document Curves or Bows Outward
The wire spine is too large for your page count. Swap it for a smaller wire that matches your compressed thickness.
Frequently Asked Questions About Wire Binding Machines
Can I Add Pages to a Wire-Bound Document After Closing?
Standard wire binding is permanent. The closed loops cannot be reopened without damaging the wire. ProClick wire uses a snap mechanism that allows opening and re-closing, and comb binding can be reopened on any comb binding machine.
What’s the Difference Between 2:1 and 3:1 Pitch Wire?
A 2:1 pitch has larger loops spaced 1/2 inch apart and creates a more substantial, premium spine ideal for calendars. A 3:1 pitch has smaller loops spaced 1/3 inch apart and is the standard for general office reports. The pitch must always match the die in your punch machine.
Which Wire Color Should I Choose?
Black is the most versatile and professional color. Silver and white work well with light-colored covers. Custom colors are available for branded materials if your supplier carries them.
Can I Bind Landscape Documents?
Yes. Set up the machine to punch along the 11-inch edge and use a full-length wire spine. This is the standard format for calendars and desk pads.
How Do I Open a Wire-Bound Document?
Use a wire opening tool, which is sold separately by binding suppliers. The tool spreads the loops so you can remove or replace pages.
Key Takeaways for Mastering Wire Binding
Success with a wire binding machine comes down to three habits: match your die to your wire pitch, choose the smallest wire that fits your stack, and keep your pages square at every stage. Punch in proper batches, thread the loops carefully, and crimp with smooth, even pressure. A few minutes of regular maintenance, like emptying the chad tray and oiling the pins, will keep your machine running like new. Pick up your next project with confidence knowing you can produce clean, professional results every time.





