

Few things are more frustrating than pushing paper into your shredder and watching it lock up completely. An Insignia shredder jam is one of the most common issues owners face, especially with cross-cut models like the NS-S6CCBK2. The machine freezes, refuses to run forward or reverse, and sometimes the red indicator light won’t even turn on. What looks like a simple paper clog can actually be a motor lock, thermal shutdown, or internal damage from metal fragments that snuck in with your documents.
The good news is that most jams can be cleared safely at home in under 15 minutes. In this guide, you’ll learn how to diagnose the exact cause of your Insignia shredder jam, remove stuck paper using safe tools, reset the motor, and prevent future blockages with proper feeding and lubrication habits.
Power Off and Cool Down Before Any Clearing Attempt
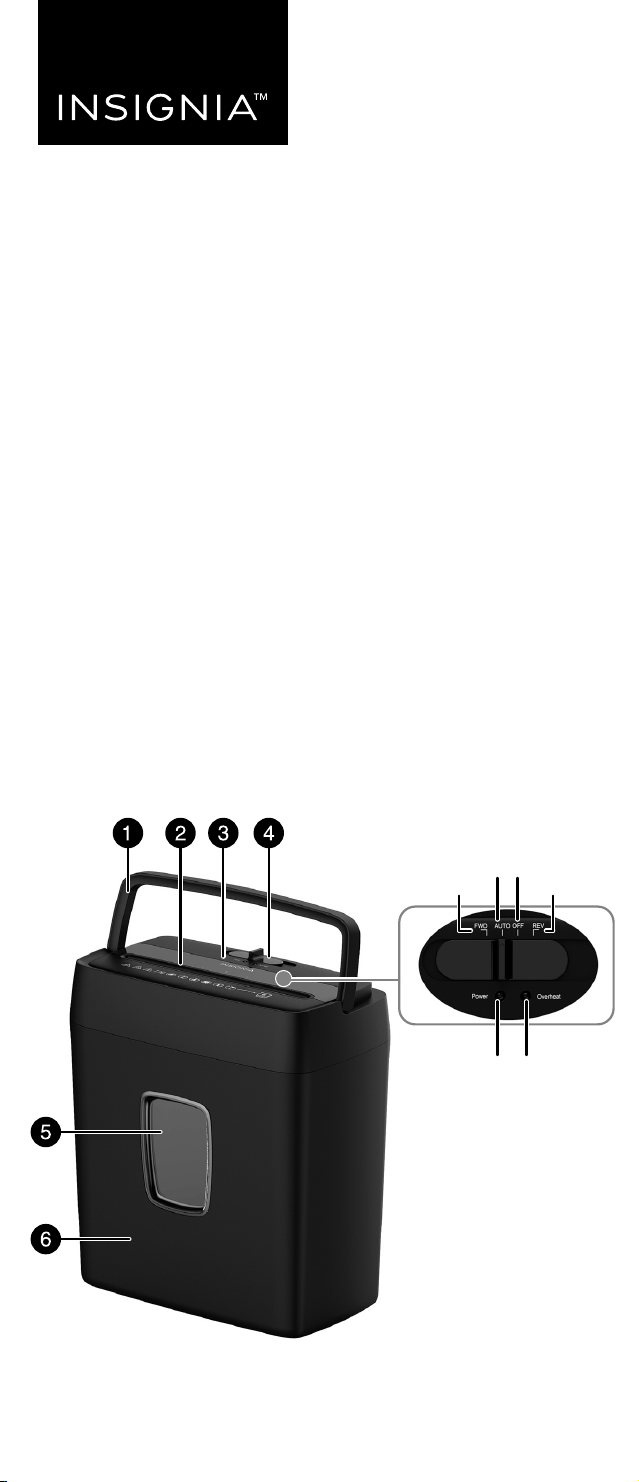
A jammed shredder can retain heat or have engaged internal safeguards that make hasty action dangerous. Taking these first steps protects both you and the motor.
Unplug the Unit Immediately
Disconnect the power cord from the wall outlet before doing anything else. Never attempt to clear a jam while the shredder is plugged in, even if it appears dead. Residual power or accidental activation can cause the blades to spin unexpectedly.
Wait at Least 10 Minutes
Allow the shredder to cool down completely. The NS-S6CCBK2 has built-in thermal protection that shuts off the motor when overheated. A 10-minute cooldown resets this safeguard and reduces the risk of motor burnout when you restart the machine.
Wear Safety Gloves
Put on cut-resistant or heavy-duty gloves before touching the cutting mechanism. The blades are extremely sharp, and even small paper fragments can leave rough edges that cut skin.
Remove the Waste Bin for Better Access

The waste bin blocks your view of the cutting chamber from below. Removing it gives you a critical second angle for spotting and extracting stuck paper.
Slide the Bin Straight Out
Grasp the bin handle and pull it forward. Empty it if it’s full, because overfilled bins create back-pressure that contributes to recurring jams.
Inspect the Chamber from Below
With the bin removed, shine a flashlight up into the cutting chamber. You may see the end of stuck paper dangling down, which tells you whether the jam is near the blades or deeper inside the unit.
Check for Metal Fragments
Scan the chamber floor for staples or paper clips. These often fall below after shredding and can cause repeated jams or permanent motor damage. Remove any metal pieces using non-conductive plastic tweezers.
Extract Stuck Paper Using Safe Tools
Using the wrong tool can scratch blades, conduct electricity, or push debris deeper. Stick to materials that won’t damage the cutting assembly.
Use Wooden Chopsticks or Plastic Rods
Insert a wooden chopstick or plastic rod into the feed slot. Gently hook the edge of the stuck paper and pull in the direction of normal shredding rotation. If you meet resistance, reposition the tool rather than forcing it.
Pull Loose Fragments with Plastic Tweezers
For paper fragments visible from the top or bottom, use plastic or nylon-coated tweezers. Grip carefully and pull straight out to avoid pushing debris further into the mechanism.
Avoid Metal Tools Near the Blades
Metal screwdrivers or tweezers can scratch and dull the cutting edges. If you must use needle-nose pliers for a large mass of jammed paper, only do so while the unit is inverted and unplugged, and never let the metal contact the blade assembly directly.
Invert the Shredder for Deep Paper Removal
When paper is lodged too far down to reach from the feed slot, flipping the unit gives you mechanical leverage and a clearer path to the blockage.
Place the Shredder Upside Down on a Soft Surface
Put a towel down first to protect the housing. Make sure the waste bin is already removed, and the feed slot faces the floor.
Pull Out Jammed Paper with Needle-Nose Pliers
With the unit unplugged, insert needle-nose pliers into the bottom opening. Grip the mass of jammed paper and pull it out in sections. This method works best when paper has bunched up directly below the blades.
Straighten Edges Before Re-feeding
If the jam was caused by torn or crumpled paper, fold the leading edge to create a clean, straight line. This helps the rollers grip evenly and prevents the same snag from happening again.
Separate the Cutting Head for Stubborn Jams
For severe jams or suspected metal contamination, detaching the cutting head from the base gives you full access to the blade assembly and feed rollers.
Lift the Cutting Head Off the Base
Wearing gloves, grip the upper cutting unit firmly and lift it straight up. On the NS-S6CCBK2, this usually requires no tools, just even, steady pressure.
Inspect the Internal Mechanism
With the head detached, examine the blades and rollers closely. Look for paper wrapped around rollers, embedded staples or plastic fragments, and dust buildup clogging the chamber.
Clear Debris Manually
Use a dry brush or compressed air to remove fine particles. For stubborn residue, wipe gently with a dry microfiber cloth. Never apply liquids or sprays inside the mechanism.
Reattach the Head Securely
Align the cutting head properly over the base and press down until it clicks into place. Confirm all connectors are seated before plugging the unit back in.
Diagnose No-Power Issues After Clearing the Jam
If your Insignia shredder jam is cleared but the unit still won’t turn on, the problem may be electrical rather than mechanical.
Test the Power Connection
Ensure the cord is fully inserted into both the shredder and the wall outlet. Moving the unit during clearing can partially dislodge the plug.
Verify the Outlet Works
Plug a lamp or phone charger into the same outlet. If that device doesn’t work either, try a different circuit.
Check for Motor Burnout
If the red light remains off and the unit makes no sound despite confirmed power, the motor may be burned out. Forced operation during a jam or shredding staples can cause permanent motor failure. In this case, replacement is usually more practical than repair.
Prevent Future Jams with Better Habits

Most jams are avoidable with a few simple adjustments to how you feed and maintain your shredder.
Oil the Blades Every 15 to 20 Minutes
Use shredder-specific oil, never WD-40. Apply a few sprays to a sheet of paper and run it through the machine. Repeat every 15 to 20 minutes of continuous use to reduce friction and heat buildup.
Feed Paper in Small Batches
Never exceed the recommended sheet limit. For the NS-S6CCBK2, stick to 6 to 8 sheets at a time. Overloading is one of the top causes of recurring jams.
Avoid Problematic Materials
Keep these items out of your shredder to prevent immediate blockages and long-term damage:
– Plastic such as report covers and credit cards, which melts and gums up blades
– Staples or paper clips that can break blades or burn out motors
– Thick cardstock or laminated paper that exceeds cutting capacity
– Adhesive labels or sticky notes that leave residue attracting paper dust
Straighten Jagged Paper Edges
Old printer paper often has frayed or torn edges that catch in the feed rollers. Fold or trim these corners before shredding to keep paper moving smoothly.
Clean the Cutting Chamber Regularly
Dust and micro-fragments accumulate inside the unit over time, increasing friction and jam risk.
Empty the Bin Frequently
Don’t wait until the bin is completely full. A packed bin can press paper back into the feed path, creating resistance that leads to jams.
Wipe the Feed Slot Weekly
Use a dry cloth to remove paper dust from the entry point. Buildup here interferes with the rollers’ initial grip on the paper.
Inspect for Buildup Monthly
Unplug the unit and check the cutting chamber for compacted paper or oily residue. Clean as needed using a soft brush or compressed air.
Know When Replacement Makes More Sense
Even with careful maintenance, some damage is irreversible. Watch for these warning signs of permanent failure:
– The motor runs but the blades don’t turn
– A burning smell appears during operation
– Jams keep happening despite proper feeding habits
– The red light stays off even with confirmed power
If you’ve shredded multiple staples or plastic items, forced the unit repeatedly while jammed, or owned the shredder for over two years with minimal maintenance, replacement may be more practical than continued repair attempts.
Frequently Asked Questions About Insignia Shredder Jams
Why does my Insignia shredder jam so often?
Frequent jams usually stem from feeding paper with jagged or torn edges, overloading the sheet capacity, or shredding prohibited materials like plastic or staples. Old printer paper with degraded edges is one of the most common culprits reported by users.
Can I use reverse mode to clear a jam?
In severe cases, the automatic reverse function fails to dislodge the jam, especially when paper is compacted tightly around the blades. Manual extraction with wooden tools or pliers is often necessary.
Is it safe to use metal tweezers inside the shredder?
Metal tweezers and screwdrivers can scratch or dull the blades and pose an electrical risk. Use wooden chopsticks or plastic tweezers for blade-adjacent work, and reserve metal needle-nose pliers only for inverted extraction when the unit is unplugged.
How long should I wait before restarting after a jam?
Wait a minimum of 10 minutes after a jam before powering the shredder back on. This cooldown period resets the thermal safeguard and prevents motor burnout during restart.
What oil should I use on my Insignia shredder?
Use dedicated shredder oil, not WD-40 or generic lubricants. Apply a few sprays to a sheet of paper and run it through every 15 to 20 minutes of continuous use.
When should I replace my shredder instead of repairing it?
Consider replacement if the motor shows no response after clearing and power checks, if you smell burning during operation, or if the unit has been forced repeatedly while jammed. Insignia shredders are budget-friendly, so repair costs often exceed replacement value once the motor fails.
Key Takeaways for Resolving an Insignia Shredder Jam
An Insignia shredder jam is almost always fixable at home if you follow the right sequence. Start by unplugging the unit and waiting 10 minutes for the thermal safeguard to reset. Remove the waste bin for a clear view of the cutting chamber, then extract stuck paper using wooden chopsticks or plastic tweezers. For deeper jams, invert the unit and use needle-nose pliers, or separate the cutting head for full access to the blade assembly.
If the shredder still won’t power on after clearing, test the outlet and cord before assuming motor burnout. Going forward, oil the blades every 15 to 20 minutes, feed paper in small batches, and avoid staples, plastic, and torn edges to keep your shredder running smoothly for years.





