

You press the power button on your Infoguard shredder, expecting the familiar hum of blades, but nothing happens. No lights, no motor sound, just silence. This frustrating scenario is one of the most common issues shredder owners face, and in most cases, the fix takes less than 15 minutes without any tools or replacement parts. The phrase “Infoguard shredder won’t turn on” almost always points to preventable causes like power interruptions, safety interlocks, paper jams, or dirty sensors rather than complete hardware failure.
This guide walks you through every diagnostic step in logical order, starting with the simplest checks and progressing to deeper mechanical issues. By the end, you’ll know exactly why your Infoguard shredder won’t turn on and how to restore it to working condition.
Verify Power Source and Cord Connections
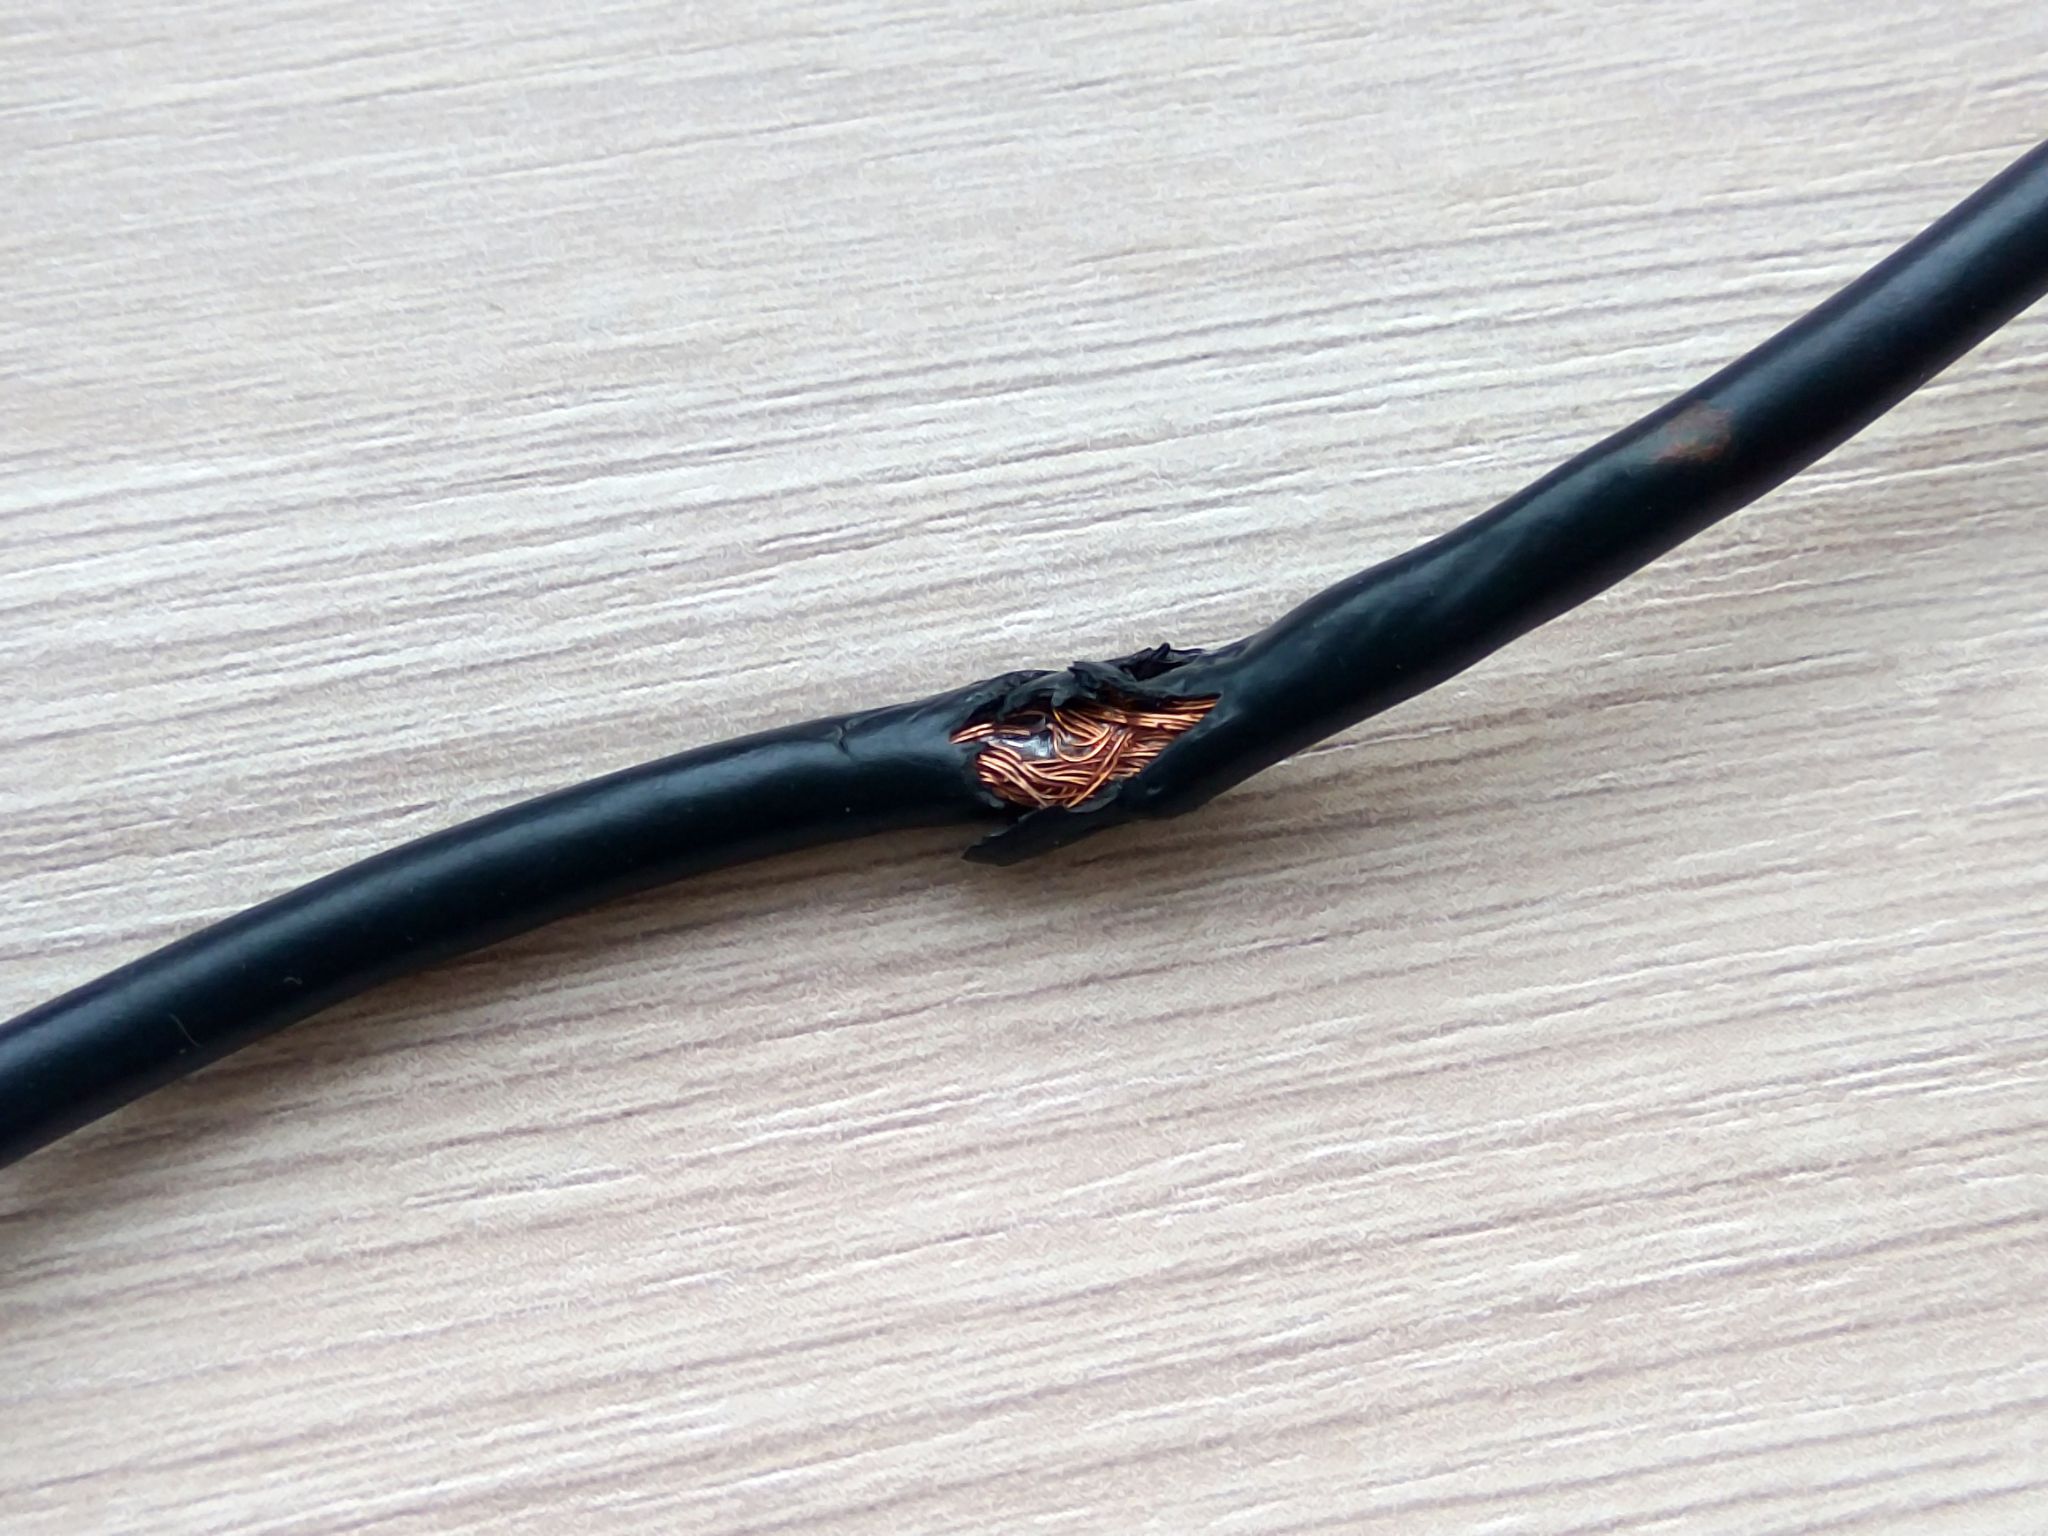
Before assuming internal failure, rule out external electrical issues first. A dead outlet or loose cord connection causes more “dead shredder” complaints than any other factor.
Test the Outlet and Circuit
Plug a lamp or phone charger into the same outlet to confirm it delivers power. If the test device doesn’t work, check your building’s circuit breaker or fuse box for a tripped switch and reset it. Avoid using extension cords or power strips with your shredder, as these can reduce voltage and interrupt operation.
Inspect the Power Cord
Examine the entire cord for frays, kinks, or exposed wires. Even minor damage can break the circuit and prevent startup. Ensure the cord is fully inserted into both the wall outlet and the shredder’s power port. A loose connection at either end often mimics a completely dead machine.
Confirm Correct Switch Positions
Verify the main power switch is flipped to “On.” Then check that the control switch sits on “Auto,” “Forward,” or “Standby” rather than “Reverse” or “Off.” For models with auto-start sensors, the unit must be in “Auto” mode to activate when paper is inserted. Leaving the switch on “Reverse” disables all forward operation.
Confirm Safety Interlocks Are Fully Engaged
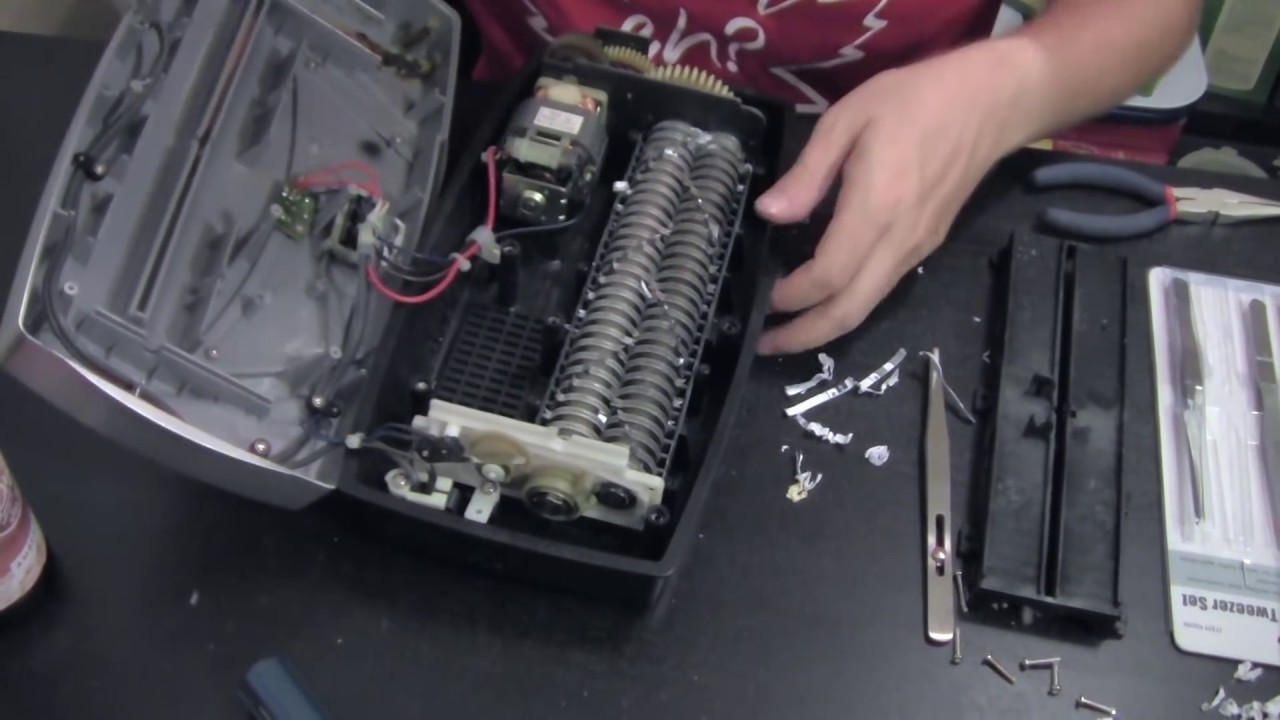
Infoguard shredders contain multiple safety features that cut power when components aren’t properly aligned. These interlocks prevent accidents but frequently trigger false lockouts.
Reseat the Head Unit onto the Basket
The motor head must sit firmly on the wastebasket. Lift it off completely and reseat it, ensuring all words and icons face forward. A raised tab on the back of the bin fits into a corresponding slot on the head unit. If this tab misses the slot, or if the head unit sits even slightly raised, the safety interlock disables power entirely.
Close the Cabinet Door Completely
If your model has a cabinet door, shut it firmly until you hear or feel it latch. Many units use a striker or embedded magnet to activate a door-open micro-switch. If the “Door Open” light stays illuminated when the door is closed, the striker may be bent or the sensor faulty. Adjust the hinges or straighten the striker to restore proper alignment.
Push the Pull-Out Basket Fully In
For models with a slide-out bin, push it all the way into the cabinet until it stops. A bracket inside acts as a safety lock, and partial extension disables the motor. Remove the bin, clear any debris from the housing, and reinsert it completely.
Avoid Excessive Tilting
Infoguard models with ShredSafe™ or tilt protection shut off automatically when tipped beyond the first preset position. Return the unit to a fully upright stance and avoid leaning on the lid during operation.
Allow Thermal Reset After Overheating
Extended shredding sessions generate significant motor heat. When internal temperatures exceed safe thresholds, thermal protection triggers a permanent shutdown until the unit cools completely.
Wait 30 to 60 Minutes for Cooldown
Switch off the shredder and unplug it immediately after it stops responding. Wait at least 30 minutes, or up to one hour for a full thermal reset. Do not attempt restarts during this period, as repeated overheating can cause permanent motor damage.
Prevent Future Overheating Episodes
Follow the manufacturer’s duty cycle by shredding for 5 to 10 minutes, then resting the machine. Avoid feeding more sheets than the rated capacity. Regular lubrication also reduces friction and heat buildup that trigger thermal shutdowns.
Clean and Unblock the Entry Sensor
If power and safety checks pass but the shredder still won’t start in “Auto” mode, the feed entry sensor is likely blocked or contaminated.
Locate the Center Activation Sensor
The paper-detection sensor sits in the middle of the feed slot. It triggers the motor when paper enters. Dust, oil residue, or small paper fragments can blind the sensor and prevent activation.
Clean the Sensor Safely
Unplug the shredder before cleaning. Use a dry cotton swab or lint-free microfiber cloth to gently wipe the sensor surface. For deeper access, wrap the cloth around a thin ruler and wipe up, down, and side to side. Never use canned air on this sensor, as it can push debris deeper or damage sensitive optical components.
Clear Blockages With a Rigid Card
Insert an index card, file folder, or greeting card into the center of the feed slot. Apply firm pressure to dislodge any obstruction pressing against the sensor switch. This physical clearing often resets the system and restores auto-start functionality.
Eliminate Light Interference
Don’t position the shredder directly under flickering sunlight or bright LED fixtures. Some models use optical sensors that misfire or fail to activate under strong ambient light conditions.
Clear Paper Jams Completely
Even small paper remnants can trick the shredder into permanent lockout mode. Thorough jam clearance often restores operation immediately.
Power Down and Inspect the Blades
Turn off and unplug the shredder. Open the cabinet and remove the bin. Look into the output side of the cutting blades for any stuck paper fragments.
Extract Visible Paper With Tools
Use needle-nose pliers or tweezers to pull out visible pieces. Never insert fingers near the blades, even when the unit is unplugged.
Run the Reverse and Forward Cycle
Follow these steps to mechanically clear stubborn jams:
- Set the control switch to “Reverse” for 5 seconds to back up the jam.
- Switch to “Forward” for 5 seconds.
- Repeat this cycle three times consecutively.
- Manually pull out any loosened paper through the feed entry.
Warning: Never use reverse mode when shredding credit cards or CDs, as this can damage the cutting mechanism.
Soak Severe Jams With Oil
For jams that resist mechanical clearing:
- Unplug the unit completely.
- Drizzle 2 to 3 tablespoons of regular cooking oil directly onto the jam site. Do not use spray or aerosol lubricants.
- Wait 30 minutes for the oil to soften the paper fibers.
- Return the shredder to “Auto/On” mode and forcefully insert rigid cardboard to push the softened jam through.
Check the Bin Full Sensor and Liner
An overfilled bin or faulty sensor can disable the shredder even when the bin appears empty.
Empty the Bin and Check Seating
Remove all shredded material from the bin. Check underneath for stray shreds that might prevent the bin from seating fully. Reinstall the bin and press firmly until it locks into position.
Remove Plastic Liners
Plastic bags, especially opaque or solid-colored ones, can block optical bin-full sensors. Remove any liner and test operation. If you need a liner, choose only clear bags specifically designed for shredders. Avoid white or opaque materials that interfere with sensor optics.
Test the Mechanical Flap Sensor
- Unplug the shredder and remove the bin.
- Locate the pivoting flap behind the cutting blades.
- Push the flap back and release it. It should spring forward freely and produce a slight click.
- No click indicates a broken micro-switch or faulty flap mechanism.
Compressed air is safe for cleaning the bin housing area, unlike the feed slot sensors.
Diagnose Internal Mechanical Failures

When all external troubleshooting fails, the issue likely lies inside the machine. Listen carefully during power-on attempts to identify the specific failure type.
Interpret Motor Sounds During Startup
- Complete silence: Suggests a dead motor, faulty start capacitor, or PCB failure.
- High-pitched spooling sound: Indicates stripped or worn gears, common after repeated overloading.
- Grinding or clicking: Points to broken gears, damaged bearings, or a bent drive shaft.
Inspect Auto-Feed Components
For Rexel Auto+ models, check the rubber feed rollers. If they appear shiny, cracked, or smooth, clean them with isopropyl alcohol or replace them. For Fellowes Automax models, examine the pick-up disc for wear or damage. Always center small papers directly over the rollers or disc for proper grip.
Address a Seized Cutter Head
If the cutter head won’t rotate at all, lack of lubrication or debris may have seized the mechanism. Apply shredder oil liberally across the blade width and cycle the unit in reverse and forward. If no movement occurs after oiling, professional disassembly may be required.
Prevent Future Power and Startup Failures

Consistent maintenance dramatically reduces the likelihood of your Infoguard shredder won’t turn on scenarios recurring.
Never Shred Prohibited Materials
These items cause jams and motor strain that lead to startup failures:
- Envelopes, especially windowed or glued varieties
- Adhesive materials like stickers, labels, and tape
- Laminated paper, transparencies, and film
- Cardboard, corrugated board, and fabric
- Large paper clips (remove before feeding)
- Plastic or hard items unless explicitly rated for your model
Feed Below Maximum Sheet Capacity
Even if your shredder is rated for 10 sheets, feeding 7 to 8 sheets reduces motor strain and thermal stress. Overloading trips protection circuits and prematurely wears internal gears.
Lubricate on a Consistent Schedule
Apply shredder oil across the blade width every 30 minutes of cumulative use. Run the unit in reverse and forward to distribute the oil evenly. This simple habit prevents 90% of friction-related failures.
When to Seek Professional Repair
If you’ve completed every troubleshooting step and the shredder still won’t turn on, professional service becomes necessary.
Clear Indicators for Expert Repair
- No lights or display after verifying power, cord, and switches point to PCB failure.
- “Door Open” or “Bin Full” light stays illuminated despite proper alignment and an empty bin, indicating a faulty sensor or PCB.
- Motor runs but won’t pull paper suggests gearbox or transmission failure.
- Persistent jams after oiling and clearing indicates worn bearings or a damaged cutter shaft.
Recommended Next Steps
- Under warranty: Contact Infoguard support directly for replacement or authorized repair.
- Out of warranty: Order replacement parts such as PCBs, gears, or sensors, or consult a certified repair technician.
- Within the return window: Return the unit to the retailer for a replacement.
Frequently Asked Questions About Infoguard Shredder Won’t Turn On
Why does my Infoguard shredder won’t turn on even though it’s plugged in?
A plugged-in but non-responsive shredder usually indicates a safety interlock issue, not a power failure. The most common causes are a misaligned head unit, a partially inserted bin, or an activated thermal protection switch. Reseat the head unit firmly, push the bin all the way in, and wait 30 minutes if the unit was recently used heavily.
How long does it take for an Infoguard shredder to reset after overheating?
The thermal reset requires at least 30 minutes, though waiting a full hour ensures complete cooldown. During this period, keep the unit switched off and unplugged. Attempting restarts before the thermal fuse resets can cause permanent motor damage.
Can a dirty sensor prevent my Infoguard shredder from starting?
Yes. The feed entry sensor sits in the center of the slot and triggers the motor when paper is detected. Dust, oil, or paper fragments can block this sensor and prevent auto-start operation. Clean it with a dry cotton swab and clear any obstructions with a rigid card inserted into the center of the slot.
What should I do if my Infoguard shredder won’t turn on after a paper jam?
First, power down and unplug the unit. Remove the bin and inspect the output side of the blades for stuck paper. Use needle-nose pliers to extract visible pieces, then run the reverse-forward cycle three times. For stubborn jams, apply 2 to 3 tablespoons of cooking oil and wait 30 minutes before attempting to push the softened paper through with rigid cardboard.
Is it safe to use cooking oil on my Infoguard shredder?
Regular cooking oil is safe and recommended for shredder lubrication. Apply it across the blade width and run the unit in reverse and forward to distribute it. Never use spray or aerosol lubricants, as these can damage internal components and leave harmful residues.
When should I replace my Infoguard shredder instead of repairing it?
Consider replacement if the unit requires PCB replacement, motor replacement, or complete gearbox rebuild, and the cost exceeds 50% of a new unit’s price. Also replace if the shredder is out of warranty, older than 5 years, and experiencing multiple recurring failures despite proper maintenance.
Key Takeaways for Restoring Your Infoguard Shredder
When your Infoguard shredder won’t turn on, work through the diagnostic sequence systematically: verify power first, then check safety interlocks, thermal status, sensors, jams, and bin sensors before assuming internal failure. Most startup problems resolve within minutes using basic checks like reseating the head unit, clearing paper jams, or cleaning the entry sensor.
For long-term reliability, oil your shredder every 30 minutes of use, feed below maximum capacity, and clean sensors monthly. These simple habits prevent the vast majority of “won’t turn on” complaints and keep your Infoguard running smoothly for years. If all troubleshooting steps fail, contact Infoguard support or a certified technician rather than attempting internal disassembly without proper tools and expertise.





