

If your Royal 1216X shredder suddenly stops working, you are not alone. This powerful crosscut shredder is prone to specific mechanical and electronic failures that can halt your productivity. Whether the power light is on but the motor won’t spin, the auto-feed isn’t triggering, or the unit shuts down after heavy use, most issues stem from paper jams, blocked sensors, thermal overload, or failed components on the circuit board.
This guide delivers targeted troubleshooting steps based on real-world repair data. You will learn how to quickly identify and fix everything from simple debris blockages to critical electronic failures involving the Zener diode and resistor circuits. By following these methods, you can restore full functionality to your Royal 1216X, often without needing professional repair.
Power Not Responding? Check Basics First
Before diving into internal components, rule out simple power and safety issues. Many shredders that appear dead are simply misconfigured or disconnected.
Verify Outlet and Cord Connection
Plug a lamp or phone charger into the same outlet to confirm it is live. If the outlet works, check that the Royal 1216X power cord is fully seated into both the wall and the shredder. A loose connection can mimic total failure.
Ensure Bin Is Fully Seated
The shredder has a mechanical safety switch that prevents operation if the 16-gallon bin is not locked in place.
Remove the bin completely and slide it back in firmly until you hear a distinct click. Make sure the unit sits on a level surface, as tilting can prevent switch engagement. If the bin is misaligned, the motor will not activate, even if the power light is on.
Motor Silent? Clear Hidden Jams

Even if no large paper jam is visible, tiny shreds can wedge deep in the feed path or around the blades, blocking movement and triggering safety protocols.
Inspect with Flashlight and Pliers
Tilt the shredder head or flip it carefully to view the blade area. Shine a bright flashlight into the feed slot. Use long needle-nose pliers or tweezers to pull out stuck paper fragments. Never force the blades manually, as this can damage gears.
Blow Out Dust and Debris
Paper dust accumulates over time, especially near sensors and blade shafts.
Use compressed air to blow out the feed slot and between cutting heads. Focus on the area just above the blades where the optical sensor is located. Avoid using liquids or sprays, as moisture can damage electronics.
Use Reverse Mode to Dislodge
If the motor powers but jams immediately, switch to reverse mode. Let it run for 5 to 10 seconds to back out the obstruction. Then switch back to forward and test with one sheet.
“Ready” Light Off? Clean the Optical Sensor
The Royal 1216X uses an infrared optical sensor to detect paper and activate auto-feed. If this sensor is blocked, the machine will not start, even if power is on.
Locate and Wipe the Sensor
Look inside the feed slot for a small window or lens near the top. This is the optical sensor. Gently wipe it with a dry cotton swab or soft cloth. Remove any paper dust, oil residue, or lint buildup.
Test Auto-Feed After Cleaning
After cleaning, insert a single sheet of paper. Watch for the Ready light to illuminate. If it still does not respond, the issue may be electronic.
A damaged or bent paper comb can cause constant paper drag that mimics sensor failure. Inspect the comb teeth for bends or breaks.
Overheating? Allow Cool-Down Time
The Royal 1216X has built-in thermal overload protection. After prolonged use, the motor shuts off automatically to prevent burnout.
Wait 30 to 60 Minutes
If the shredder stops after heavy use, turn it off and let it sit undisturbed for at least 30 minutes. Do not attempt to force restart. After cooling, test with a single sheet.
Prevent Future Overheating
To avoid repeat shutdowns, limit continuous use to 15 minutes max. Allow a 10-minute rest period after each session. Stick to 12 to 14 sheets per pass, not the full 16-sheet limit. Oil blades regularly to reduce friction and heat buildup.
Forward Mode Dead? Check the 2.2 Ohm Resistor
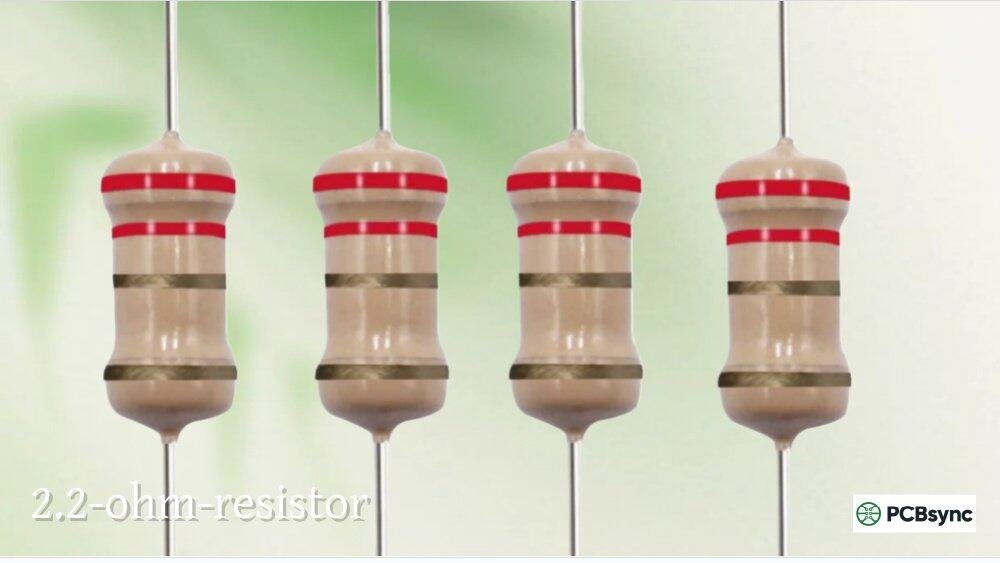
If the power light works but the motor does not respond to forward or auto commands, especially after heavy use, the culprit is often a failed ceramic resistor on the main board.
Symptom Identification
Lights function normally, but reverse mode may still work while forward and auto modes do nothing. This points to a break in the motor drive circuit.
Locate and Replace the Resistor
Open the shredder head by removing 6 screws on top. Expose the main circuit board. Find the 2.2 Ohm ceramic resistor, usually a white or tan block near the power input. In failure, it becomes an open circuit, cutting power to the motor.
Desolder the old 7W resistor and replace with a 2.2 Ohm, 10W ceramic resistor. Higher wattage improves heat tolerance and prevents repeat failure. Use a proper soldering iron and avoid shorting nearby components.
Auto-Feed Not Working? Replace the Zener Diode

When reverse works but auto-feed fails and the Ready light stays off, the problem is likely in the voltage regulation circuit, specifically the Zener diode.
Why the Zener Diode Fails
The Royal 1216X uses a transformerless power supply that relies on a Zener diode to stabilize voltage to the control board. The original part is an 18V, 0.5W Zener diode. Under load, the circuit can spike to 35V. At that voltage, the diode and its series resistor overheat, exceeding their 0.5W rating. The result is a burnt diode, dead auto-feed, and dark Ready light.
Visual Signs of Failure
Look for black or brown burn marks around the Zener diode. Check for cracked or discolored diode body. The nearby resistor will show browning or charring.
Fix the ZD1 Circuit
Disassemble the unit by removing the 6 screws securing the top lid. Carefully lift the cover to expose internal boards. Locate ZD1, a small glass diode near the power input. Find the adjacent resistor, which is often discolored.
Desolder the old Zener diode and replace with an 18V, 1W Zener diode. Observe correct polarity, as the band marks the cathode. Replace the nearby resistor with a 1W version for better heat handling. Resolder all connections securely.
Do not use a 25V Zener diode. It will not activate at 18.6V, allowing overvoltage to destroy the L7812CV regulator and other ICs.
Prevent Future Failures: Maintenance Tips
Avoid repeat breakdowns with simple, consistent care.
Oil Blades Every 300 Sheets
Use shredder-specific oil only. Never use WD-40 or household oils. Spray a light coat across the blade entry. Run the shredder in reverse for 5 seconds to distribute the oil. Lubrication reduces friction, heat, and paper dust buildup.
Feed in Small Batches
Limit to 10 to 12 sheets per pass, even though 16 is the maximum. Large batches strain the motor and increase jam risk.
Keep It Clean
Empty the bin before it is full, as overflow can misalign the safety switch. Wipe the feed slot weekly with a dry cloth. Blow out dust monthly with compressed air.
Operate on a Flat Surface
Uneven floors can tilt the unit, preventing the bin safety switch from engaging. Always ensure the shredder sits level during operation.
Diagnostic Decision Tree
Use this quick reference to match symptoms to fixes.
No power and no lights indicates a dead outlet or unplugged cord. Test the outlet and check the cord connection.
Lights on but motor silent suggests a hidden jam or 2.2 Ohm resistor failure. Clear any jam and check the resistor.
Reverse works but auto fails points to Zener diode failure. Replace with an 18V/1W diode.
Stops after 10 minutes means thermal overload. Wait 30 minutes and reduce the load next time.
Ready light off means a dirty sensor or ZD1 fault. Clean the sensor and check the Zener diode.
Grinding noise indicates a paper jam or broken comb. Run in reverse, extract paper, and inspect the comb.
Frequently Asked Questions About Royal 1216X Shredder Troubleshooting
Why does my Royal 1216X shredder stop after a few minutes of use?
This is likely thermal overload protection. The motor shuts down automatically after prolonged use to prevent burnout. Allow 30 to 60 minutes to cool down, then reduce your batch size and oil the blades regularly.
Can I replace the Zener diode with a higher voltage rating?
No. Using a 25V Zener diode instead of the 18V version will prevent the dummy load from activating at the correct threshold. This allows overvoltage to reach the L7812CV regulator, causing catastrophic failure of the regulator and downstream components.
How do I know if the 2.2 Ohm resistor has failed?
If the power light works but the motor does not respond to forward or auto commands, the resistor has likely failed. Reverse mode may still work. Open the unit and check the resistor for visible damage or test with a multimeter for continuity.
Why does reverse work but auto-feed does not work?
This indicates a Zener diode failure in the voltage regulation circuit. The reverse function works because it uses a different circuit path. Replace the Zener diode with an 18V, 1W version to restore auto-feed functionality.
How often should I oil my Royal 1216X shredder?
Oil the blades every 300 sheets of use or once per month during regular operation. Use only shredder-specific oil, never WD-40 or household oils, as these can damage internal components.
What causes the “Ready” light to stay off?
A dark Ready light usually means the optical sensor is dirty or the Zener diode has failed. Clean the sensor first with a dry cotton swab. If the light still does not illuminate, replace the Zener diode.
Key Takeaways for Fixing Your Royal 1216X Shredder

The Royal 1216X is a workhorse, but its transformerless power design has known weak points. By addressing paper jams, cleaning sensor blockages, and upgrading critical electronic components like the 2.2 Ohm resistor and ZD1 Zener diode, you can restore reliable performance and extend the machine is life by years.
Most failures are fixable with basic tools and a few dollars in replacement parts. Always use an 18V, 1W Zener diode for the repair, and upgrade the ceramic resistor to 10W for better heat tolerance. Regular maintenance, especially lubrication and batch control, will keep your shredder running smoothly and prevent avoidable breakdowns.
If you have replaced the Zener diode and resistor and the unit still will not start, consider testing the L7812CV regulator or LM324 op-amp, as voltage spikes can damage these downstream components.





