Is your paper shredder struggling to cut through a few sheets? Does it jam constantly, make grinding noises, or leave paper edges torn instead of clean? If so, your blades are likely dull—and it is time for a fix. Sharpening paper shredder blades is not just about performance. It is essential for maintaining document security, preventing motor strain, and extending your machine’s life.
Most users assume shredder blades cannot be sharpened, but the truth is, with the right method, they can be restored safely and effectively. Whether you own a basic home model or a heavy-duty office unit, regular maintenance like lubrication and controlled sharpening keeps blades slicing cleanly. In this guide, you will learn how to diagnose dull blades, apply safe sharpening techniques, avoid dangerous hacks, and know when replacement is necessary.
Diagnose Dull Blade Symptoms
Before sharpening, confirm your blades are actually dull. Many performance issues stem from lack of lubrication or misalignment, not blade wear. Accurate diagnosis prevents unnecessary maintenance and potential damage.
Check for Performance Warning Signs
If your shredder shows any of these symptoms, blade dullness may be the culprit:
- Struggles with normal paper loads. You are feeding fewer sheets than the machine is rated for, yet it jams or stalls.
- Torn or uneven shreds. Instead of clean cross-cut confetti or straight strips, paper comes out frayed or partially cut.
- Increased motor noise or vibration. A healthy shredder runs smoothly. Grinding, rattling, or shaking suggests worn or misaligned blades.
- Frequent overheating or shutdowns. Dull blades create more friction, forcing the motor to work harder and overheat.
Run a single sheet of plain paper through. If it feeds slowly or tears, your blades need attention.
Perform a Visual Inspection
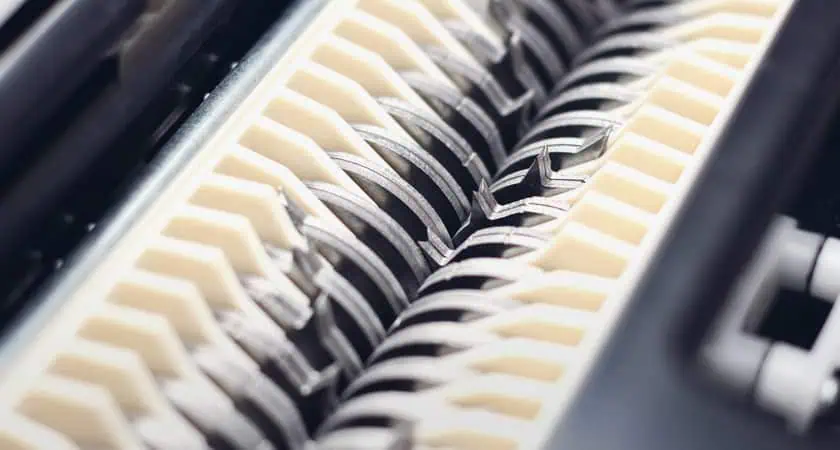
Unplug the shredder and inspect the cutting assembly. Some models allow a clear view of the blades through the feed slot. Others may require partial disassembly.
Look for these indicators:
- Rounded or chipped edges. Sharp blades have crisp, defined cutting corners.
- Rust or corrosion spots. These weaken metal and require blade replacement.
- Blue discoloration. This indicates overheating, which alters steel hardness.
- Paper dust buildup. Thick clumps suggest poor lubrication, not necessarily dullness.
Never touch blades directly. Use gloves and a flashlight for a safe inspection.
Test with the Paper and Marker Method
For a precise assessment, follow these steps:
- Feed a blank sheet. If it resists or jams, lubricate first.
- After oiling, try again. If performance does not improve, blades are likely dull.
- For advanced users: Apply a permanent marker to the blade edge if it is accessible. Run a sharpening sheet through. If the ink removes unevenly, sharpening angles are inconsistent.
Lubricate Before You Sharpen
Lubrication is the number one maintenance step, and often all your shredder needs. Most dull blade issues are actually caused by paper dust buildup and dry mechanisms. Regular oiling prevents wear and keeps blades sharp longer.
Choose the Right Shredder Oil
Use only shredder-specific oil. Common substitutes like WD-40, vegetable oil, or 3-in-1 oil will cause problems.
Approved options include:
- Liquid shredder oil from brands like Fellowes or Bonsenii
- Pre-oiled lubricant sheets with micro-abrasives
- OEM-recommended oils specified for your model
Oil Every 30 Minutes of Use
Frequency depends on usage level:
- Light home use: Oil every one to two months or when emptying the bin
- Office use: Oil after every 30 minutes of shredding
- Heavy duty use: Oil every four hours of elapsed time
Always run the shredder in reverse for 10 to 20 seconds after oiling to distribute oil across all blade teeth and internal gears.
Apply Oil Correctly: Three Methods
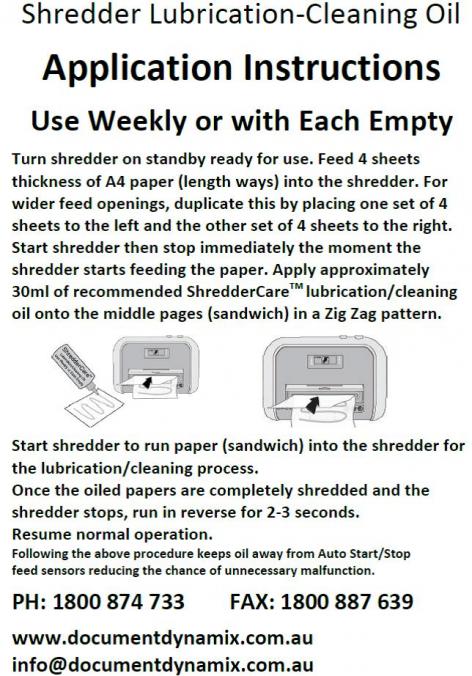
Use oiled paper for best results with liquid oil:
- Turn off and unplug the shredder.
- Draw a thin line of oil across a standard paper sheet.
- Feed it in slowly. Let the machine pull it through.
- Run two to three dry sheets afterward to absorb excess oil.
For quick touch-ups, apply oil directly:
- Apply two to three drops of oil directly into the paper feed slot.
- Plug in and run the shredder in reverse for 15 seconds.
- Follow with dry paper to prevent leaks.
Lubricant sheets offer the easiest and safest approach:
- Insert one sheet into the feed slot, arrow first.
- Let it shred completely.
- Switch to reverse for 15 seconds.
- Repeat every bin emptying for optimal results.
These sheets clean, lubricate, and lightly sharpen, making them ideal for routine care.
Safe Sharpening: Use Approved Sheets Only
When lubrication fails to restore performance, active sharpening is needed. The safest, most effective method uses sharpening and lubricant sheets, not aluminum foil.
Why Avoid Aluminum Foil
Despite old DIY advice, running aluminum foil through your shredder is risky. Foil increases resistance and can overheat motors not designed for metal. Thin foil can bend and catch, causing micro-fractures in the blades. The process creates sharp metal debris that jams mechanisms or becomes airborne. Most manufacturers explicitly prohibit metal in feed slots, which voids your warranty.
Skip the foil. Use dedicated sharpening sheets instead.
Use Micro-Abrasive Sharpening Sheets
These pre-treated paper sheets contain fine abrasives and lubricants that gently hone blade edges without risk.
How they work:
- As the sheet shreds, abrasives polish the cutting edges
- Lubricants reduce friction and clear static dust
- Safe for strip-cut, cross-cut, and micro-cut models
Step-by-step sharpening process:
- Insert one sharpening sheet into the feed slot, following arrow direction.
- Let it shred completely in forward mode.
- Switch to reverse mode for 15 to 20 seconds to coat all blade surfaces.
- For wide shredders, use two to three sheets side by side to cover full width.
- Run a dry paper sheet through to remove residue.
Sharpen every three to five bin emptyings, or when cut quality declines.
Manual Sharpening: For Heavy-Duty Units Only

Manual sharpening is not recommended for home or office cross-cut shredders due to complex blade geometry. However, industrial single-shaft or double-shaft shredders can be sharpened manually with proper tools and safety gear.
When Manual Sharpening Makes Sense
This approach is appropriate for industrial-grade machines with replaceable blades, high-volume operations where replacement is costly, and units with straight-edged or helical blades rather than micro-cut diamonds.
Cross-cut shredders have intricate, interlocking teeth that require precision grinding best left to professionals.
Gather Required Tools and Safety Gear
Tools needed include:
- Bench grinder at low speed or rotary tool
- Metal files matched to blade profile
- Sharpening stones with fine grit
- Angle guide for 20 to 30 degree bevels
- Micrometer to measure blade thickness
- Torque wrench for reassembly
Safety gear required:
- Cut-resistant gloves
- Safety goggles
- Hearing protection
- Dust mask
Always unplug and lock out power before disassembly.
Follow These Sharpening Steps
Disassemble the unit carefully:
- Remove casing screws and front plate.
- Slide out blade shafts, spacers, and blades carefully.
- Label parts to ensure correct reassembly.
Inspect blades first. Check for cracks or deep chips, which require replacement. Blue discoloration means replacement is needed because heat-damaged steel will not hold an edge. Measure thickness below specification, which also requires replacement. Surface rust calls for cleaning or replacement.
Sharpen with consistent angles:
- Clamp the blade securely in a vice.
- Maintain a 20 to 30 degree bevel, matching the original angle.
- Use smooth, even strokes with a file or grinder.
- Pause frequently to dip in water. This prevents overheating and temper loss.
Deburr and polish:
- After sharpening, a burr forms on the back edge.
- Remove it with a fine honing stone at a slight angle.
- Polish with 600 plus grit stone for a smooth, low-friction edge.
Reassemble with precision:
- Reinstall blades in correct order and orientation.
- Ensure edges face the feed direction.
- Tighten bolts to manufacturer torque specs. Overtightening warps blades.
Test safely:
- Run machine empty and listen for smooth operation.
- Feed paper and check for clean cuts with no vibration.
- If noise or jams persist, recheck alignment.
Know When to Replace Blades

Sharpening removes metal. Eventually, blades become too thin or damaged to function safely.
Replace, Do Not Sharpen: Critical Signs
Consider replacement instead of sharpening when any of these conditions exist:
- Deep cracks or chips create risk of blade shattering
- Thickness falls below manufacturer specifications, making blades too fragile
- Blue or burnt spots indicate steel has lost its hardness
- Severe rust or pitting weakens structure and contaminates paper
- Ragged cuts persist after sharpening attempts
- Persistent jams continue after proper oiling
If sharpening does not restore clean cuts, replace the blades.
Cost vs. Replacement Decision
Blade replacement costs 30 to 100 dollars for most units. Professional sharpening services run 50 to 150 dollars. New shredders range from 50 to 300 dollars or more. If sharpening costs exceed 50 percent of a new unit, replace the shredder.
Prevent Future Dullness: Best Practices
Keep your shredder sharp and reliable with daily and weekly habits.
Stick to a Maintenance Schedule
Perform these tasks at indicated intervals:
- After every 30 minutes of use: Oil with shredder-specific oil
- Every bin emptying: Run a lubricant or sharpening sheet
- Monthly: Visually inspect for dust and wear
- Annually: Perform full clean and deep lubrication
Avoid These Common Mistakes
Never use cooking oil or WD-40 in your shredder. Do not attempt to shred foil, plastic cards, or wet paper. Avoid overloading beyond the sheet capacity. Do not ignore warning noises or jams. Never skip the reverse cycle after oiling.
Optimize Your Environment
Keep humidity above 40 percent to reduce static and dust buildup. Store spare blades in a dry place to prevent rust. Use a shredder cover to minimize dust accumulation.
Label your oil bottle clearly to prevent accidental misuse with the wrong lubricant.
Troubleshoot Common Blade Issues
Even with proper care, problems arise. Use this quick-reference guide.
Uneven Cuts After Sharpening
Cause: Inconsistent sharpening angle or misaligned blades. Fix: Recheck angle with a guide and realign blades during reassembly.
Shredder Overheats After Oiling
Cause: Too much oil, overloading, or dull blades. Fix: Run dry sheets to absorb excess, reduce load, and sharpen or replace blades.
Metallic Grinding Noise
Cause: Foreign object like a staple or paperclip, or blade damage. Fix: Unplug the machine, inspect, remove debris, and check for chipped blades.
Static Clumps in Bin
Cause: Dry environment or lack of lubrication. Fix: Use lubricant sheets and increase room humidity.
Key Takeaways for Sharpening Paper Shredder Blades
Sharpening paper shredder blades does not require magic. It requires the right tools and routine maintenance. For most users, lubricant and sharpening sheets are the safest, most effective solution. Skip the aluminum foil myth, avoid household oils, and stick to manufacturer-recommended products.
Start with oiling if your shredder is struggling. If that fails, use a sharpening sheet. Only consider manual sharpening for industrial units, and always prioritize safety. With proper care, your shredder can deliver clean, secure cuts for years. Keep it lubricated, sharpen it wisely, and replace blades when needed.
Frequently Asked Questions About Sharpening Paper Shredder Blades
How often should I sharpen my paper shredder?
For maintenance, use sharpening or lubricant sheets every time you empty the bin or at minimum every 30 minutes of run time. Manual sharpening is only needed when performance drops, typically after extensive use or when visual inspection confirms edge wear.
Can I use cooking oil or WD-40?
No. These substances gum up the mechanism, attract dust, damage plastic gears, and pose fire risks. Only use oil specifically formulated for paper shredders.
Is the aluminum foil method safe?
While some older guides suggest it, most modern manufacturers and safety experts advise against it. Risks include motor damage, blade chipping, and warranty voidance. Use dedicated sharpening sheets instead.
How do I know if my blades need replacing instead of sharpening?
If blades have deep cracks, are visibly thinner than original specs, show heat discoloration called blueing, or if sharpening fails to restore clean cuts, replacement is necessary.
Can I sharpen cross-cut shredder blades manually?
Manual sharpening of cross-cut blades is extremely difficult due to their complex diamond and helix shape. Use lubricant sheets for maintenance and rely on professional services or part replacement for major dullness in cross-cut models.
What causes a shredder to overheat?
Overheating is usually caused by dull blades increasing friction, lack of lubrication, overloading the machine beyond its sheet capacity, or running the machine longer than its duty cycle allows without breaks.