
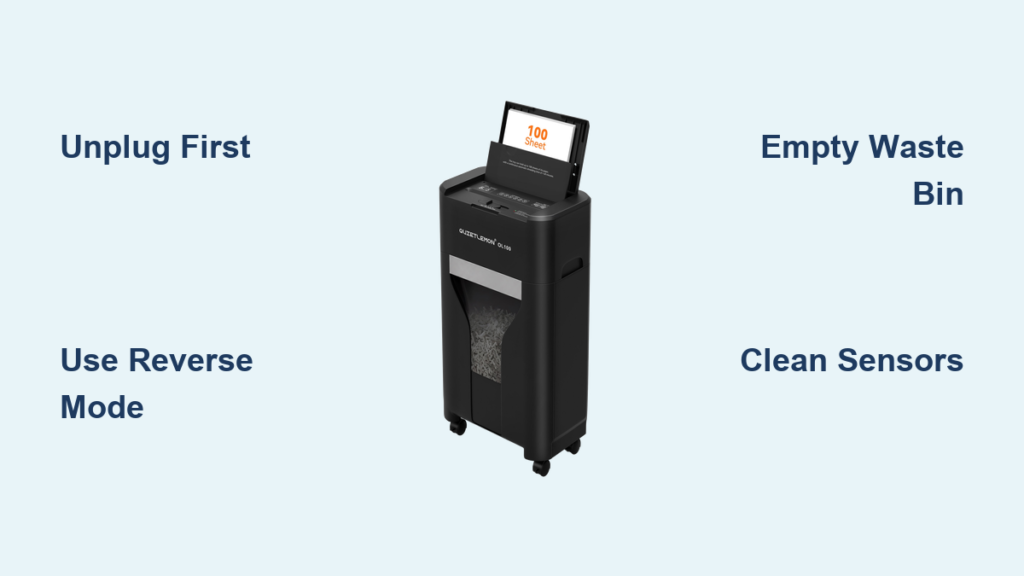
You press the power button on your Infoguard shredder, feed in a stack of old tax documents, and nothing happens. The reverse button works, but forward mode is silent. Now you have a growing pile of papers and a machine that refuses to cooperate.
A jammed Infoguard shredder is frustrating, but most jams are fixable in under 15 minutes. This guide covers how to safely clear blockages, reset the motor, clean the sensors, and prevent future jams. You will also learn when professional repair makes more sense than a DIY fix.
Power Down and Unplug Before Any Repair
Safety comes first. Always disconnect your Infoguard shredder from power before troubleshooting.
Switch off the unit and unplug it immediately when you notice a jam. Running a jammed shredder can overheat the motor, strip gears, or warp internal parts. Even if the machine appears dead, unplugging prevents accidental restarts while your hands are near the blades.
Wait at least 30 seconds after unplugging to reset the internal circuitry. If the motor was hot or stalled under load, wait 45 minutes for a full cooldown. This wait often resolves temporary lockouts caused by thermal overload.
Never insert tools or fingers into the feed slot while the unit is plugged in. Treat every jam as an electrical hazard until you confirm otherwise.
Identify the Type of Jam First
Not all Infoguard jams behave the same way. Matching your symptoms to the right fix saves time and prevents further damage.
Reverse Works but Forward Does Not
This is the most common Infoguard jam pattern. The shredder powers on, reverse mode produces a normal grinding sound, but switching to forward results in silence or clicking.
Paper is likely stuck in the forward feed path. The blades can rotate backward to push debris out, but the obstruction blocks forward rotation. A safety sensor may also detect the blockage and disable forward operation as a precaution.
No Power and No Lights
If pressing the power button does nothing, the problem may not be a jam. Check whether the power cord is fully inserted into a working outlet. Test the outlet with another device to confirm it has power. Inspect the cord for frays, kinks, or visible damage.
If the outlet works and the cord looks fine, the issue could be internal, such as a blown fuse or failed power supply.
Overheating or Motor Lock
An illuminated overheat light means the motor exceeded safe temperature limits. This usually happens after prolonged use or repeated jam attempts. Unplug the unit and wait 45 minutes before retrying.
A motor overload light (often red) indicates too many sheets were fed at once. Reduce your batch size and allow a reset period before testing again.
Empty and Reseat the Waste Bin
A full or improperly seated waste bin causes more jams than almost any other issue. The fix takes less than a minute.
Empty the Bin Completely
Turn off and unplug the shredder. Remove the bin and dump all contents. Shake it gently to dislodge clinging particles. Check for compacted paper near the bottom or sides that could block the sensor.
Look under the cutting head for residual shreds that may have escaped the bin. Wipe the chamber floor with a soft brush or cloth.
Reseat the Bin Correctly
Slide the bin back into the base until you hear a firm click. The middle indicator light should turn off when the bin is properly seated. If it stays on, adjust the bin position and try again.
Never operate the shredder without the bin securely in place. The machine is designed to shut down automatically if the bin insertion sensor detects absence or misalignment.
Use Reverse Mode to Clear the Jam
The reverse button is your first mechanical tool against jams. It rotates the blades backward to push stuck paper out through the feed slot.
Plug the shredder back in and switch it to power mode. Press and hold the Reverse button for 5 to 10 seconds. You should hear the motor engage and see jammed paper slowly emerge from the slot.
If nothing happens, wait 15 seconds and try again. Some motors need multiple reset attempts before they respond.
Alternate Forward and Reverse for Stubborn Jams
For tight blockages, use an oscillation technique. Hold Reverse for 5 seconds, release for 2 seconds, then hold Forward briefly for 1 to 2 seconds. Repeat this cycle several times.
This rocking motion shifts pressure points across the rollers and helps loosen paper that is wedged in place. Keep sessions short to avoid overheating. If the motor stalls, stop and unplug for a cooldown.
Manually Remove Stuck Paper

When reverse mode fails, you need to extract the jam by hand. Always unplug the shredder first.
Open the Cutting Chamber
Lift or detach the shredder head from the base to expose the blade assembly. On most Infoguard models, the top unit lifts straight up or slides forward without tools.
Once open, inspect both the top and bottom blade plates. Jams often extend deep between the roller teeth, so check thoroughly.
Extract Paper with Tweezers or Pliers
Use long-nosed tweezers or needle-nose pliers to grip and pull out visible paper fragments. Work slowly and pull from both ends of the jam when possible. Remove paper from above and below the rollers, since the bulk is sometimes hidden underneath.
If paper is shredded into strips and stuck, use tweezers to comb through the cut pieces and extract them one at a time.
Cut Wrapped Paper Strands
Paper can wrap tightly around rollers like thread on a spool. If pulling does not work, carefully cut the loops with a small, sharp knife or utility blade. Slide the tip between the roller and paper, then slice the strand. Avoid pressing hard so you do not scratch or nick the blades.
Never use metal tools aggressively. Forcing metal against rollers can bend shafts or misalign gears.
Use a Non-Metallic Push Tool
Some models have a rear access port near the motor housing. If yours does, insert a wooden stick or plastic pick to nudge paper forward. Avoid metal rods, which can damage internal gears.
Clean Sensors and Internal Debris

Dust and paper particles build up over time, especially around optical sensors and blade grooves. This residue can mimic a jam or prevent startup entirely.
Wipe the Beam Brake Sensors
These sensors detect paper entry. When dirty, the shredder may think no paper is present or believe a jam exists.
Locate the sensor inside the feed slot, usually a small lens or LED point. Take a dry paper towel or lint-free cloth, fold it slightly, and insert it into the slot. Gently slide it back and forth across the sensor area for 10 seconds. Remove the cloth and inspect for dust. Repeat if necessary.
Blow Out Dust with Compressed Air
Use a can of compressed air to clean blade grooves and hard-to-reach areas. Hold the can upright and spray in short bursts. Focus on the spaces between roller teeth, around the motor housing, and near gear assemblies.
Do not tilt the can. Liquid propellant can damage electronics.
Run a Cleaning Sheet Through
After debris removal, run a stiff cardstock sheet or pre-oiled cleaning strip through the shredder. While unplugged, manually push the sheet through the feed slot to scrape residual gunk from the rollers.
Then plug in and run in reverse, followed by forward, to complete the clean cycle. A piece of cereal box cardboard works well in a pinch.
Reset and Test After Clearing
Even after clearing a jam, the shredder may remain locked out until properly reset.
Perform a full electrical reset by following these steps:
- Unplug the shredder.
- Wait 30 seconds, or 30 minutes if the unit overheated.
- Plug the shredder back in.
- Press Reverse first and run for 3 to 5 seconds.
- Switch to Normal mode.
- Feed one sheet of paper slowly.
This sequence clears any residual error state and confirms both motor directions work. If the unit still will not run forward, repeat your manual inspection. Some paper may remain hidden in the mechanism.
Lubricate to Prevent Future Jams
Lack of lubrication is a leading cause of recurring jams. Dry rollers create friction, making it harder to pull paper through the cutting mechanism.
Use Proper Shredder Oil Only
Never use cooking oil, WD-40, or household lubricants. These substances attract dust, gum up blades, or degrade plastic parts over time.
Use commercial shredder oil specifically formulated for cross-cut mechanisms, such as Fellowes Powershred Oil or HSM Shredder Oil.
Apply Oil Correctly
Turn on the shredder and apply 3 to 5 generous drops of oil along the feed slot. Let the machine run in reverse for 5 to 10 seconds, then switch to forward and run for another 5 seconds. This distributes oil evenly across all cutting surfaces.
Alternatively, use pre-oiled shredder sheets and feed them like regular paper.
Oil on a Regular Schedule
Frequent users should oil every two weeks. Occasional users should oil monthly or after every jam. For heavy-duty shredding sessions, oil before and after large batches. Regular oiling reduces friction, prevents overheating, and extends motor life significantly.
Avoid Common Jam Triggers
Most jams are preventable with better feeding habits. Follow these best practices to keep your Infoguard running smoothly.
Do Not Overload the Feed
Even if your model is rated for 15 sheets, limit batches to 12. This gives the motor headroom and reduces strain. For thicker paper, reduce further to 8 to 10 sheets max.
Feed Paper Slowly
Let the auto-feed mechanism pull paper in naturally. Do not force or push sheets into the slot. Rushing causes misfeeds and jams. Wait until the previous sheet is fully consumed before adding the next.
Skip Staples and Paper Clips
Unless your Infoguard model explicitly states it shreds staples, remove them first. Metal objects dull blades, cause blockages, and lead to permanent damage over time. The same rule applies to tape, laminated paper, plastic sheets, and credit cards. When in doubt, do not shred it.
Empty the Bin Before It Overflows
Keep the bin below 80 percent capacity. A full bin restricts airflow and causes shreds to back up into the cutting chamber. Empty the bin after every major shredding session as a routine habit.
When to Seek Professional Help

If you have tried all the steps above and the shredder still will not work, internal damage may be the cause.
Signs of Mechanical Failure
Watch for these warning signs:
- Motor runs in reverse but clicks or stalls in forward
- No sound at all, even with power lights on
- Smoke or burning smell during operation
- Rollers spin unevenly or pull paper to one side
These symptoms indicate possible gear breakage, motor burnout, or circuit board failure.
Warranty and Repair Options
If the unit is under warranty, contact Infoguard support before attempting any disassembly. Opening the casing typically voids coverage.
For out-of-warranty units, consider authorized repair services or local electronics repair shops with experience in office equipment. For basic models, replacement may be more economical than repair.
Disassembly as a Last Resort
Only open the casing if you are technically skilled and the unit is out of warranty. Remove side screws, slide out the internal unit, and inspect gears, belts, and wiring. Look for broken plastic gears, disconnected wires, or misaligned rollers.
If you spot damage, replacement parts may be hard to source. Weigh the repair effort against buying a new shredder.
Frequently Asked Questions About Infoguard Shredder Jams
Why does my Infoguard shredder work in reverse but not forward?
Paper is likely stuck in the forward feed path. The blades can rotate backward to push debris out, but the obstruction blocks forward rotation. A safety sensor may also detect the blockage and disable forward operation. Start with reverse mode, then manually extract any remaining paper.
How long should I wait after an Infoguard shredder overheats?
Wait at least 45 minutes for the motor to cool fully before attempting to restart. This cooldown period resolves temporary lockouts caused by thermal overload. Forcing operation during cooldown can cause permanent motor damage.
What kind of oil should I use on my Infoguard shredder?
Use commercial shredder oil specifically designed for cross-cut mechanisms, such as Fellowes Powershred Oil or HSM Shredder Oil. Never use cooking oil, WD-40, or household lubricants, as these attract dust and can damage internal components.
Can I shred staples in my Infoguard shredder?
Only if your specific model explicitly states it handles staples. Most Infoguard cross-cut models are not rated for metal objects. Shredding staples without confirmation will dull blades and cause severe jams.
How often should I oil my Infoguard shredder?
Frequent users should oil every two weeks. Occasional users should oil monthly or after every jam. For heavy-duty shredding sessions, oil both before and after large batches to keep rollers running smoothly.
What does the motor overload light mean?
The motor overload light indicates you fed too many sheets at once, typically more than 12 to 15 sheets. Reduce your batch size, unplug the unit for a reset period, and try again with fewer sheets.
Key Takeaways for Fixing Your Jammed Infoguard Shredder
A jammed Infoguard shredder is almost always fixable without professional help. The most important steps are to unplug immediately, identify your jam type, and clear the blockage using reverse mode or manual extraction. Cleaning the sensors and lubricating the blades regularly prevents most future jams.
Start by emptying the waste bin and running reverse mode for 10 seconds. If the jam persists, manually remove paper with tweezers and clean the sensors with a dry cloth. Finish by lubricating the blades with proper shredder oil and testing with a single sheet.
Keep this guide bookmarked for the next time your shredder stalls. With proper care, your Infoguard can deliver reliable performance for years to come.





