

Need to bind a report, presentation, or workbook that lies completely flat and can be edited later? A comb binding machine handles all of that quickly and affordably. Comb binding remains one of the most popular finishing methods for offices and schools because it’s fully reusable, inexpensive, and produces professional results with minimal practice. Once you understand the process, you can produce clean, durable documents in just minutes per book.
This guide walks you through every stage of using a comb binding machine. You’ll learn how to prepare your document stack, select the right comb size, punch clean holes, and thread and close your finished bind. You’ll also find troubleshooting tips for common problems and maintenance advice to keep your machine running smoothly. By the end, you’ll be able to produce polished, flat-opening documents with confidence.
Prepare Your Document Stack Before Punching
A well-prepared stack is the foundation of a clean bind. Skipping this step leads to crooked holes and a sloppy final product.
Align and Square All Pages
Assemble your pages in their final order, with the front cover on top and the back cover on the bottom. Place the stack on a flat surface and jog it by tapping all four edges firmly against the desk. This squares every sheet and ensures your punch lines up across the entire document. Spend 10 to 15 seconds on this step; it saves time and frustration later.
Check Paper Weight and Capacity
Most comb binding machines handle standard 20 lb copy paper without issue. If you’re using heavier cardstock for covers or thicker specialty paper, confirm your machine’s maximum sheet capacity. Overloading the punch causes torn holes and unnecessary wear on the machine. For mixed paper weights, punch a few test sheets first to verify clean, consistent perforations.
Select the Correct Comb Size

Choosing the right comb diameter keeps your document secure and ensures a clean, professional appearance.
Match the Comb to Your Page Count
Use this quick reference table to pick the correct size based on 20 lb paper:
| Comb Diameter | Page Capacity | Best For |
|---|---|---|
| 3/16″ | Up to 20 pages | Thin reports, booklets |
| 1/4″ | 21–40 pages | Handouts, short manuals |
| 3/8″ | 56–80 pages | Proposals, workbooks |
| 1/2″ | 81–120 pages | Training guides |
| 3/4″ | 176–225 pages | Reference books |
| 1″ | 226–300 pages | Catalogs, large binders |
| 2″ | Up to 425 pages | Maximum thickness |
When in doubt, go one size up. A slightly oversized comb closes more easily and reduces stress on the rings. A comb that’s too small won’t snap shut properly and may pop open over time.
Choose a Color for Organization
Plastic combs come in over 16 standard colors, giving you a built-in color-coding system. Use blue for HR documents, green for finance, or any scheme that fits your workflow. Color-coding boosts organization and adds a polished, branded look to your binders.
Set Up the Binding Machine for Accurate Punching
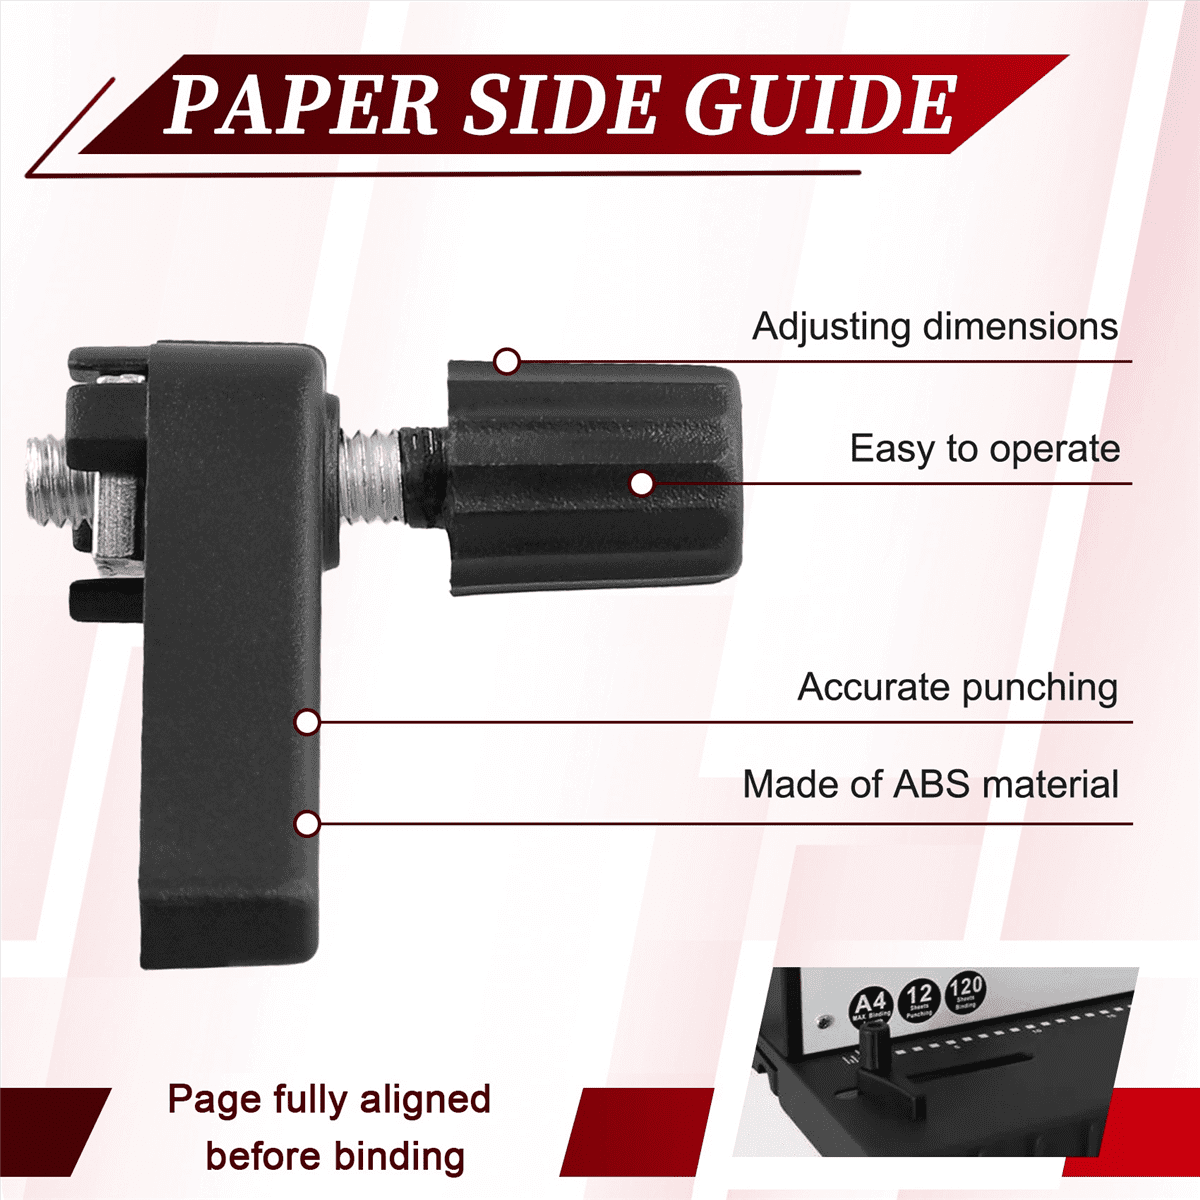
Proper setup prevents misaligned holes and ensures consistent results across every page in your document.
Adjust the Paper Stop
Set the paper stop to match your document’s binding edge. For standard 8.5″ x 11″ paper, position the stop so the punch pins hit about 3″ from the edge. Lock it firmly in place. If your machine has adjustable punch pins, disengage the outer pins when binding smaller paper sizes like A4 or legal to avoid unnecessary holes.
Clear the Chip Tray
Before starting a long binding run, empty the chip tray. Paper scraps accumulate quickly and can interfere with smooth punching. On electric models, a full tray may trigger safety sensors and stop the machine mid-cycle. A quick clear takes only seconds and prevents interruptions.
Punch the Document Pages in Consistent Batches
Accurate punching is the single most important step in producing a clean bind. One mistake here affects every page.
Work in Uniform Batch Sizes
Feed pages into the machine in consistent batches rather than mixing small and large stacks. If your machine handles 10 sheets per stroke, punch all pages in groups of 10. Uniform batches keep hole positions identical across every sheet. Exceeding the rated capacity causes ragged or torn holes that weaken the paper around the spine.
Apply Full, Firm Pressure
On manual machines, press the punch handle down in one smooth motion without hesitating. Partial strokes produce incomplete punches. On electric models, press and release the activation button fully. Listen for a clean “thud” — that’s the sound of crisp, rectangular slots being formed properly.
Pro Tip: After punching, flip through the stack to confirm every page has clean, aligned holes. Re-punch any misaligned sheets before moving forward.
Open the Plastic Comb with the Machine
Opening the comb correctly is critical. Hand-forcing it damages the rings and prevents a secure close.
Use Only the Machine’s Comb Opener
Place the comb tines-down into the opening slots on the machine. Activate the opener using the lever or button. The machine spreads the tines wide enough for easy threading. Never open the comb by hand — this over-stretches the rings and causes premature fatigue. A manually forced comb may never close tightly again.
Confirm Full Opening Before Threading
Check that every tine is fully spread before loading pages. Some machines have a visual indicator or mechanical stop to signal full opening. If any ring isn’t open, pages won’t seat properly, and the finished bind will be loose or uneven.
Thread the Pages and Close the Comb
This is where your document comes together. Take your time and work methodically.
Slide Pages Onto the Open Comb
Hold the punched stack over the open comb. Start at one end and thread each hole onto a corresponding tine, working your way to the other end. Make sure every page is fully seated with no skipped rings. Keep the stack straight as you lower it to avoid twisting.
Release and Verify a Secure Close
Once all pages are threaded, release the opener. The tines snap closed, locking the pages in place. Run your fingers along the entire spine to confirm every ring has snapped shut completely. If any tine is partially open, re-open the comb and reseat that section before closing again.
Warning: If you feel resistance while threading, stop. Misaligned holes or an improperly opened comb are the likely causes. Fix the root issue rather than forcing the pages.
Troubleshoot Common Comb Binding Problems
Even with careful preparation, issues can arise. Here’s how to fix the most frequent problems quickly.
Ragged or Torn Holes
Cause: Too many sheets punched per stroke.
Solution: Reduce your batch size and stay within the machine’s rated capacity. For heavier paper, punch fewer sheets per pass.
Comb Pops Open After Closing
Cause: Comb was opened by hand and rings are over-stretched.
Solution: Always use the machine’s opener. Replace any comb that no longer snaps closed firmly.
Misaligned Pages at the Edge
Cause: Paper stop not set correctly or pages not jogged before punching.
Solution: Re-set and lock the paper stop, then realign the stack and re-punch affected pages.
Document Won’t Lie Flat
Cause: Comb is too small for the page count.
Solution: Switch to the next size up. A cramped comb won’t allow full 360-degree opening.
Edit and Reuse Your Bound Documents
One of comb binding’s biggest advantages is full editability. You can update documents anytime without reprinting.
Add or Remove Pages
Re-open the comb using the machine’s opener, slide the document off, insert or remove pages as needed, then re-thread and close. No tools required — just the machine and a few seconds.
Reorder Content Easily
Need to move a section or update a chapter? Open the comb, reposition the pages, and close again. This makes comb binding ideal for training manuals, syllabi, and policy binders that change frequently.
Expert Note: Most combs can be opened and closed dozens of times before the tines lose enough tension to close cleanly. Avoid over-opening beyond what’s necessary to protect ring life.
Maintain Your Binding Machine for Long-Term Use

Simple, regular care keeps your machine running smoothly and extends its lifespan.
Clean the Punch Area Weekly
Remove paper dust and debris from the punch mechanism and chip tray. A small brush or compressed air works well. Buildup affects punch accuracy and can cause jams over time.
Lubricate Punch Pins Monthly
Apply a single drop of machine oil to each punch pin. This reduces friction, prevents rust, and keeps operation smooth — especially in high-use environments.
Inspect the Comb Opener Regularly
Check that the opener mechanism spreads tines evenly. If one side feels weak or sluggish, it may indicate worn parts that need service before they fail.
Frequently Asked Questions About Comb Binding Machines
How do I add pages to a finished comb-bound document?
Re-open the comb using the machine’s opener, remove the document, insert the new pages in the correct position, re-thread onto the comb, and close. This full editability is comb binding’s most important practical advantage over non-editable systems.
Can I use a comb binding machine for wire binding?
No. Standard comb machines punch rectangular slots for comb spines. Wire binding requires round holes at a different pitch, so the two systems need separate machines and are not compatible without a different punch die.
What types of documents work best with comb binding?
Training manuals, proposals, school workbooks, price lists, cookbooks, and catalogs all benefit from comb binding. Any document that needs to lie flat when open and may require updates after the initial bind is a strong candidate.
How many times can a plastic comb be opened and closed?
Most combs can be opened and closed dozens of times before the tines lose sufficient spring tension to close cleanly. Avoid over-opening the comb beyond what’s needed to thread pages — that’s the main cause of premature ring fatigue.
What is the maximum page count I can bind with a comb?
A 2-inch plastic comb holds approximately 425 sheets of 20 lb paper. For capacity details across all sizes, refer to the comb size table in the setup section above.
Key Takeaways for Successful Comb Binding
Comb binding delivers fast, affordable, and fully reusable results — perfect for dynamic office and school environments. Start with properly jogged pages and the correct comb size for your page count. Use your machine’s opener (never your hands) and punch in consistent batches that match your machine’s rated capacity. When in doubt, size up on the comb and keep your machine clean and lubricated for years of reliable use. Ready to produce your first bind? Check your supplies, power up the machine, and create a clean, professional document today.





