
If you’ve ever flipped through a perfectly bound notebook or report and wondered how it was made, the answer is likely a coil binding machine. These devices transform loose pages into durable, polished documents suitable for offices, classrooms, and home projects. Learning how to use a coil binding machine gives you full control over your finished product, from page count to coil color. This guide breaks down every stage, including setup, punching, inserting, binding, and crimping, so you can produce flawless results on your first try.
Set Up a Safe and Stable Workspace
A reliable workspace is the foundation of accurate binding. Choose a flat, sturdy table with good lighting and enough room to organize your paper stack, coils, and tools. A cluttered or wobbly surface leads to misaligned holes and wasted materials.
Follow Core Safety Rules
Protect yourself and your equipment by following a few simple precautions. Place the machine on a stable surface to prevent tipping during operation. Never force the handle down; it should move smoothly on its own. If you feel heavy resistance, stop and check for paper jams or an overloaded stack. Do not punch more than 20 sheets at once, since exceeding this limit can break the punch mechanism. After each session, empty the waste paper bin to keep the machine performing at its best.
Adjust the Edge and Paper Guides
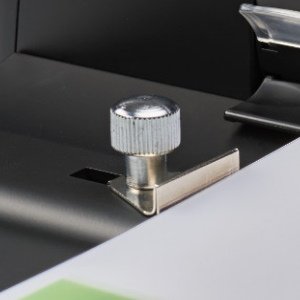
Proper alignment ensures every hole lines up perfectly across your entire document. Without it, coils will skip, snag, or fail to close properly.
Set the Apothem Correctly
The apothem, also called the edge adjuster, controls how far the punched holes sit from the paper edge. Pull or slide it to set the correct distance, typically around 1/4 inch (6 mm) for standard documents. Lock it firmly once adjusted.
Reposition the Paper Stop
If you are using a paper size different from the machine’s current setting, loosen the limit block and slide it to match your document’s length. For example, align it with the 11-inch mark for letter-sized paper, then tighten it securely so every sheet feeds consistently.
Punch the Paper with Precision
Accurate hole punching is the most important step in coil binding. Even small misalignments make coil insertion difficult and weaken the finished product.
Insert the Paper Stack
Slide your paper into the machine, pushing it firmly against both the paper stop and edge guide. Keep the pages square, flat, and free of curls. Hold the stack in place with one hand while operating the handle with the other to prevent shifting.
Punch in One Smooth Motion
Press the handle down fully and evenly to punch all holes at once. Avoid rocking or applying sudden pressure, which can tear paper or bend pins. Release the handle gently and let the spring mechanism return it to the starting position. Lift your stack and inspect the holes for consistency. Repeat for additional sets, never exceeding 20 sheets per punch.
Pro Tip: For thicker documents, divide your pages into 20-sheet sections, punch each separately, then combine them before binding.
Choose and Insert the Coil
Selecting the right coil size ensures smooth page turning and long-lasting durability. A coil that is too loose or too tight will compromise the final result.
Match Coil Size to Page Count
Coil diameter depends on the thickness of your document. A general guide includes:
- 50 pages: 6 mm coil
- 100 pages: 9 mm coil
- 150 pages: 12 mm coil
Insert a test coil and check that it spirals freely through all holes without bulging or sagging.
Thread the Coil Manually
Hold the coil at one end and twist it into the first few holes by hand. Once engaged, continue rotating the coil through the remaining holes with your fingers. Work slowly to avoid skipping holes or bending the coil.
Bind the Document Using the Machine
Once the coil is inserted, the machine’s binding function closes it tightly and evenly along the entire edge. This step locks the pages into a professional, tamper-resistant finish.
Align the Coil with the Barrel
Line up the coiled edge with the binding barrel, the heated roller located on top of the machine. Plug in the machine and allow it to warm up if your model uses heat-assisted binding. Hold the document firmly against the barrel with one hand.
Activate the Binding Roller
Press and hold the bind button. The roller will rotate, pulling the coil through and compressing it evenly. Keep the document straight as it feeds through, and release the button once the entire coil has passed under the roller.
Fix Uneven Binding: If one end of the coil is not fully compressed, flip the document over and run it through again from the opposite direction. Some models also allow manual back-rotation to correct minor issues.
Trim and Crimp the Coil Ends
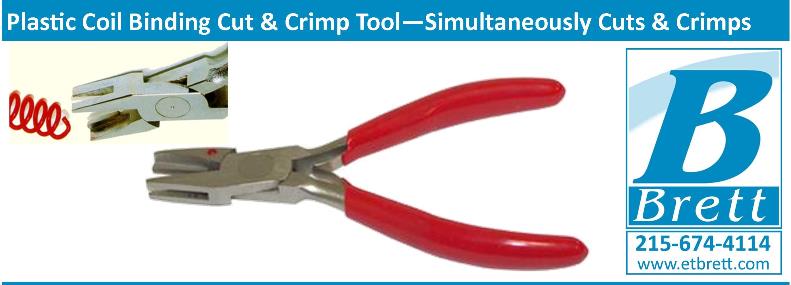
Finishing the ends prevents the coil from unraveling and gives your document a clean, polished appearance.
Cut the Excess Coil
After binding, you will likely have extra coil extending beyond the document. Use a crimper tool to trim it cleanly. Insert the protruding end into the side of the crimper without the red dot, then squeeze the handles to cut.
Crimp Both Ends Securely
To lock the coil in place, crimp both ends after trimming. Insert the tip of the coil into the side with the red dot on the crimper. Squeeze the handles to bend the last loop into a tight hook or “pigtail” shape. Bend it at least 90 degrees so it cannot spin back out.
Warning: Never leave coil ends uncrimped. They can catch on objects and gradually unwind your document over time.
Troubleshoot Common Coil Binding Problems
Even experienced users encounter issues. Knowing how to address them quickly keeps your workflow running smoothly.
Holes Are Misaligned After Punching
Check that the paper stop and edge guide are locked and correctly positioned. Make sure the paper is pushed fully into both guides before punching. If alignment is still off, clean debris from the punch pins and recalibrate the machine.
The Coil Won’t Insert Easily
Verify that the coil diameter matches your paper thickness. A coil that is too large will not compress properly, while one that is too small creates tension. Also, confirm that all holes are fully punched, since partial holes block insertion.
The Binding Feeds Unevenly
If the machine binds only part of the coil, confirm the document is straight against the roller. Re-feed from the opposite end if needed. For heat-assisted models, ensure the machine is fully warmed up, since cold rollers may not grip properly.
Maintain Your Coil Binding Machine
Regular upkeep extends the life of your machine and ensures consistent results.
Clean After Every Use
Unplug the machine and remove paper scraps from the punch area. Use a small brush or compressed air to clear dust from the pins and binding roller, then wipe surfaces with a dry cloth.
Lubricate the Punch Mechanism
Occasionally apply a single drop of machine oil to the punch pins and hinge points to keep movement smooth. Avoid over-lubricating, as excess oil attracts dust and paper fibers.
Store Coils Properly
Keep coils in a dry, flat location to prevent kinking. Bent coils are difficult to insert and may jam the binding process.
Frequently Asked Questions About Coil Binding Machines
How many sheets can a coil binding machine punch at once?
Most machines safely handle up to 20 sheets per punch. Exceeding this limit can break the punch mechanism or damage the pins.
What coil size should I use for my document?
Match the coil diameter to your total page count. For example, a 100-page document typically uses a 9 mm coil, while a 150-page document requires a 12 mm coil.
Do all coil binding machines use heat?
Not all models use heat-assisted binding. Some rely solely on mechanical pressure to close the coil. Check your machine’s manual to confirm its binding method.
Why is my coil difficult to insert?
The coil may be too small or too large for your page count. Also, check that all holes are fully punched, since partial holes block smooth insertion.
Can I remove and reuse a coil after binding?
Yes. If you leave the crimped ends intact, you can usually rotate the coil out and reuse it for another document of similar thickness.
How do I prevent my coil from unraveling?
Always crimp both ends of the coil after binding. Bending the final loop at least 90 degrees locks the coil in place and prevents it from spinning off.
Key Takeaways for Successful Coil Binding
Mastering how to use a coil binding machine comes down to three essentials: accurate punching, proper coil sizing, and secure crimping. Always respect the 20-sheet punching limit, keep your guides tightly adjusted, and match your coil diameter to your page count. With a clean workspace, a well-maintained machine, and a few practice runs, you can produce professional, durable documents in minutes. Start with a small test project today to build confidence and refine your technique.





