

You’ve just pulled your new Westcott paper trimmer out of the box, excited to tackle that stack of photos, cardstock, or scrapbook paper waiting on your desk. Then you make the first cut, and the edge comes out frayed, crooked, or incomplete. Frustrating, right? The truth is, even the best budget trimmers need proper setup, alignment, and technique to deliver the clean results you want.
This guide covers everything you need to know about using your Westcott paper trimmer effectively. You’ll learn how to set it up, align materials for accurate cuts, handle different paper types, troubleshoot common issues, and keep your trimmer in great shape for years of reliable use.
Unbox and Inspect Your Westcott Trimmer
Check All Components Before First Use
Before making any cuts, carefully unbox your trimmer and verify everything is in place. The personal model (15804) is ready to use right out of the package, while the guillotine model (16559) includes a safety guard and replaceable blade. Look for:
- A securely attached stainless steel blade
- No cracks or missing parts
- Smooth blade movement along the track
One verified buyer reported receiving a unit with a missing blade, so inspection matters. If something is wrong, contact Westcott at 877-412-7467 or file a warranty claim at their website.
Place It on a Stable, Flat Surface
Both Westcott models have lightweight plastic bases that can shift mid-cut, throwing off your alignment. To prevent sliding:
- Set the trimmer on a hard desk or craft table
- Avoid soft surfaces like beds or couches
- Add a non-slip mat underneath for extra grip
The personal trimmer measures just 17.63″ x 6.38″ x 1.5″, making it especially prone to movement. A stable base means straighter cuts and fewer do-overs.
Align Paper Using the Built-In Grid
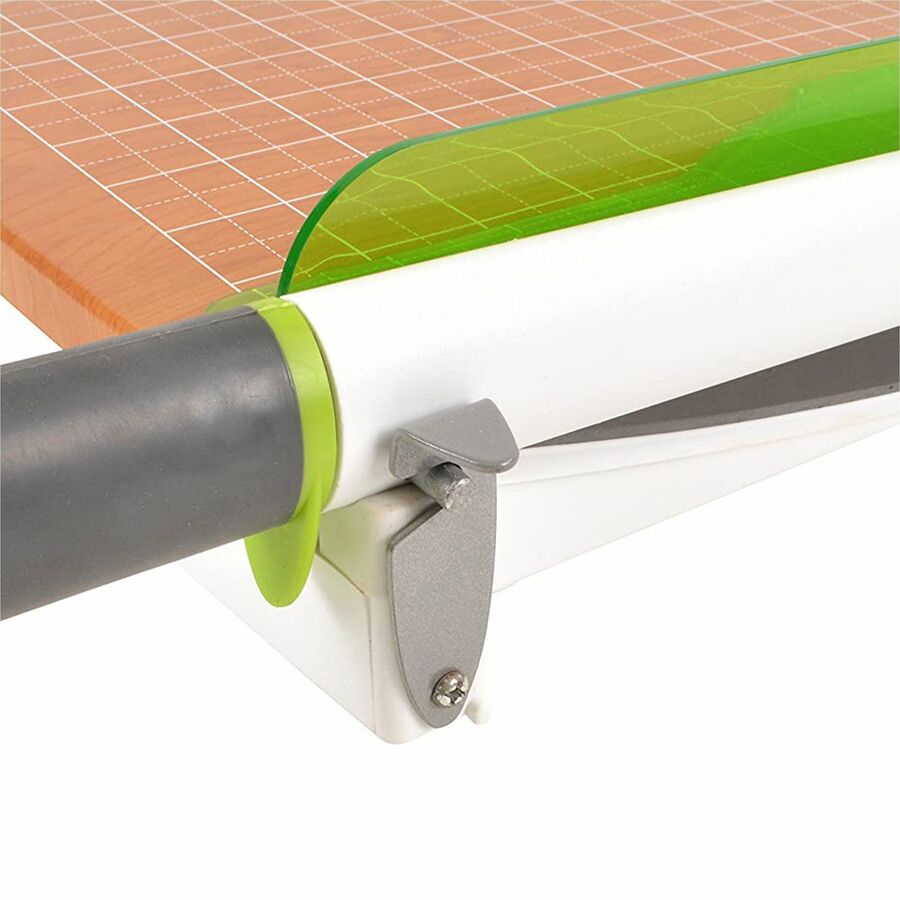
Match Paper to the Measurement Lines
Westcott trimmers feature grid markings etched directly into the base. The guillotine model has full-length rulers and cross-grid lines for precision, while the personal trimmer offers clear alignment guides. To get accurate placement:
- Line up your paper edge with the desired measurement
- Keep the sheet flush against the left guide rail
- Use the grid to square photos or cardstock perfectly
For ultra-fine strips less than 1/8 inch wide, rely on the smallest grid increments. One verified buyer praised the personal trimmer for cutting decorative paper strips “less than a toothpick wide” with consistent accuracy.
Position Material Correctly Under the Blade
Slide your paper beneath the blade housing until the cut line matches the blade’s edge. On the guillotine model, lower the safety guard first, then position your material. For multiple sheets:
- Stack neatly without curling edges
- Limit to 10 sheets maximum on the guillotine model
- Stick to 1–2 sheets on the personal trimmer for clean results
Avoid forcing thick stacks through the blade, as this causes frayed edges and unnecessary blade wear.
Make Smooth, Even Cuts
Apply Steady Pressure for Best Results
The guillotine model uses a downward cutting motion. Grasp the handle and press down in one smooth, full motion. Let the blade do the work rather than forcing it. A consistent press ensures a clean cut from start to finish.
The personal trimmer works with a sliding blade that moves from right to left. Use even pressure across the entire cut length in one fluid motion. Some users find they need a second pass on thicker materials like cardstock, especially toward the end of the cut.
Fix Rough or Incomplete Cuts
If your cut isn’t clean, run through this quick checklist:
- Recheck your paper alignment
- Clear any debris from the blade track
- Reduce the number of sheets in your stack
- Test the blade sharpness
One user complained of a dull blade leaving “rough, frayed edges” on photos. If your blade feels resistant or tears paper, it may be defective. The guillotine model’s blade is replaceable, so contact Westcott for a warranty replacement if needed.
Cut Photos, Ribbon, and Other Materials
Trim Photos Without Tearing
Westcott trimmers handle photos well when you take a careful approach:
- Work with one photo at a time
- Align carefully with grid lines
- Apply slow, steady pressure
Avoid glossy prints that may stick to the blade. If you cut multiple photos, do them one by one for best results. A dull blade can pull or tear photo paper, so replace it if you notice resistance.
Handle Ribbon and Thin Plastic
The stainless steel blade can handle more than standard paper. For ribbon, cut cleanly in one pass while holding the end taut. One user reported clean cuts on thin plastic sheets as well. Thin cardboard is possible, though not recommended for repeated heavy use. Avoid thick, rigid materials that can damage the blade or strain the mechanism.
Troubleshoot Common Cutting Problems
Blade Won’t Cut Cleanly
A dull blade or too many sheets in the stack are the usual suspects. Reduce your stack thickness, or request a replacement blade through Westcott’s warranty program.
Trimmer Slides During Use
The lightweight plastic base tends to shift during cutting. Place it on a non-slip surface and hold the base steady with your non-cutting hand for better control.
Uneven Cut at the End
Inconsistent pressure or blade wear typically causes this. Apply even force throughout the cut and inspect the blade for any visible damage.
Paper Misalignment
Skipping the grid or guide rail leads to crooked cuts. Always align paper against the left edge and your chosen measurement line before cutting.
Follow Essential Safety Practices
Use the Safety Guard (Guillotine Model)
The Model 16559 includes a built-in safety guard that covers the blade when not in use. Always lower the guard before positioning paper, raise it only when ready to cut, and keep fingers clear of the blade path. This simple habit prevents accidents and protects children in shared spaces.
Keep Hands Away From the Blade
Never place fingers near the cutting edge. Use the handle or pressure bar to activate each cut. When trimming small pieces, use a scrap piece of paper to guide the material through rather than your hand.
Maintain Your Trimmer for Long-Term Performance
Clean the Blade and Base Regularly
Paper dust and adhesive residue build up over time. Wipe the base with a dry or slightly damp cloth and remove lint from the blade track. Never use solvents or pour water on any components. A clean track prevents paper jams and keeps the blade moving smoothly.
Replace the Blade When It Gets Dull
The guillotine model features a replaceable stainless steel blade. Signs you need a new one include:
- Ragged or torn paper edges
- Increased resistance during cutting
- Needing multiple passes for clean results
Contact Westcott support for replacement parts under the 5-year warranty. Do not attempt to sharpen the blade yourself, as this can compromise both safety and cutting performance.
Know What Your Trimmer Can’t Do
Skip Heavy-Duty Materials
These are light-duty trimmers built for occasional home use. Avoid:
- Thick cardboard
- Multiple layers of chipboard
- Laminated sheets
- Metal or fabric
Forcing heavy materials through can damage the blade or break the mechanism.
Set Realistic Expectations
While the guillotine model earns 4.82/5 stars and the personal trimmer scores 4.6/5, some users note limitations. Comments like “not the best paper cutter I’ve ever had” and “end doesn’t cut as cleanly sometimes” show these tools work best for moderate, not industrial, demands. They’re excellent for craft sessions, home offices, and light scrapbooking, just not high-volume commercial cutting.
Frequently Asked Questions About Westcott Paper Trimmers
How many sheets can a Westcott paper trimmer cut at once?
The guillotine model (16559) handles up to 10 sheets per manufacturer specifications. For the personal trimmer (15804), users recommend limiting to 1–2 sheets for cleanest results.
Can I cut materials besides paper?
Yes. Westcott trimmers can cut ribbon, photos, and thin plastic sheets. The guillotine model may also handle thin cardboard. Avoid thick cardboard, laminated sheets, metal, and fabric.
Is the blade replaceable?
The guillotine model (16559) has a replaceable stainless steel blade. Contact Westcott support at 877-412-7467 or visit their warranty claims page to order a replacement under the 5-year warranty.
How do I fix uneven or frayed cuts?
Check your paper alignment, reduce the number of sheets, clear debris from the blade track, and test the blade sharpness. If the blade feels dull or resistant, request a warranty replacement.
What warranty comes with Westcott trimmers?
Both models include a 5-year warranty covering defects in workmanship. File claims at westcottbrand.com/contact-us/warranty-claims.html or call 1-800-835-2263.
Why does my trimmer slide during use?
The lightweight plastic base shifts easily on smooth surfaces. Place it on a non-slip mat or hold the base steady with your non-cutting hand while you work.
Key Takeaways for Using Your Westcott Paper Trimmer
Westcott paper trimmers deliver reliable, precise cuts at an affordable price when you use them correctly. Start by inspecting your unit and placing it on a stable surface. Use the built-in grid for accurate alignment, apply steady pressure, and stay within the recommended sheet limits for your model.
Keep the blade track clean, replace dull blades promptly through the warranty program, and stick to light-duty materials. With proper care, your Westcott trimmer will handle years of craft projects, photo trimming, and office tasks with consistent results. Ready to get started? Pull out that stack of paper and make your first cut with confidence.





