
If you’ve ever ended up with ragged edges from scissors or a rotary trimmer, a guillotine paper cutter is your best tool for clean, precise, and consistent straight cuts. Whether you’re trimming office documents, finishing print jobs, or working on craft projects, knowing how to use a paper cutter properly ensures professional results and a long machine life. This guide walks you through every step from setup to maintenance so you can cut with confidence, accuracy, and safety. You’ll learn how to align paper correctly, apply proper pressure, avoid common mistakes, and keep your equipment in top condition.
Inspect the Cutter Before Use
Before making any cut, always check your guillotine paper cutter for safety and performance. A quick inspection prevents accidents and ensures clean results.
Check Blade Sharpness and Condition
A sharp blade slices cleanly through paper. If the blade looks dull or chipped, or if cuts require excessive force, it’s time to sharpen or replace it. Dull blades tear paper, creating ragged edges and increasing strain on the machine. Run your finger along the side of the blade (never across the edge) to feel for nicks or flat spots that signal replacement is needed.
Clean the Cutting Deck
Paper dust, adhesive residue, or small debris on the deck can lift sheets slightly, leading to misalignment and inaccurate cuts. Wipe the deck with a dry microfiber cloth or use a soft brush to remove buildup. Pay close attention to the measurement scale and back gauge area, as both must be clear for accurate positioning.
Test the Safety Guard
The safety guard is a clear plastic or metal shield that should move freely and block access to the blade path when not in use. Confirm that it retracts smoothly during the cut and returns automatically afterward. Never disable or bypass this feature, as it is designed to protect your fingers during operation.
Measure and Position the Paper Correctly
Accurate cuts start with precise alignment. Even a millimeter off can ruin a print job or binding project.
Align Using the Back Gauge
The back gauge is the adjustable vertical stop at the rear of the cutting deck. To cut to a specific size, set the gauge to your desired measurement and press the paper edge firmly against it. For example, to trim letter-sized paper to 8 inches wide, position the gauge at 8 inches and align the paper’s long edge flush against it.
Pro Tip: Always use the same edge of the paper (such as the uncut side) when measuring. Pre-cut edges may not be perfectly square and can lead to errors.
Use the Blade Indicator Line for Visual Alignment
Some cuts rely on aligning with a printed image rather than a paper edge. In these cases, ignore the back gauge and instead line up the cut line on your paper with the blade indicator, which is a thin line or groove on the deck showing where the blade will fall. Double-check alignment from both ends before clamping.
Clamp the Stack Securely

Clamping holds the paper flat and prevents slippage during the cut, which is critical for clean, square results.
Engage the Clamp Fully
Lower the clamp until it presses firmly across the entire stack. On larger cutters, you may need to turn a knob or lever to lock it in place. You should not be able to slide the paper once it is clamped.
For stacks of 5 sheets or fewer, some desktop models allow hand pressure instead of mechanical clamping. However, using the clamp even on thin stacks improves consistency and safety.
Jog the Paper Before Clamping
Jogging means tapping the stack lightly on the table to square the edges. Fanned or uneven stacks lead to stepped cuts, where the top sheet ends up shorter than the bottom. Hold the stack vertically and tap it down sharply on the cutting deck to align all sheets before positioning.
Make the Cut with Control
Now that everything is aligned and secured, it is time to cut.
Use Both Hands for Smooth Pressure
If your cutter has two handles, grip both firmly and apply steady, even downward pressure in one continuous motion. Do not stop halfway, as this can cause the blade to bind or tear the paper when restarted.
On single-handle models, use one strong hand and keep your body balanced. Let your arm and shoulder drive the motion rather than relying only on your wrist.
Apply Body Weight on Thick Stacks
Cutting 20 or more sheets requires more force. Bend your knees slightly and use your upper body weight to assist the downstroke. Keep your stance stable and avoid jerky movements.
Warning: Never place your hand near the blade path, even if the guard is up. Always keep fingers behind the paper edge or use a push stick for narrow trims.
Release and Remove Cut Paper
After the blade reaches the bottom, the cut is complete.
Release the Clamp First
Always disengage the clamp before lifting the blade arm. This prevents accidental shifting of the paper during removal.
Remove Both Sections Safely
Pull the trimmed edge away first, then remove the main sheet. Keep your fingers clear of the blade as it returns to the top position, since some models have spring-assisted return mechanisms that move quickly.
Check Cut Quality
Examine the stack from the side. All sheets should be cut at the exact same position with smooth, straight edges. If the bottom sheets appear offset, the clamp was not tight enough or the paper was not jogged properly.
Maintain Your Paper Cutter Regularly
Proper care extends blade life, ensures accuracy, and keeps the machine safe.
Clean After Every Use
Wipe the deck, back gauge, and measurement scale with a dry cloth to remove paper fibers and dust that can interfere with alignment. Avoid wet cleaners unless specified by the manufacturer, since they can damage markings or cause rust.
Lubricate Moving Parts Monthly
Apply a drop of light machine oil to the blade pivot point and clamp mechanism every few weeks, especially on heavy-use models. Do not oil the blade edge itself. Only oil the hinge and rails. WD-40 is not recommended because it attracts dust and evaporates quickly.
Replace Worn Clamp Pads
Rubber or felt pads on the clamp wear down over time. If paper slips during cutting, inspect the pads. Replace them if they are cracked, flattened, or sticky. Most models allow easy pad replacement with screws or adhesive backing.
Troubleshoot Common Cutting Issues
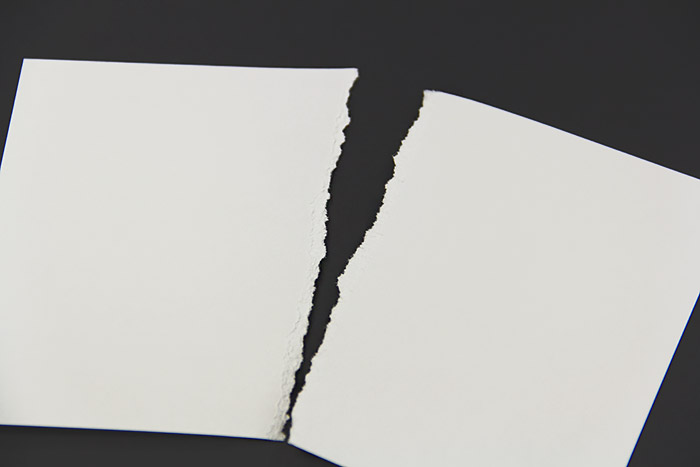
Even with proper setup, problems can occur. Here is how to fix them fast.
Cut Edge Is Torn or Ragged
A dull or damaged blade is the usual cause. Sharpen or replace the blade. For photo paper or laminated sheets, use a fresh blade, as these materials dull blades faster.
Expert Note: Change blades proactively in high-volume environments. Schedule replacement every 3 to 6 months based on use.
Cut Is Not Square Across the Stack
Paper was likely not squared against the back gauge, or the gauge is misaligned. Re-jog the stack and re-clamp. If the problem persists, recalibrate the back gauge using a machinist’s square to ensure it is exactly 90 degrees to the blade path.
Bottom Sheets Are Cut Shorter Than Top Sheets
Paper likely slipped forward during the cut. Tighten the clamp and ensure the stack is fully jogged. Also, avoid overloading the machine beyond its rated capacity.
Know Your Machine’s Limits
Using the right cutter for the job prevents damage and ensures clean results.
Match Stack Size to Capacity
| Machine Type | Max Sheets (20lb paper) | Best For |
|---|---|---|
| Desktop | 5 to 20 sheets | Personal use, light trimming |
| Mid-Range | 15 to 40 sheets | Print shops, school offices |
| Heavy-Duty | 30 to 100+ sheets | Production runs, binding prep |
| Stack Cutter | 100 to 500+ sheets | Commercial printing |
Never exceed the manufacturer’s specified limit. Overloading strains the blade and frame, reducing accuracy and lifespan.
Can You Cut Photos or Plastic?
Photos: Yes, but use a sharp blade and cut smaller stacks of 5 to 10 sheets. Photo paper coating is harder and dulls blades faster.
Plastic: Thin plastics like laminated covers or polypropylene can be cut with a sharp blade. Avoid thick or rigid plastics, which can chip the blade or damage the machine. Use a rotary trimmer for film or vinyl.
Replace or Sharpen the Blade When Needed
Blades do not last forever. Watch for these warning signs:
- Cuts require more force than usual
- Edges look fuzzy or show small tears
- Blade has visible nicks or a shiny, rounded edge
Some models have self-sharpening systems that hone the blade with each cut. Others require professional sharpening or replacement. Always follow the manufacturer’s guidelines.
Pro Tip: Keep a spare blade on hand for high-use environments. Swapping takes minutes and keeps your workflow uninterrupted.
Frequently Asked Questions About Guillotine Paper Cutters
Can a guillotine cutter cut photographs?
Yes, but photographs require a sharp blade and clean clamping. The resin coating on photo paper is harder than standard paper and dulls blades more quickly. For critical photo trimming, use a fresh or recently sharpened blade and cut smaller stacks.
What is the maximum thickness I can cut with a guillotine?
Maximum stack thickness depends on your specific machine model and blade length. Desktop guillotines typically handle 5 to 20mm of paper thickness, while heavy-duty models handle 40 to 100mm. Always check your machine’s specifications rather than estimating.
Can a guillotine cutter cut plastic materials?
Standard guillotine cutters can cut thin plastics like polypropylene covers and laminated paper adequately with a sharp blade. For thick or rigid plastic, standard guillotines are not appropriate. Use a rotary trimmer for thin plastic film.
How do I know when the guillotine blade needs replacing?
The blade needs replacing when cuts require noticeably more force than normal, when cut edges show tearing or roughness on standard paper, or when the blade visually shows chips or dullness along its cutting edge.
Should I lubricate the guillotine blade?
Some manufacturers recommend light lubrication of the blade surface periodically to reduce friction and prevent oxidation. Use a light machine oil or the lubricant recommended by the manufacturer. Never use WD-40 on cutting blades.
Final Tips for Mastering How to Use a Paper Cutter
Mastering how to use a paper cutter is about more than just pressing a handle. It is about precision, safety, and consistent care. Always use the safety guard, cut in a well-lit area to see alignment lines clearly, and double-check measurements before clamping, especially on expensive or printed stock. Store the cutter with the blade down when possible to protect the edge and prevent accidents, and train all users in shared offices or print shops.
By following these steps, you will get clean, square cuts every time, protect your equipment, and avoid workplace injuries. Whether you are trimming flyers, preparing scrapbook paper, or finishing a client project, a guillotine cutter is a powerful tool when used the right way. Keep it clean, keep it sharp, and cut with confidence.





