

Loose pages flying off your desk, proposals that look unfinished, or training manuals that fall apart after one read? These are common frustrations that a book binding machine solves instantly. Learning how to use a book binding machine transforms scattered documents into clean, professional, and durable materials suitable for any setting.
This guide explains two popular systems, comb binding and spiral binding, with practical steps, troubleshooting tips, and supply recommendations. By the end, you will know exactly how to set up, punch, and finish your documents for a polished result every time.
Choose the Right Binding Type for Your Project
The first step in learning how to use a book binding machine is selecting the right system. Comb and spiral binding each offer unique benefits, and your choice impacts both the machine you need and your finished document.
Comb Binding Overview
Comb binding uses a plastic spine with curved tines that thread through rectangular holes. Pages can be added, removed, or reordered at any time, making this method ideal for documents that change frequently. Combs are available in 19+ colors and sizes from 3/16 inch to 2 inches.
Spiral Binding Overview
Spiral binding uses a continuous wire or plastic coil threaded through round holes. Once bound and crimped, the document becomes permanent. It is best for reports, presentations, and notebooks that do not require editing.
Quick Comparison
- Comb binding: Editable, lowest cost per document, wide color range
- Spiral binding: Fixed, 360-degree rotation, professional finish
Prepare Your Document Before Binding
Proper preparation prevents uneven holes, misaligned pages, and binding errors. A few extra minutes here saves time during the actual binding process.
Collate and Align the Pages
Stack your pages in final order with the front cover on top and the back cover on the bottom. Place the stack on a flat surface and jog it firmly by tapping the edges until all four sides align perfectly. Misaligned pages cause off-center holes that weaken the binding and make the document look unprofessional.
Verify Paper Size and Type
Most machines support letter-size (8.5″ x 11″) paper. If your document is a different size, you will need to adjust the machine settings. Standard 20 lb paper works well for both systems unless your machine specifies otherwise.
Set Up the Binding Machine Correctly
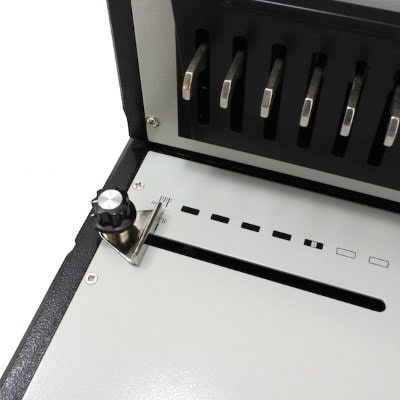
Each machine type has specific adjustments that must be made before punching. Skipping this step is the most common cause of binding errors.
Comb Binding Machine Setup
- Set the paper stop to match your document’s spine length
- For smaller-than-letter paper, disengage the outer punch pins so only the correct pins are active
- Empty the chip tray to prevent paper buildup that interferes with punching
Spiral Binding Machine Setup
- Pull the Apothem (edge adjuster) to set the distance between holes and paper edge
- Loosen and move the limit block if your paper size differs from the current setting
- Place the machine on a stable, level surface and plug it in
Punch the Document Without Damaging the Paper
Punching is the most delicate step in how to use a book binding machine. Overloading the punch causes torn holes and weakened paper, which ruins the final product.
Respect the Punch Capacity
Every machine has a maximum sheet count per stroke.
- Comb binding machines: Follow manufacturer ratings, typically 10 to 20 sheets per stroke
- Spiral binding machines: Never exceed 20 sheets per stroke or the machine will break
Maintain Consistent Batch Sizes
Punch your entire document in equal batch sizes so every page has holes in the exact same position. Inconsistent batches cause misalignment, which makes threading difficult and produces uneven spines.
Use One Smooth Motion
On manual machines, press the handle firmly and fully in a single stroke. Partial presses create ragged holes. On electric models, press the activation button once and let the machine do the work.
Comb Binding: Open the Comb on the Machine

Opening the comb correctly is critical. This step is where most beginners make mistakes that shorten the life of their supplies.
Place the Comb in the Opener
Insert the plastic comb into the comb-opening section with the tines facing down into the slots. Activate the opener either manually or by lever. The machine spreads the tines wide enough for pages to slide on.
Avoid Manual Opening
Never open a comb by hand. Manually forcing the tines apart over-stretches the rings, leading to premature ring fatigue. Once a comb loses its snap, it will not close securely.
Comb Binding: Select the Right Comb Size
Choosing the correct comb diameter ensures your document closes snugly and opens flat. Use this quick reference for 20 lb paper:
| Comb Diameter | Page Capacity |
|---|---|
| 3/16″ | Up to 20 pages |
| 1/4″ | 21–40 pages |
| 3/8″ | 56–80 pages |
| 1/2″ | 81–120 pages |
| 3/4″ | 176–225 pages |
| 1″ | 226–300 pages |
| 2″ | Up to 425 pages |
Pro Tip: When in doubt, go one size up. A slightly oversized comb closes more reliably than one too small to fit.
Comb Binding: Thread and Close the Document
Threading is the final stage of how to use a book binding machine for comb systems. Take your time here to ensure every hole lands on a tine.
Seat Every Hole on a Tine
Position the punched document over the open comb. Work from one end to the other, confirming one hole per tine. Every hole must be fully seated before you close the comb.
Close the Comb Smoothly
Release the opener. The tines snap shut, locking the pages in place. Run your fingers along the entire spine to confirm every ring is fully closed. If any tine pops open, re-open the comb and re-thread the document.
Spiral Binding: Insert the Coil and Bind
Spiral binding uses a motorized barrel that pulls the coil through the holes. The process is simple but requires careful alignment.
Twist the Coil Into the Document
Take the spiral coil and twist one end into the first hole of your punched document. Continue feeding it through each hole by hand until the entire document is on the coil.
Line Up With the Barrel
Place the end of the coil into the barrel mechanism on top of the machine. Hold the document close to the barrel to maintain alignment during the motorized binding process.
Activate the Motor
Press and hold the activation button. The barrel rotates, pulling the coil through the document. Stop when the entire length is bound.
Spiral Binding: Correct Errors and Finish the Ends

Even with careful setup, over-binding can happen. Knowing how to fix it saves both time and supplies.
Fix Over-Binding
If the machine binds too far or leaves one end unsecured:
– Rotate the document back by hand, OR
– Flip it over and re-feed from the opposite direction
This resets the binding without damaging the coil.
Cut and Crimp the Ends
Use the crimper tool to finish the document:
- Insert the coil into the side without the red dot and squeeze to cut excess length
- Insert the tip into the red dot side and squeeze to bend the end inward
The crimp should be tight enough that the coil cannot spin off during use.
Troubleshoot Common Binding Problems
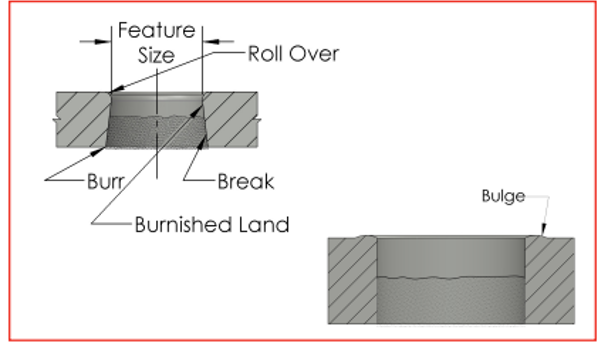
Even with careful preparation, issues can arise. Here are the most frequent problems and their solutions.
Ragged or Torn Holes
Cause: Exceeding the punch capacity
Fix: Reduce the sheet count per stroke and stay within the machine’s rating
Comb Pops Open After Closing
Cause: Manually forced open or over-stretched tines
Fix: Always use the machine’s opener and never force combs by hand
Pages Not Flush at the Top Edge
Cause: Misaligned stack or incorrect paper stop
Fix: Jog pages before punching and set the paper stop correctly
Document Will Not Open Flat
Cause: Comb is too small for the page count
Fix: Use the next size up, such as moving from 1/2″ to 3/4″
Spiral Spins Off
Cause: Ends not crimped properly
Fix: Use the red dot side of the crimper and bend the tip securely
Know the Limits of Each Machine
Understanding what your machine cannot do prevents wasted supplies and frustration.
Comb Machines Are Not Compatible With Wire Binding
Comb machines punch rectangular slots at a specific pitch. Wire binding requires round holes at a different spacing. Most consumer comb machines cannot switch to wire binding without a different punch die.
Spiral Machines Are Not Editable
Once a spiral coil is bound and crimped, the document is fixed. Adding or removing pages requires uncoiling the entire binding, which is why spiral is best for permanent documents.
Maintain Your Machine for Long-Term Use
Regular maintenance keeps your binding machine functioning smoothly and extends its lifespan.
Clean After Every Session
- Empty the chip tray or waste container after each use
- Wipe down the punching area with a dry cloth
- Keep the machine on a stable, level surface at all times
Avoid Forcing the Mechanism
If the handle or button resists, stop and check for jams or misaligned pages. Forcing the machine causes damage that may not be repairable.
Choose the Right Supplies for Your Project
Having the correct supplies on hand ensures a smooth binding process from start to finish.
Comb Binding Supplies
- Plastic combs in sizes from 3/16″ to 2″ and 19+ colors
- Binding covers for front and back protection
- Chip tray for collecting punch waste
Spiral Binding Supplies
- Spiral coils in plastic or wire
- Crimper tool with a red dot indicator
- Waste container for punch debris
Store all supplies in a cool, dry place to prevent brittleness and warping.
Match the Binding System to Your Document Type
Selecting the right system for the job is part of knowing how to use a book binding machine effectively.
Best Uses for Comb Binding
- Training manuals that require frequent updates
- Price lists that change monthly
- School workbooks that need durability and reusability
- Cookbooks that must lie flat when open
- Proposals and catalogs with editable content
Best Uses for Spiral Binding
- Reports and presentations with a polished look
- Notebooks and journals for daily use
- Documents requiring 360-degree page rotation
- Permanent reference materials
Follow Basic Safety Rules
Binding machines are safe when used correctly, but a few precautions protect both you and the equipment.
- Always place the machine on a stable surface before use
- Never force the punch handle beyond normal resistance
- Unplug electric models when not in use
- Keep hands clear of moving parts during the binding cycle
Final Tips for Professional Results Every Time
- Test on a few sheets first before binding the full document
- Use smooth, firm motions without hesitation during punching
- Verify hole alignment by holding pages up to light before threading
- Store bound documents vertically to preserve spine integrity
- Always use the machine’s opener for combs rather than your hands
Frequently Asked Questions About Book Binding Machines
What is the difference between comb and spiral binding?
Comb binding uses a plastic spine with rectangular holes and allows full editing. Spiral binding uses a continuous coil threaded through round holes and is permanent once crimped.
How do I add pages to a finished comb-bound document?
Re-open the comb using the machine’s opener, remove the document, insert the new pages, re-thread onto the comb, and close. This editability is the biggest advantage of comb binding.
Can I use a comb binding machine for wire binding?
No. Comb machines punch rectangular slots at a specific pitch, while wire binding requires round holes at a different spacing. The two systems use separate machines and are not interchangeable.
How many sheets can I punch at once on a spiral binding machine?
Never exceed 20 sheets per stroke. Punching more can break the machine. Work in consistent batches for uniform hole placement.
What size comb should I use for my document?
Use the comb size chart as a guide. For 20 lb paper, a 3/16″ comb holds up to 20 pages, while a 2″ comb holds up to 425 pages. When in doubt, go one size larger.
How long does a plastic comb last?
Most combs can be opened and closed dozens of times before the tines lose spring tension. Over-opening or forcing combs by hand shortens their lifespan significantly.
Key Takeaways for Using a Book Binding Machine
Mastering how to use a book binding machine comes down to three essentials: preparation, correct settings, and proper sequence. Start by aligning your pages and selecting the right binding system for your needs. Adjust the machine settings carefully and respect the punch capacity to avoid torn holes and damaged equipment.
When you finish, always verify hole alignment and test on a small batch first. With these habits, you will produce clean, professional, and durable documents every time, whether you choose comb binding for editable flexibility or spiral binding for a permanent polished finish.





