

Tired of fighting with scissors every holiday season? Jagged edges and torn paper can turn gift wrapping into a frustrating chore. A homemade wrapping paper cutter solves these problems by gliding through paper to create smooth, even lines in seconds. You can build one with basic tools or a 3D printer for a fraction of the cost of commercial options like the $6.99 Little Elf Gift Wrap Cutter. This guide covers two proven methods, the right blade setup, and safety tips to help you craft a reliable cutter at home.
Pick the Build Method That Fits Your Tools
Your first decision is how you want to construct the cutter. Two reliable paths work well: 3D printing or a handmade version using household materials. Your choice depends on what equipment you have and how permanent you want the tool to be.
3D-Printed Cutter Option
A 3D-printed wrapping paper cutter is ideal if you own or have access to a 3D printer. The design is precise, customizable, and replicates commercial builds at a fraction of the cost. A popular open-source model on Printables.com, created by Prusa Research, is built specifically for this purpose.
- Design Compatibility: Holds a standard 9 mm snap-off utility blade
- File Type: PDF with print and assembly instructions
- Customization: Modify grip shape, color, or add measurement guides
- Best For: Makers, crafters, and tech-savvy users who value precision
DIY Hand Tool Conversion
No 3D printer? You can still build a functional cutter by converting a utility knife or box cutter using cardboard, wood, or plastic. This method is faster and requires only basic tools.
- Materials Needed: Ruler, utility knife, glue, scrap wood or stiff plastic
- Blade Type: Standard retractable or snap-off blade
- Best For: Quick, low-cost solutions and beginners
Gather Materials and Tools
Before you start, collect everything you need to keep the project moving smoothly. Having parts on hand prevents interruptions and ensures safety during assembly.
For 3D-Printed Build
- Filament: PLA for prototypes, PETG for durability, or ABS for heat resistance
- Blade: 9 mm snap-off utility blade (Manutan #043139 comes in 10-packs)
- Printer Specs: 0.2 mm layer height with 40–60% infill for strength
- Optional Supplies: Sandpaper for smoothing edges, isopropyl alcohol for cleaning
For Handmade Build
- Base Material: Stiff cardboard, wood block, or plastic sheet 6–8 inches long
- Blade Holder: Retractable utility knife or fixed blade
- Guide Tool: Metal ruler or straight edge at least 12 inches
- Adhesive: Epoxy or strong hot glue
- Safety Gear: Gloves and eye protection
Download and Print the 3D Model
If you choose the 3D printing route, start by sourcing the digital file and configuring your print settings for a strong, functional result.
Download the Correct Model
- Source: Printables.com (Prusa Research)
- Search Term: “Wrapping paper cutter 3D model”
- License: Free for personal use under Printables.com Terms
- File Includes: Assembly diagram and blade insertion guide
Confirm the model is designed for a 9 mm wide blade, since this is the standard utility knife width and widely available.
Optimize Print Settings
Use these settings to produce a durable cutter:
- Infill: 50% for strength around the blade slot
- Walls/Shells: 3–4 to prevent cracking under pressure
- Layer Height: 0.2 mm balances speed and detail
- Material: PETG for long-term use, PLA for test prints
Print time typically runs 1–2 hours depending on your printer and the model’s size.
Assemble the Blade Mechanism
The blade is the most critical component. It must sit securely, stay aligned, and remain safe to handle.
Insert the 9 mm Snap-Off Blade
- Snap to a Fresh Edge: Break off a dull segment to expose a sharp tip.
- Slide into Slot: Align the blade with the 9 mm groove in the printed body.
- Set Depth: The blade should protrude 3–5 mm below the base for clean cuts without tearing.
- Test Stability: Gently wiggle the blade. No movement should occur.
💡 Pro Tip: If the fit feels loose, add a small piece of tape or a drop of glue around the blade base. Keep adhesive away from the cutting edge.
Alternative: Modify a Utility Knife
For a handmade version using a retractable knife:
- Remove the casing and mount it vertically into a wooden or plastic base
- Fix it so the blade extends slightly beyond the front edge
- Use a metal ruler as a guide rail along the base for straight cuts
Build Safety Features Into the Cutter

Safety matters whether you buy or build a cutter. A good design keeps fingers away from the edge during use and storage.
Recessed Blade Design
- The blade should be partially enclosed or recessed so fingers cannot touch the edge
- In 3D models, the housing naturally shields the sides. Ensure your print matches the design dimensions
Add a Blade Cover or Storage Mode
- 3D Model: Some designs include a slot to fully insert the blade for storage
- DIY Version: Create a sliding cover from plastic or keep the cutter in a case when idle
⚠️ Warning: Always store the cutter with the blade retracted or covered. Keep it out of reach of children.
Test and Calibrate Cutting Performance
Before wrapping your first gift, run a few test cuts to confirm everything works smoothly.
Perform a Test Cut
- Place wrapping paper on a flat, hard surface like a table or countertop
- Align the cutter’s edge with your desired cut line
- Apply even pressure and glide forward in one motion
- Check the result for a clean edge, no tearing, and a straight line
Adjust Blade Depth if Needed
- Too shallow? Paper does not cut through. Extend the blade slightly.
- Too deep? Risk of gouging the table or tearing paper. Retract the blade.
Repeat until you achieve a clean, one-pass cut every time.
Adjust Settings for Different Paper Types
Wrapping paper varies in weight and texture. Test your cutter on different materials to find the right balance.
Recommended Settings by Paper Type
| Paper Type | Blade Exposure | Pressure Level |
|---|---|---|
| Tissue-Thin | 2–3 mm | Light, steady glide |
| Standard Matte | 4 mm | Medium pressure |
| Foil or Textured | 5 mm | Firm, consistent push |
💡 Tip: Replace blades frequently. A dull blade causes tearing and requires more force, increasing accident risk.
Maintain Your Cutter for Long-Term Use
A well-maintained cutter lasts longer and cuts better. Spend a few minutes after each session keeping it in top shape.
Clean After Each Use
- Wipe the body with a dry cloth to remove paper dust and adhesive residue
- For 3D-printed models, use a soft brush to clean crevices
Replace Blades Regularly
- Snap-off blades: Break to a new edge every 5–10 uses
- Retractable blades: Replace when cutting becomes uneven
Inspect for Wear
- Check the blade holder for cracks or warping, especially in PLA prints
- Reprint damaged parts since digital models allow infinite replacements
Compare DIY vs. Commercial Options
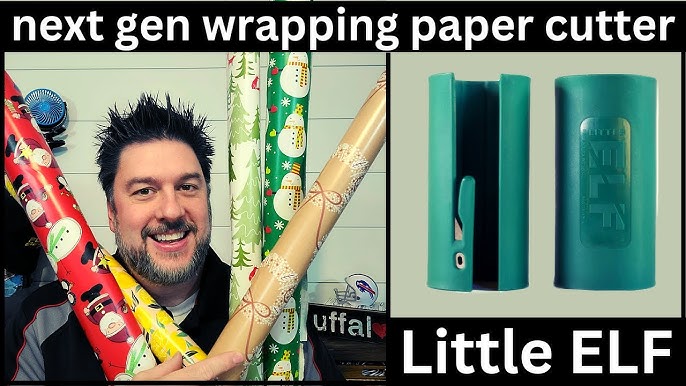
Building your own cutter saves money, but is it the right choice for you? Here’s how the options stack up.
Cost Comparison
| Option | Upfront Cost | Long-Term Value |
|---|---|---|
| Little Elf Commercial Cutter | $6.99 | Ready to use, no setup |
| DIY 3D-Printed Cutter | ~$1–2 (filament) + blade | Reprint parts, customizable |
| Handmade Cutter | Less than $1 (recycled materials) | Quick fix, less durable |
Which Should You Choose?
- Choose DIY if: You own a 3D printer, want customization, or enjoy maker projects
- Choose Commercial if: You need it now, lack tools, or prefer guaranteed safety
Both deliver clean cuts and faster wrapping. The DIY route simply adds personal satisfaction.
Troubleshoot Common Issues
Even well-built cutters can have problems. Here are quick fixes for the most common issues.
Problem: Paper Tearing
- Cause: Dull blade or uneven pressure
- Fix: Replace the blade, ensure a flat surface, and use a steady glide motion
Problem: Blade Wobbles
- Cause: Loose fit in the holder
- Fix: Adjust print tolerance or add thin tape around the blade base
Problem: Uneven Cuts
- Cause: Misaligned blade or tilted motion
- Fix: Re-seat the blade straight and use the table edge as a guide
Optional Upgrades to Enhance Functionality
Small additions can make your homemade cutter even more useful.
Add a Measurement Guide
- Etch or glue a ruler along the top edge of the cutter
- Use it for quick 6″, 8″, or 12″ cuts without a separate measuring tool
Color-Code by Blade Type
- Print in different colors for different paper types, like red for foil and blue for tissue
- This helps you organize and identify cutters quickly
Mount a Storage Slot
- Design or carve a slot in the base to store spare blades or the cutter itself
Follow Best Practices for Safe, Efficient Use
A few habits will keep you safe and your cutter performing well.
Always Cut on a Flat Surface
- Prevents slipping and ensures straight lines
- Avoid soft surfaces like beds or couches
Use Consistent Pressure
- Too much force can tear paper or damage the tool
- Let the blade do the work with a smooth, steady motion
Store Properly
- Keep in a drawer or craft box with the blade covered
- Label clearly: “Sharp Blade – Keep Away from Children”
Frequently Asked Questions About Wrapping Paper Cutters
What blade size do I need for a DIY wrapping paper cutter?
A standard 9 mm snap-off utility blade works best. This size is widely available and fits most 3D-printed and handmade cutter designs.
Can I 3D print a wrapping paper cutter without supports?
Support requirements depend on the specific model. Most designs need supports for the blade slot and handle areas to print correctly. Check the model’s instructions before starting.
How much does it cost to make a DIY wrapping paper cutter?
A 3D-printed version costs roughly $1–2 in filament plus a 9 mm blade pack. Handmade versions using household materials can cost less than $1 if you repurpose existing tools.
Are homemade wrapping paper cutters safe?
Yes, when built with a recessed blade design and stored properly. Always keep the blade covered or retracted when not in use and store the cutter away from children.
Where can I find a 3D model for a wrapping paper cutter?
Printables.com hosts a free open-source model created by Prusa Research. Search for “wrapping paper cutter” and download the PDF with assembly instructions.
How often should I replace the blade?
Replace snap-off blades every 5–10 uses by breaking off a dull segment. Retractable blades should be swapped when cuts start tearing or feel uneven.
Key Takeaways for Building Your Own Wrapping Paper Cutter
Making a wrapping paper cutter at home is a simple, rewarding project that saves time and improves safety. A 9 mm snap-off blade, secure housing, and proper technique are all you need to outperform scissors and rival commercial models. Start by choosing between a 3D-printed design or a handmade version based on your tools and skills, then test and adjust the blade depth for clean cuts. Once your cutter is built, maintain it with regular cleaning and blade replacements to keep it working like new. Pick up your materials today, and your next gift wrap will be faster, cleaner, and safer than ever.





